Customer portal app
Embed the Jira Service Management customer portal in Microsoft Teams (Jira Cloud only!)
Overview
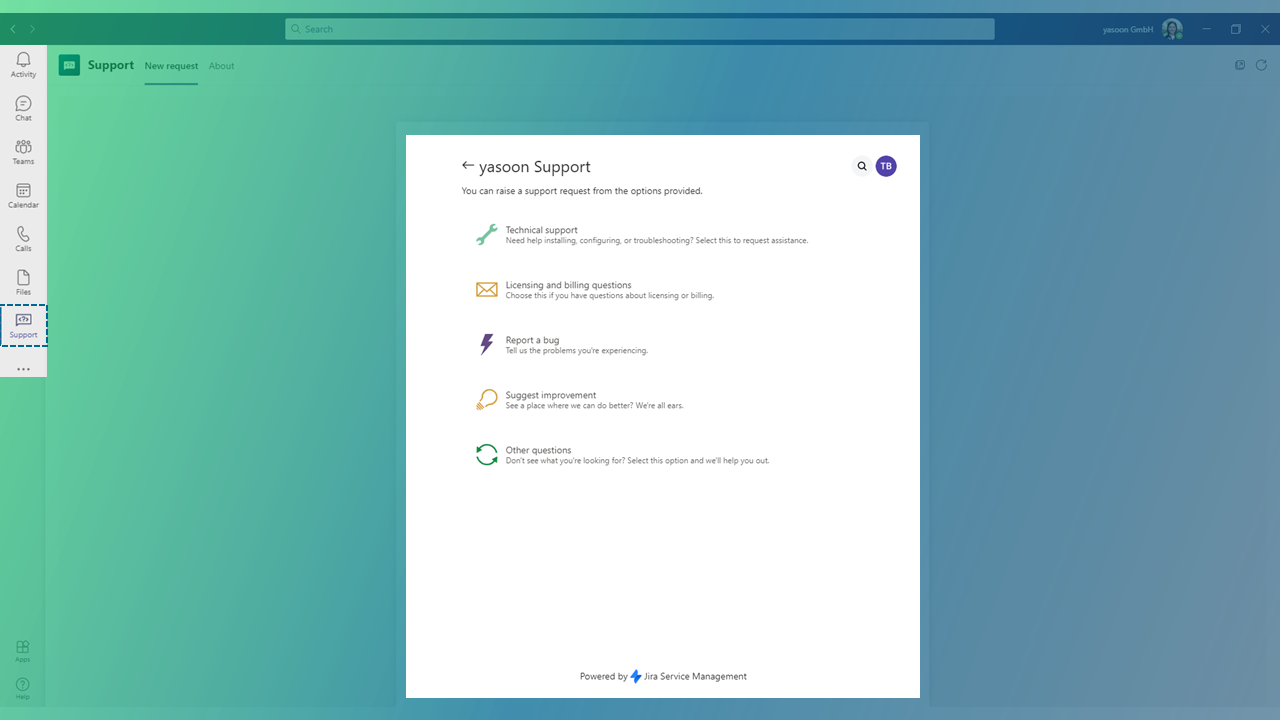
By embedding the Jira Service Management customer portal in Microsoft Teams, customers can quickly raise new requests, comment on existing requests and more - all without leaving Microsoft Teams.
You can customize the icon and name for the customer portal tab in the Microsoft Teams sidebar right in your Jira settings.
Configuration
To get started, you’ll need to configure the customer portal app first.
In Jira go to “Settings” → “Apps” → “Microsoft Teams for Jira” → “Customer portal”.

In this area, you’ll be able to do a few settings like:
defining a name
decide on an icon for the customer portal in Teams
Afterwards, you need to choose which service desks you want to access and thus, you want to make available for your customers in Microsoft Teams.
When you are done, click “Download app” to generate a .zip-file (the app).
To learn more about the app compatibility mode, please read here: App compatibility mode
Deployment / Rollout
To deploy the app (.zip-file) you just downloaded before, you have different options.
It’s recommended to test the app for yourself first, using a local installation.
Local installation
To test the app locally, you can upload it directly from Microsoft Teams. It may be possible that your company has disabled installing apps, so you may need the help of a Microsoft 365 administrator in your company.
To upload the app, go to the apps section in Microsoft Teams and select “Upload a custom app”. Then choose “Upload for me or my teams”.
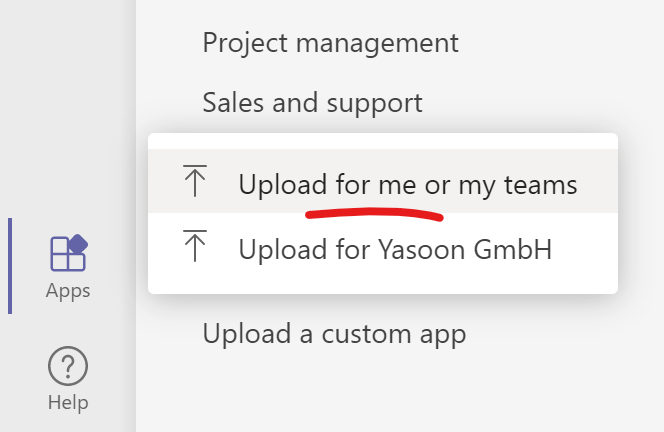
You will be prompted to select a file, please choose the zip-file you downloaded during the configuration in Jira (see above). That’s it! You can now log in with your Jira account and raise new service requests.
Distributed / company-wide installation
If you finished testing and want to provide the app to your end-users, you have different options to do this. Usually, you’ll need the help of a Microsoft Teams administrator to use the following distribution options.
In case you want to learn more about general concepts of apps in Microsoft Teams, we recommend reading the official documentation.
1. Via Microsoft Teams company-wide app (manual)
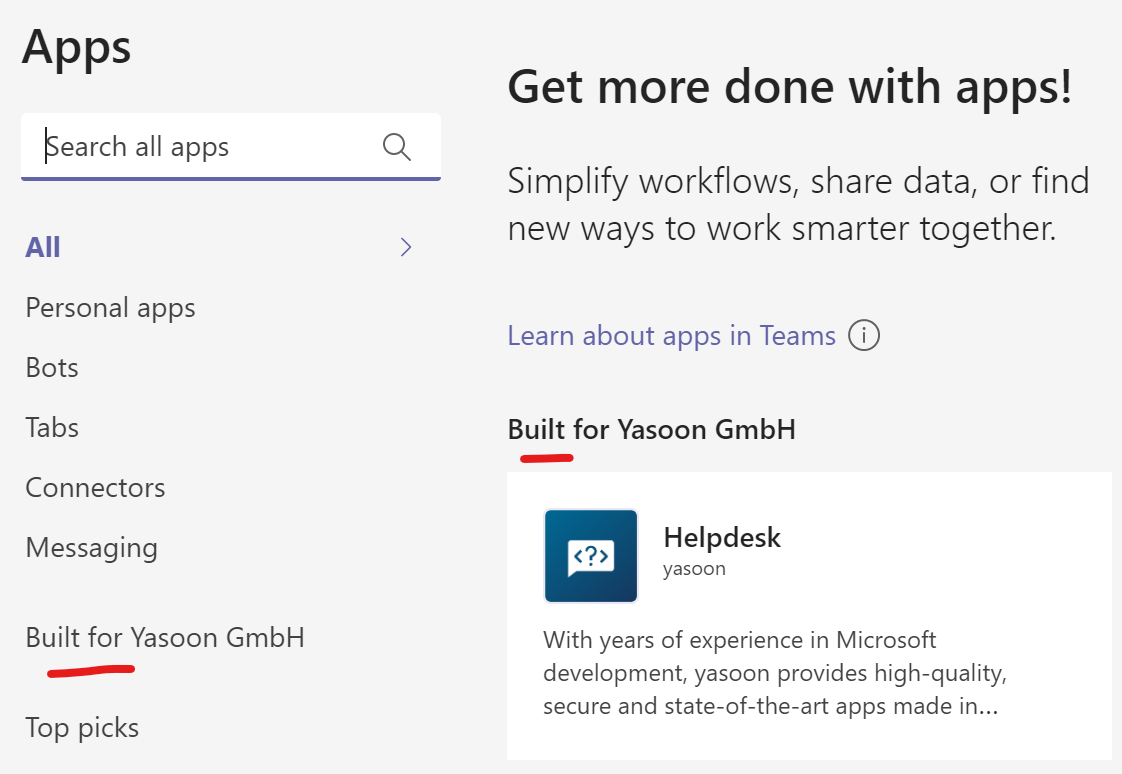
You can make the app available for all your users, so they can install it manually from the apps section of Microsoft Teams. It will show prominently and even have an own section.
To add the app to be available like this, you have two options.
Add the app from Microsoft Teams
If you are a Microsoft Teams administrator, you should have the option to upload a .zip-file directly from Teams, so it is available to your users.

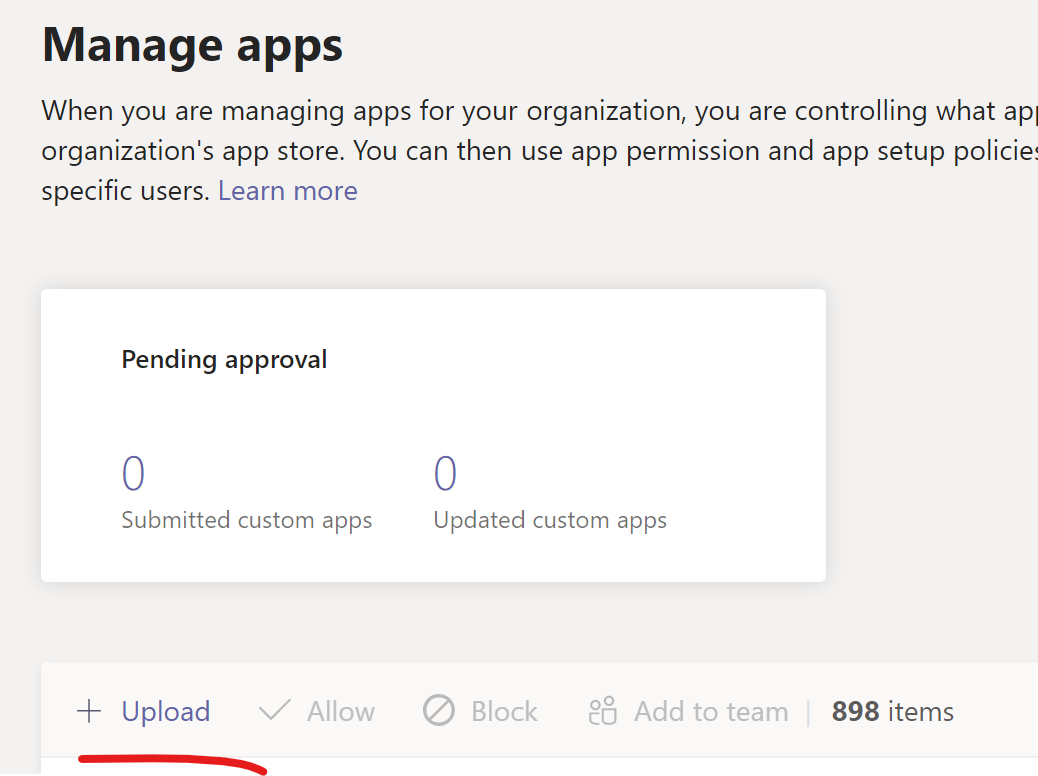
Add the app from the Microsoft Teams admin portal
You have also the possibility to achieve the same outcome, by visiting the Microsoft Teams admin portal, using the following URL:
https://admin.teams.microsoft.com/policies/manage-appsOn this page, you also have the option to upload a custom app.
2. Via Microsoft Teams admin policy (automated)
In case you want to make sure that a certain set or all users actually have installed the app by default - e.g. to increase visibility - you can also do this. For this purpose, please upload the app first, using the steps in the previous section. Then, visit the Teams admin portal policy section.
https://admin.teams.microsoft.com/policies/app-setupOn this page, you can either create a new policy (e.g. for a subset of users), or you can use the existing “Global (Org-wide default)”-policy. On the edit page of the policy, you have the option to add the app.
Make sure to search for the title (name for the customer portal ) you’ve defined/chosen during the configuration in Jira.
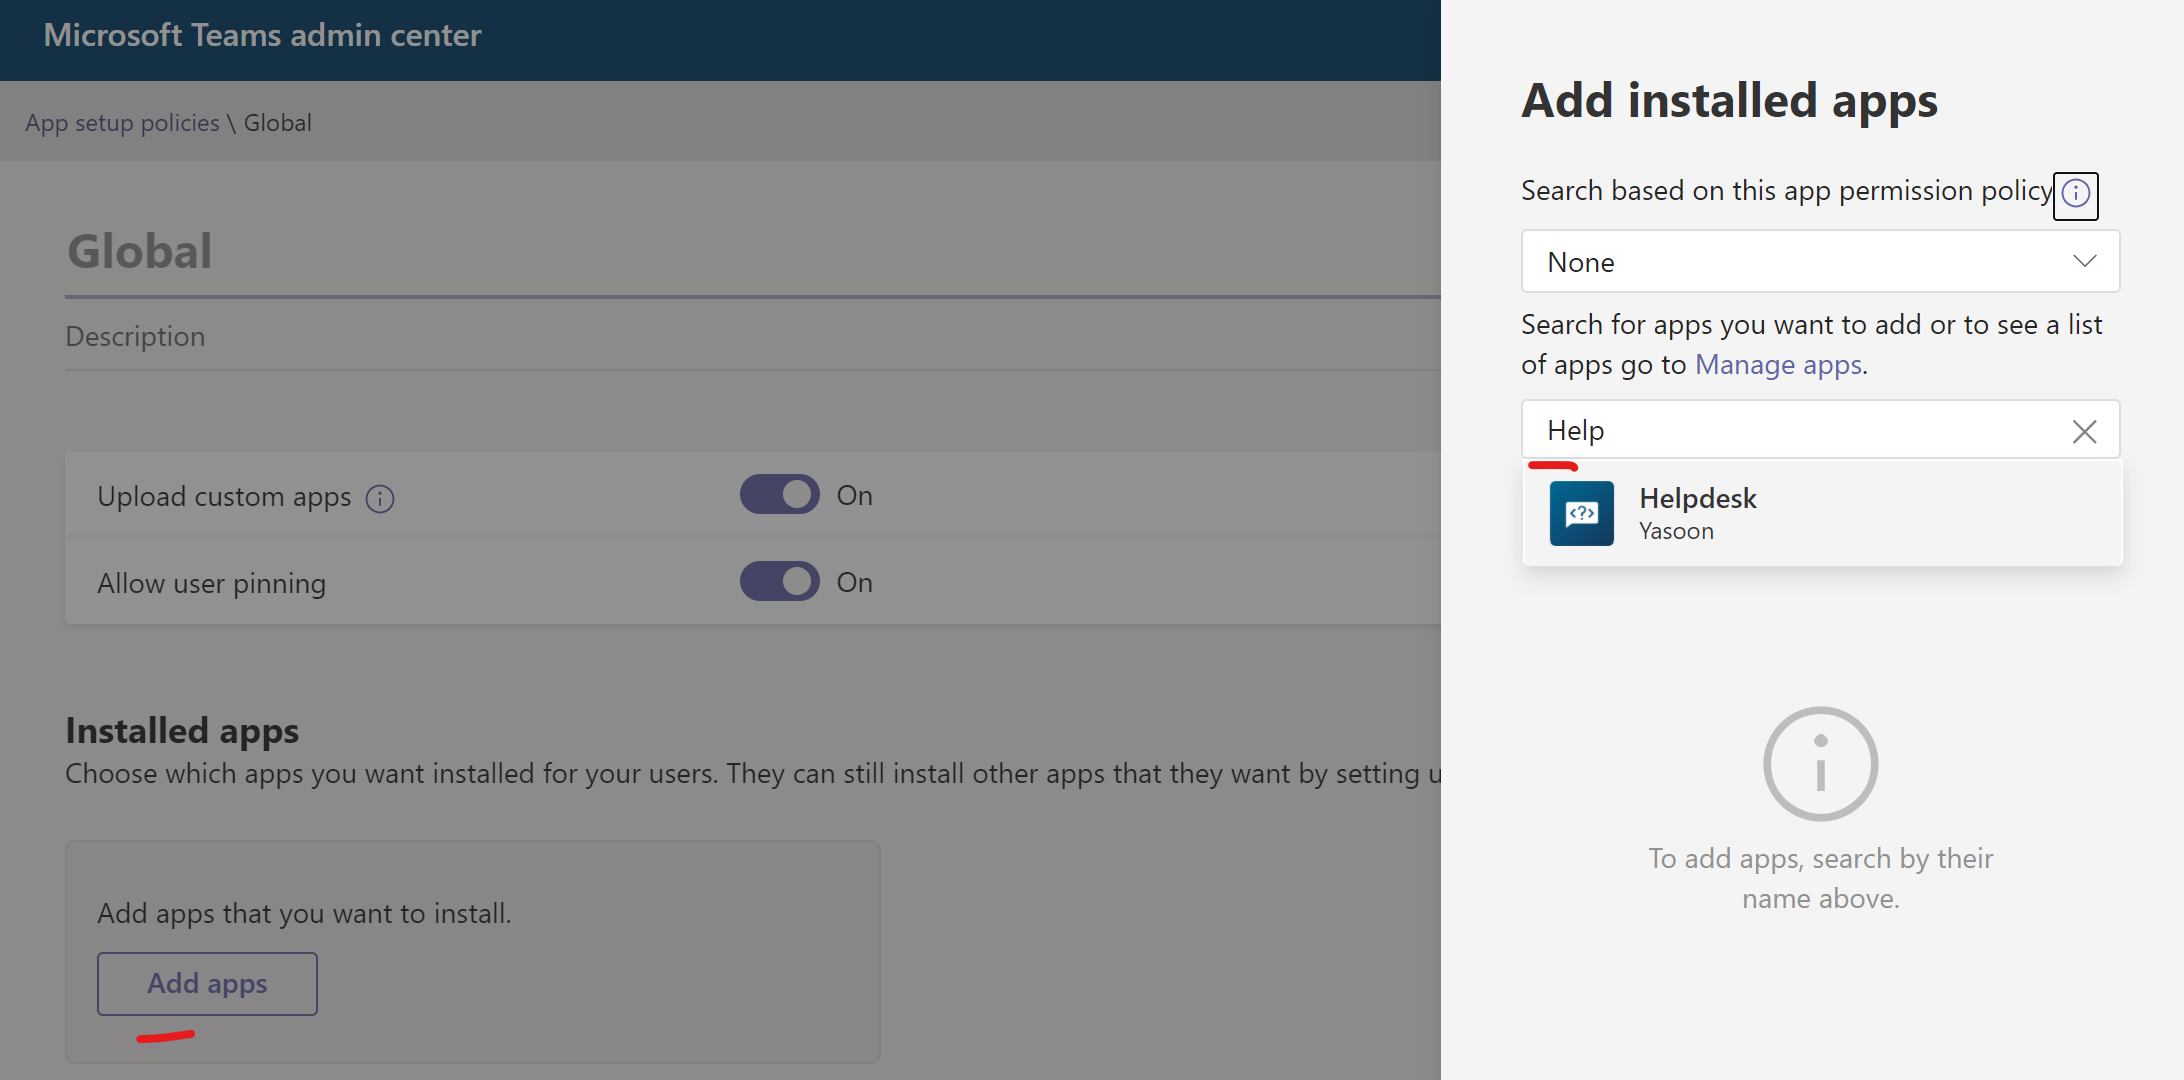
For even greater visibility, you can also immediately pin the app to the sidebar of your users, using the “Pinned apps” settings.

Limitations
There are a few limitations to be aware of, due to the nature of the app. As we cannot just embed the official Jira Service portal in Teams, it’s a custom app that tries to mimic the normal customer portal as closely as possible.
Custom fields
We currently support many custom fields that you can configure to your Jira Service Management portal view. As it’s a manual effort for certain kinds of fields, we do not support all possible fields out of the box. In case the screen to create a new request is missing any crucial fields, please don’t hesitate to get in touch, we’ll try to add the field in an upcoming version.
App compatibility mode
Another limitation of re-building the functionality is the missing app support. In case you do have custom apps from the Atlassian Marketplace to extend your customer portal (like ProForma forms), unfortunately we can’t show the app in Teams. We are in early evaluation of supporting certain apps, but in the meantime, please use the “Compatibility mode” toggle in the Jira configuration page for a workaround. Instead of opening the form in Teams itself, a click on the request type in the app will then open in the users browser, where they will be able to complete the request.
Customer single-sign-on using email address
As of today, Atlassian does not provide a good way of authenticating / identifying customers externally. To avoid having customer users go trough a weird workaround of a login flow, we decided to start with a simple single-sign-on, based on the users email address. In most cases, this should just work out of the box, e.g. when the users email address in Outlook / Microsoft 365 is the same as in Jira.
However, there might be certain cases (e.g. email aliases, hybrid setups), where the email address does not match. Please get in touch in case this an issue for you.