In the context of Jira Service Management, using approvals is crucial for numerous organizations. They help maintain adherence to workflows while keeping all relevant stakeholders informed.
However, stakeholders frequently receive a high number of emails daily, which can lead to Jira’s approval notifications being overlooked. Since most users primarily communicate via Microsoft Teams, sending approval notifications via this platform can be beneficial.
How to setup approvals in Jira Service Management
Approvals are linked to a status transition and your workflow.
To set these up easily, follow the guidelines from Atlassian: Set up approval steps | Jira Service Management Cloud | Atlassian Support
How to setup approvals for Microsoft Teams
Once you have integrated your approval steps in Jira Service Management according to your specific use case, you have two options for sending out approval notifications:
-
Option 1:
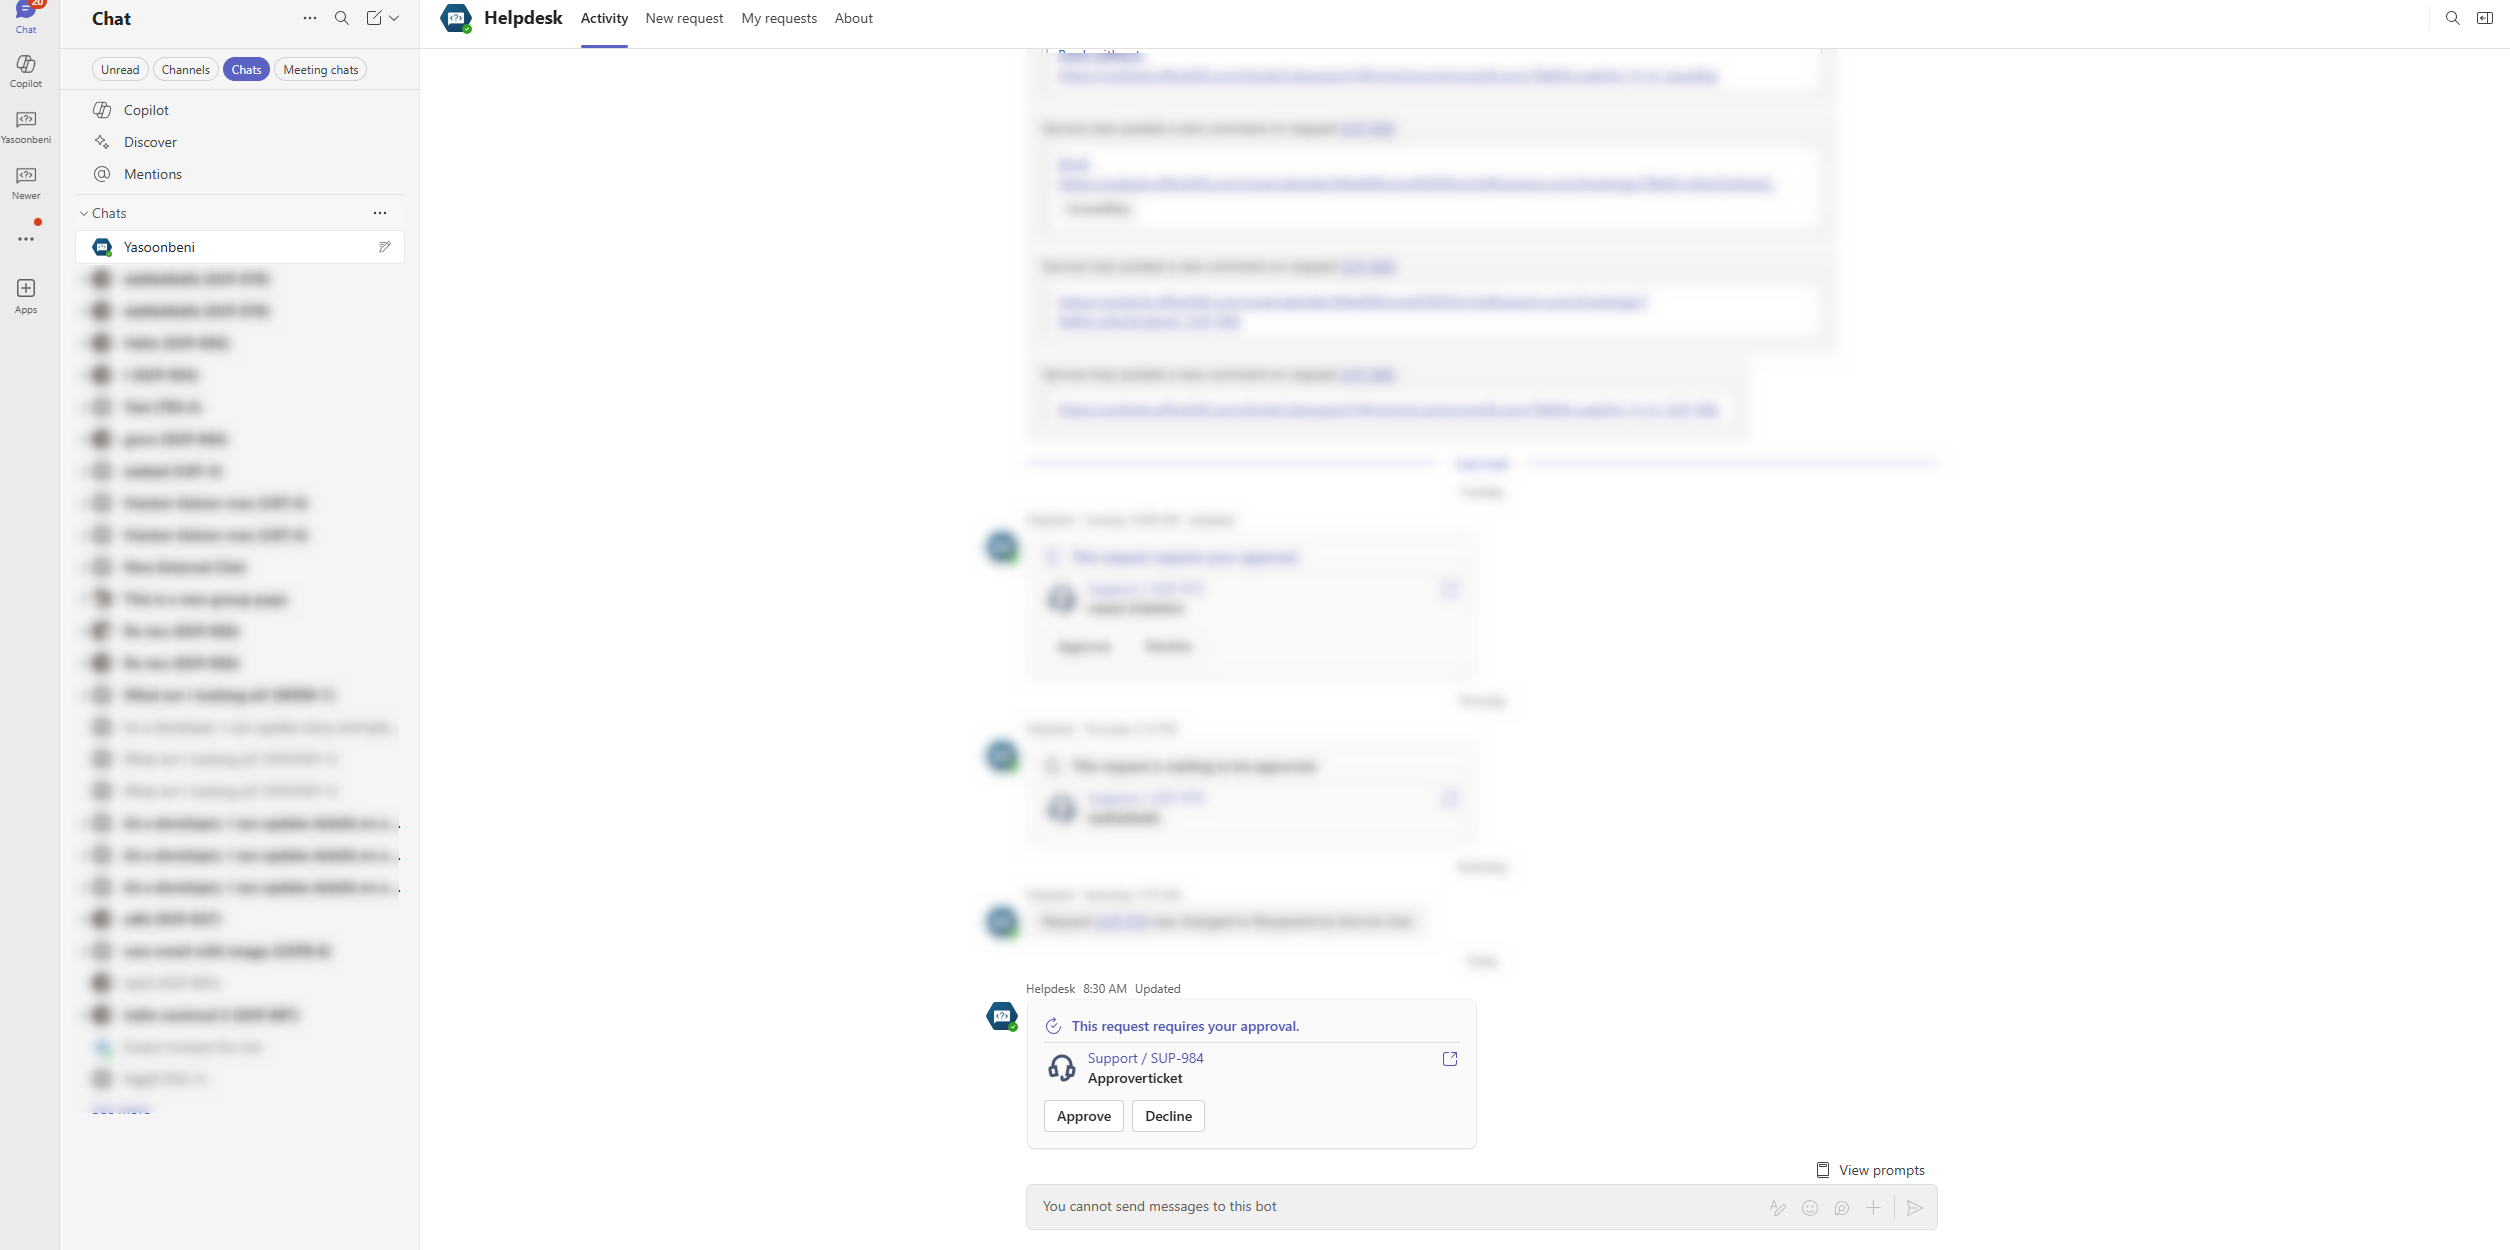
Use request notifications to send an adaptive approval card to the approvers via the bot chat in Microsoft Teams. -
Option 2:
Use a Microsoft Teams chat Preset to send the adaptive card into an existing chat with the approver in Microsoft Teams.
Prerequisite
For both options, you need to set up the following:
-
Install the Teams portal app in Microsoft Teams: Install here 📍
-
Once the app has been successfully been deployed in the Microsoft Teams admin center, you can click on “authorize” in your Jira settings, to activate notifications through the portal app in Microsoft Teams.
-20250730-095434.png?cb=f94be60008a2b355d6c803faef5d0c97)
Request notifications
To activate this option, just enable the appropriate setting within your JSM project.
You can locate this setting by navigating to your project settings and then selecting the Microsoft 365 Teams portal:
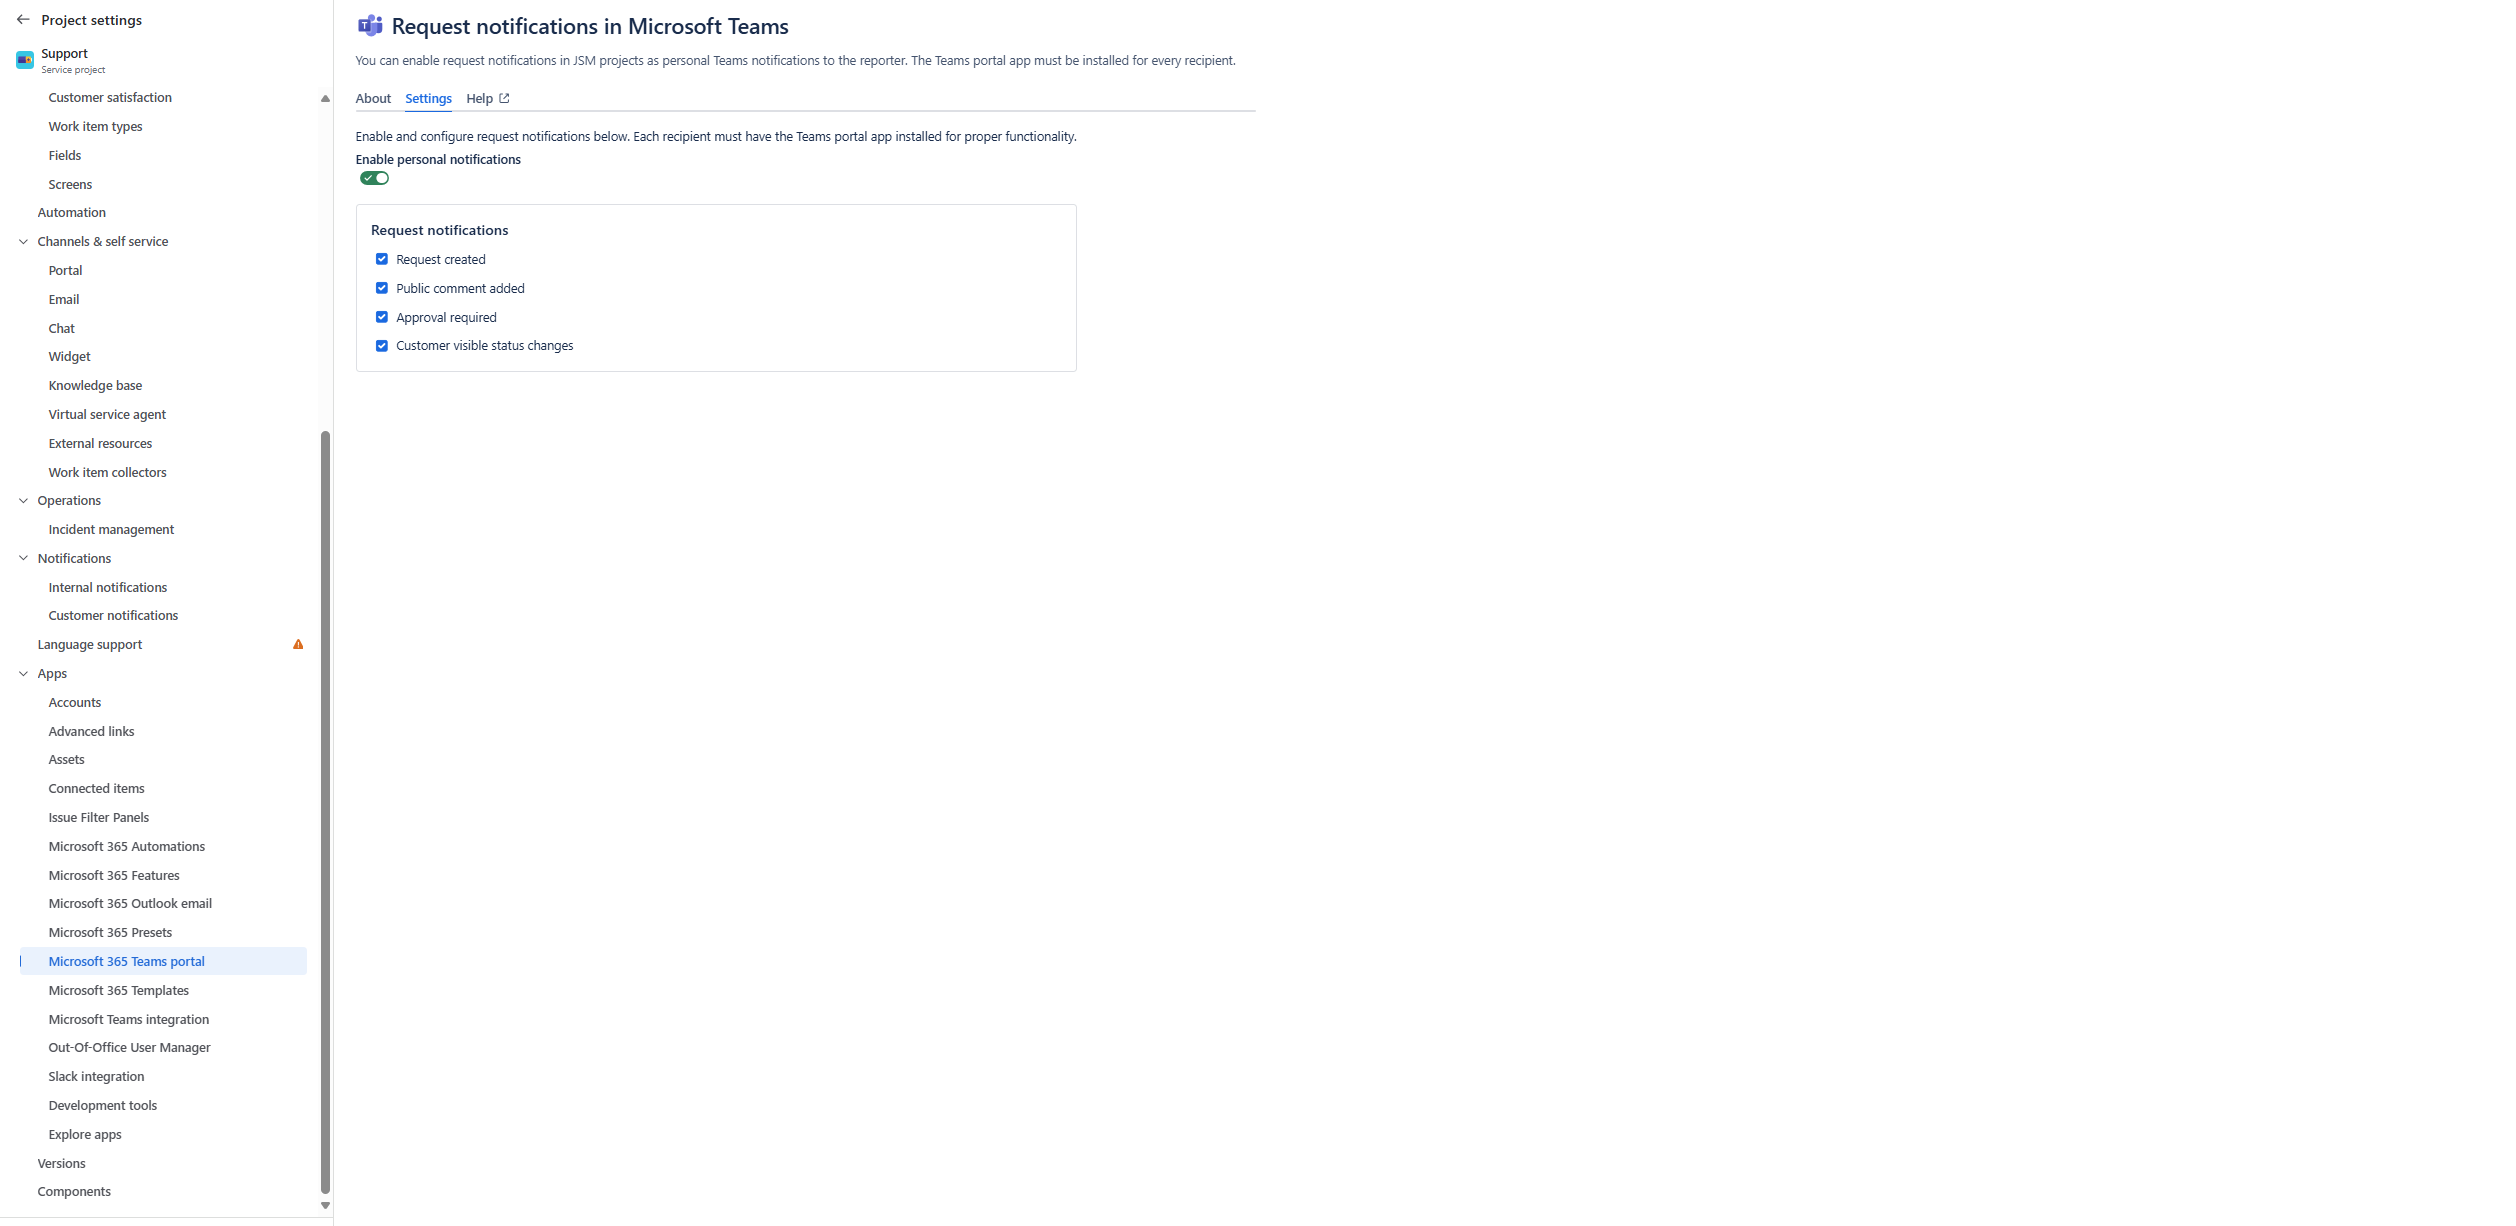
Selecting “approval required” will trigger an adaptive approval card to be sent to the approver through Microsoft Teams via the dedicated bot chat.
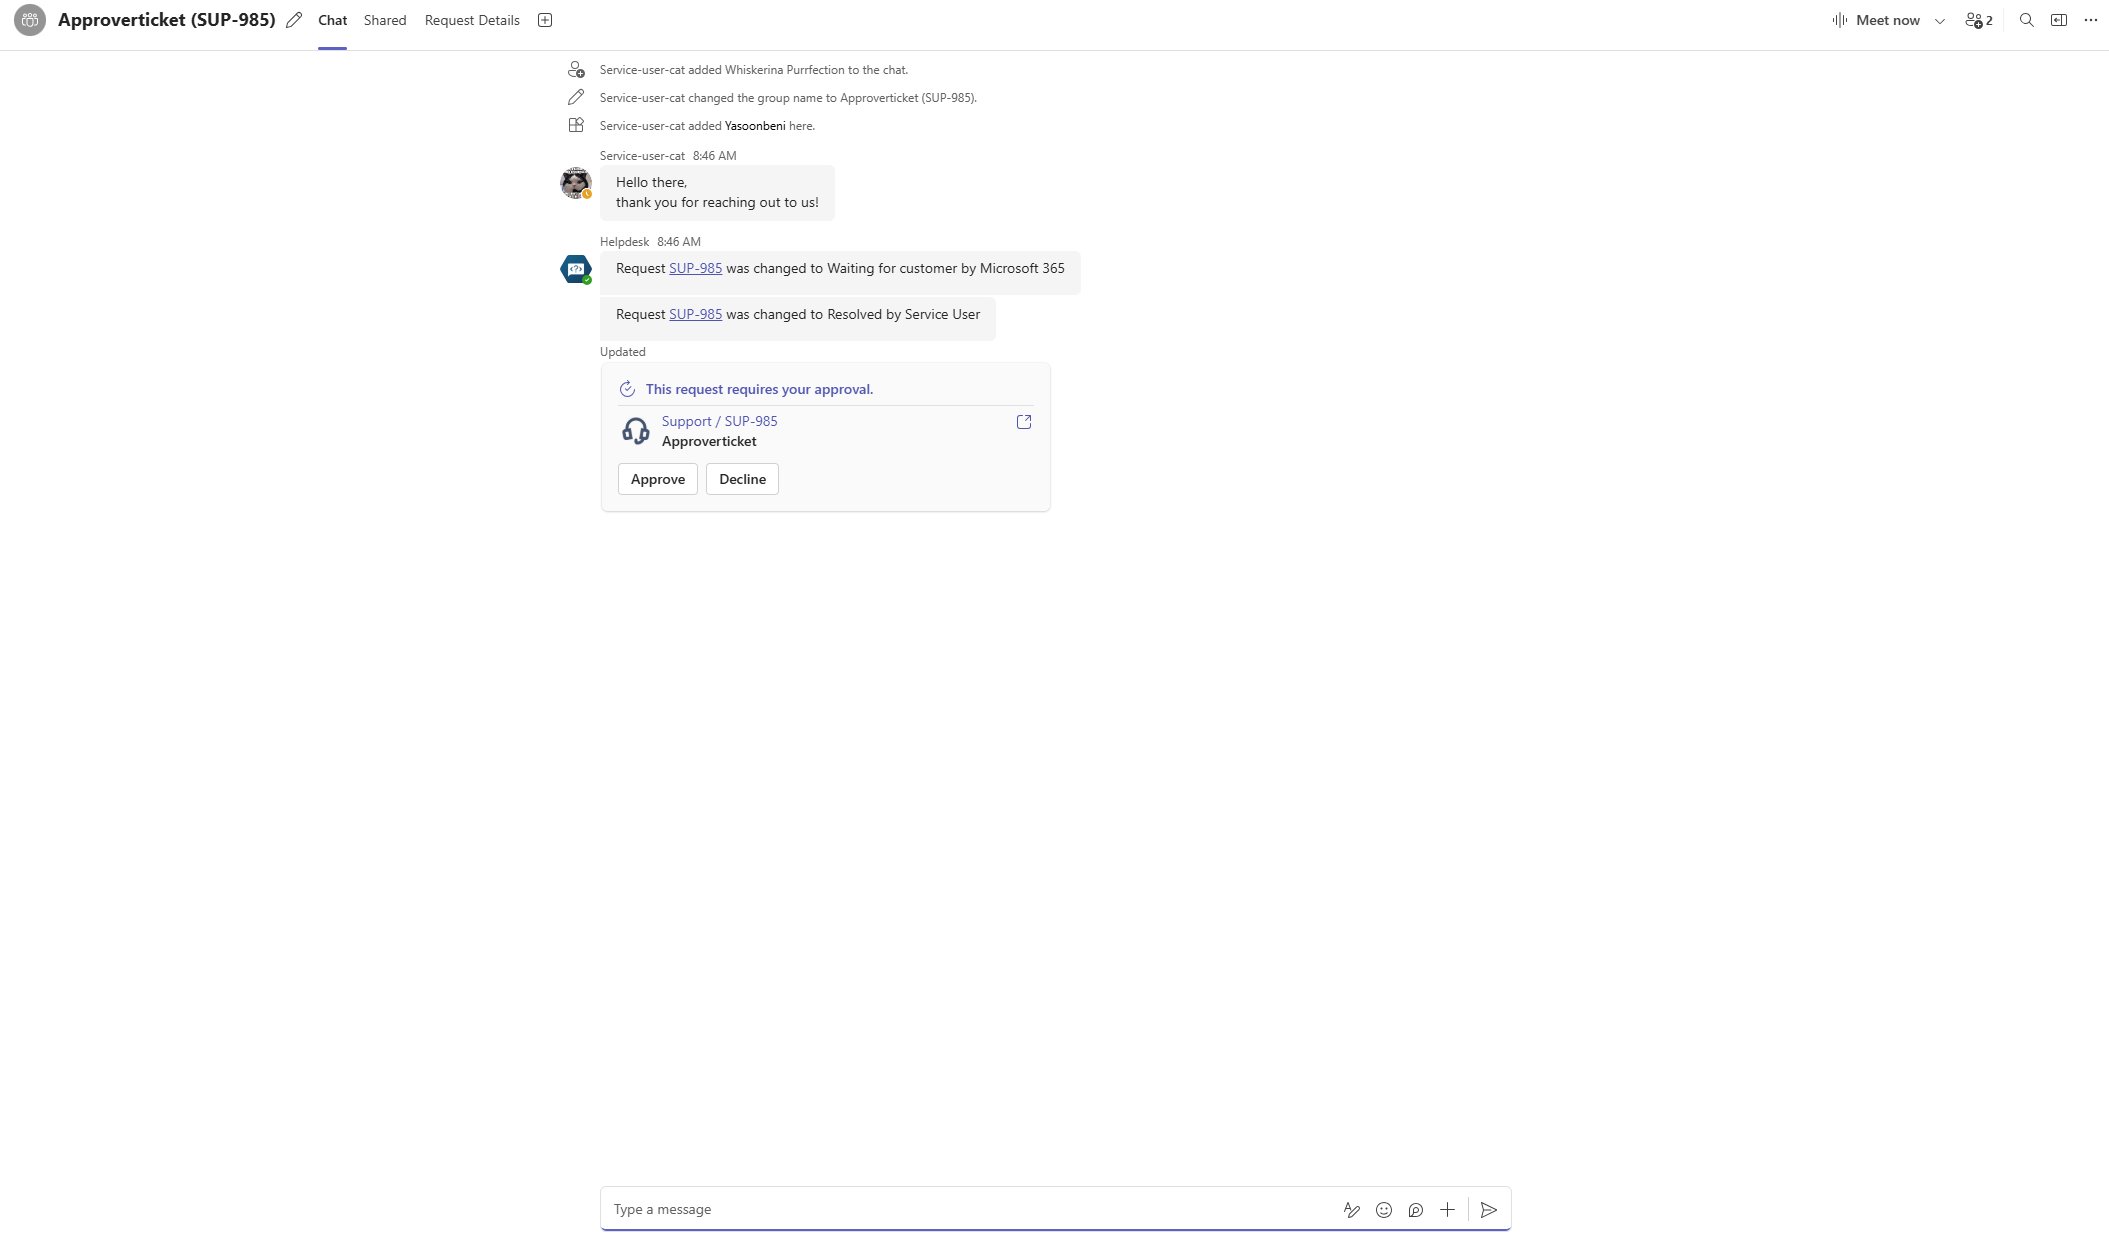
Microsoft Teams chat Preset
You can also enable approvals through our Microsoft Teams chat Presets.
To do so, navigate to your project or global Jira settings and select “Microsoft 365 Presets” in your sidebar. In the “Chat settings” section, choose our Teams portal app to function as a bot within the chat with the customer and to configure respective notifications.
Opt for “Customer approval is required” to ensure that notifications are posted in the corresponding customer chat at a later time.
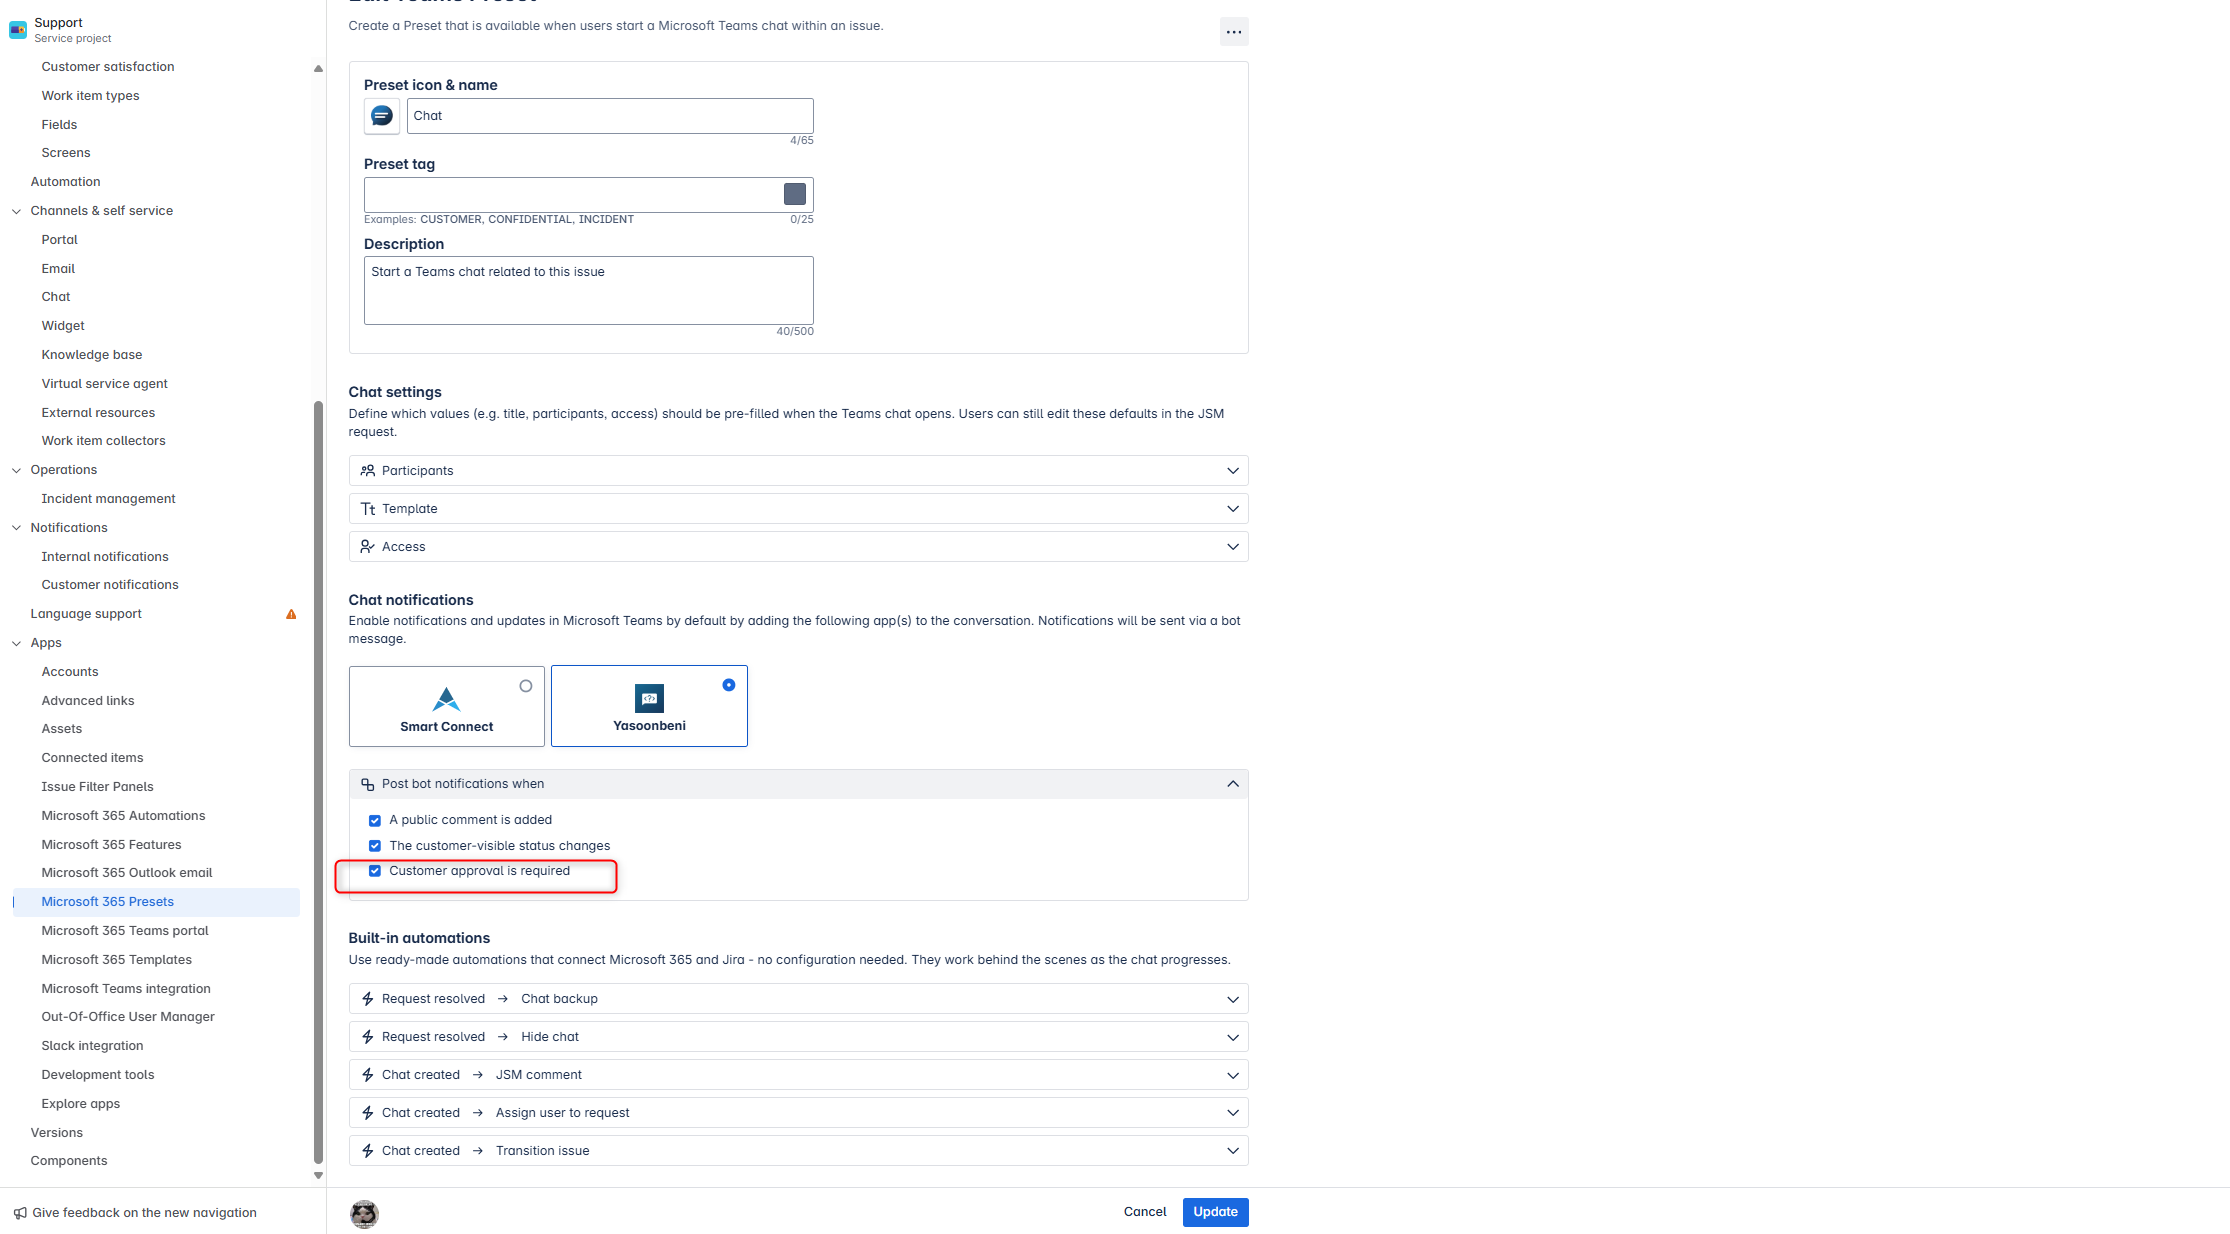
This will push the approval card into the linked chat with the approver instead of a personal bot message (see above: request notifications).