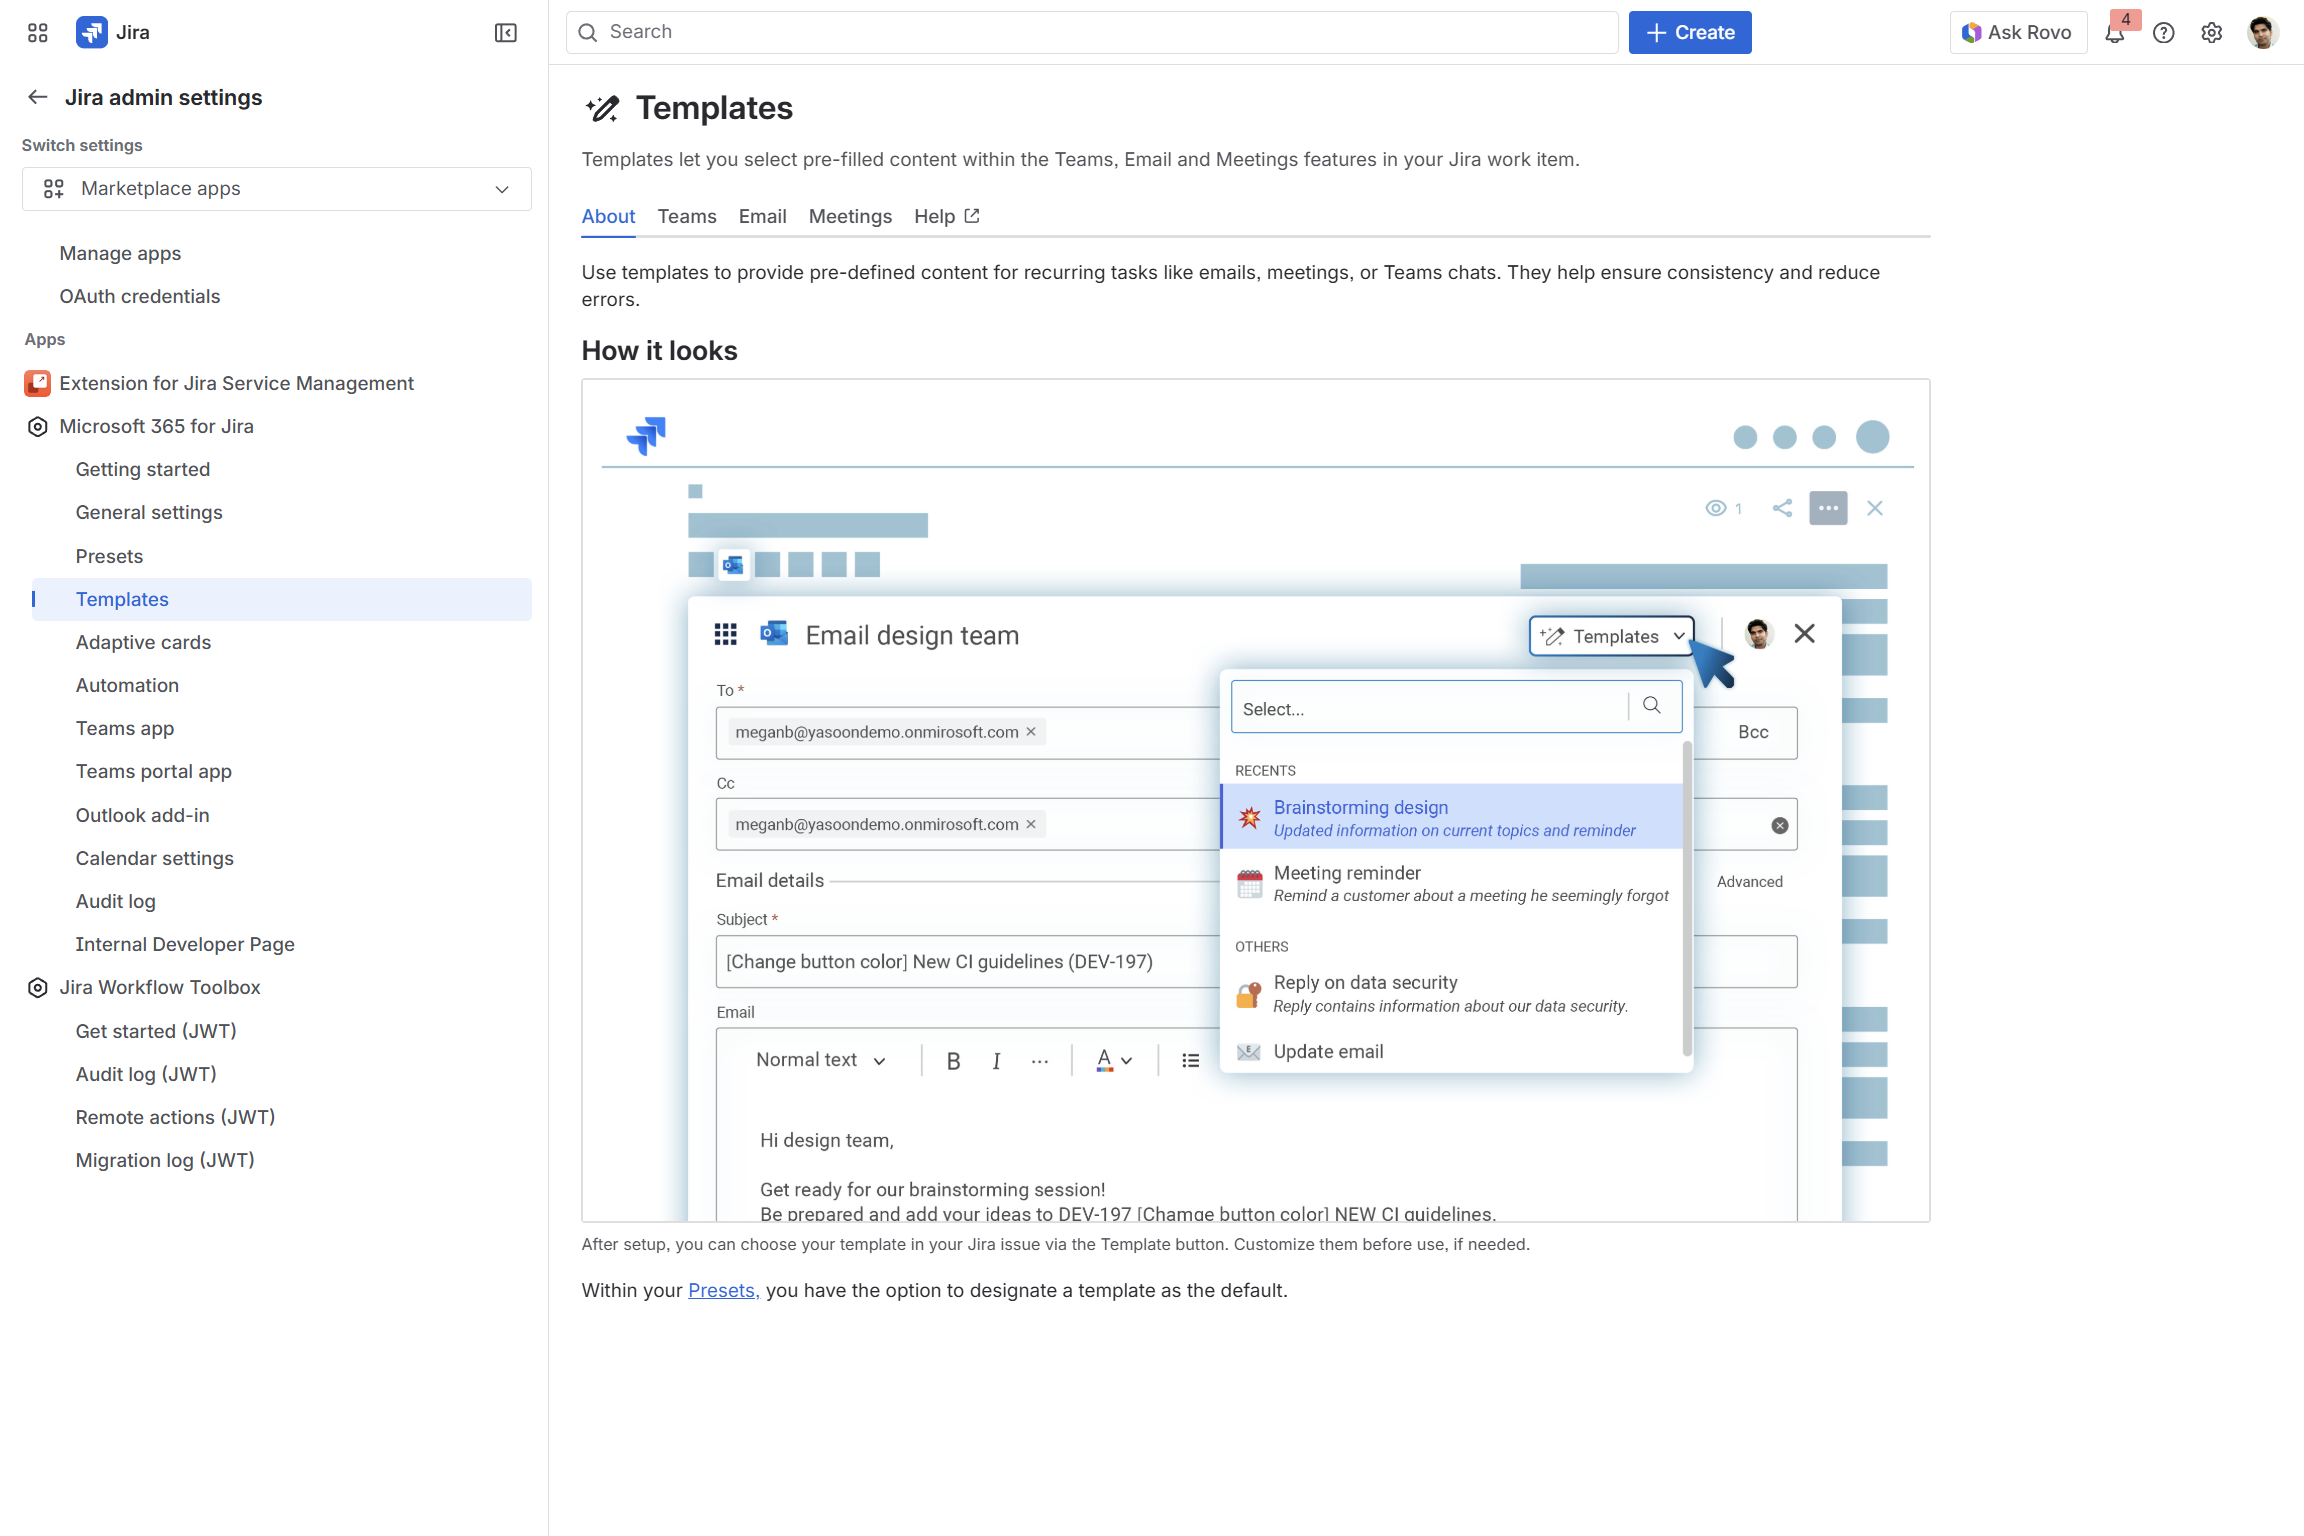
Use templates (globally or project specific) to prepare preconfigured (message) content for Microsoft Teams chats, channel conversations, Outlook meetings and emails.
Send out e.g. standardised Outlook emails or customer chat messages via MS Teams (particularly useful for JSM projects) with a click and make workflows even more efficient.
The following section provides detailed information on how to customise the content of your templates.
Especially for Jira Service Agents working with Jira Service Management and Microsoft 365 this is a neat feature. It allows for efficient communication without typing the same message repeatedly.
Templates are all set-up the same way in Microsoft 365. So if you can do emails, you can also set-up chats and meeting templates! 👏
Overview
Demo video
The below demo video shows an exemplary set-up of a chat template on a global level and the end user view in Jira.
Please note: Defaults for templates are now defined via Presets.
Set-up a template
When setting a template you can do so from scratch (“create blank”) or take advantage from a preconfigured template blueprint, specifically designed for a specific use case (see options under “Blueprint library”).
Blueprints should simplify the process of setting up templates in the first place and thus, already come with a predefined title, description and message content most adequate for the individual scopt of application.
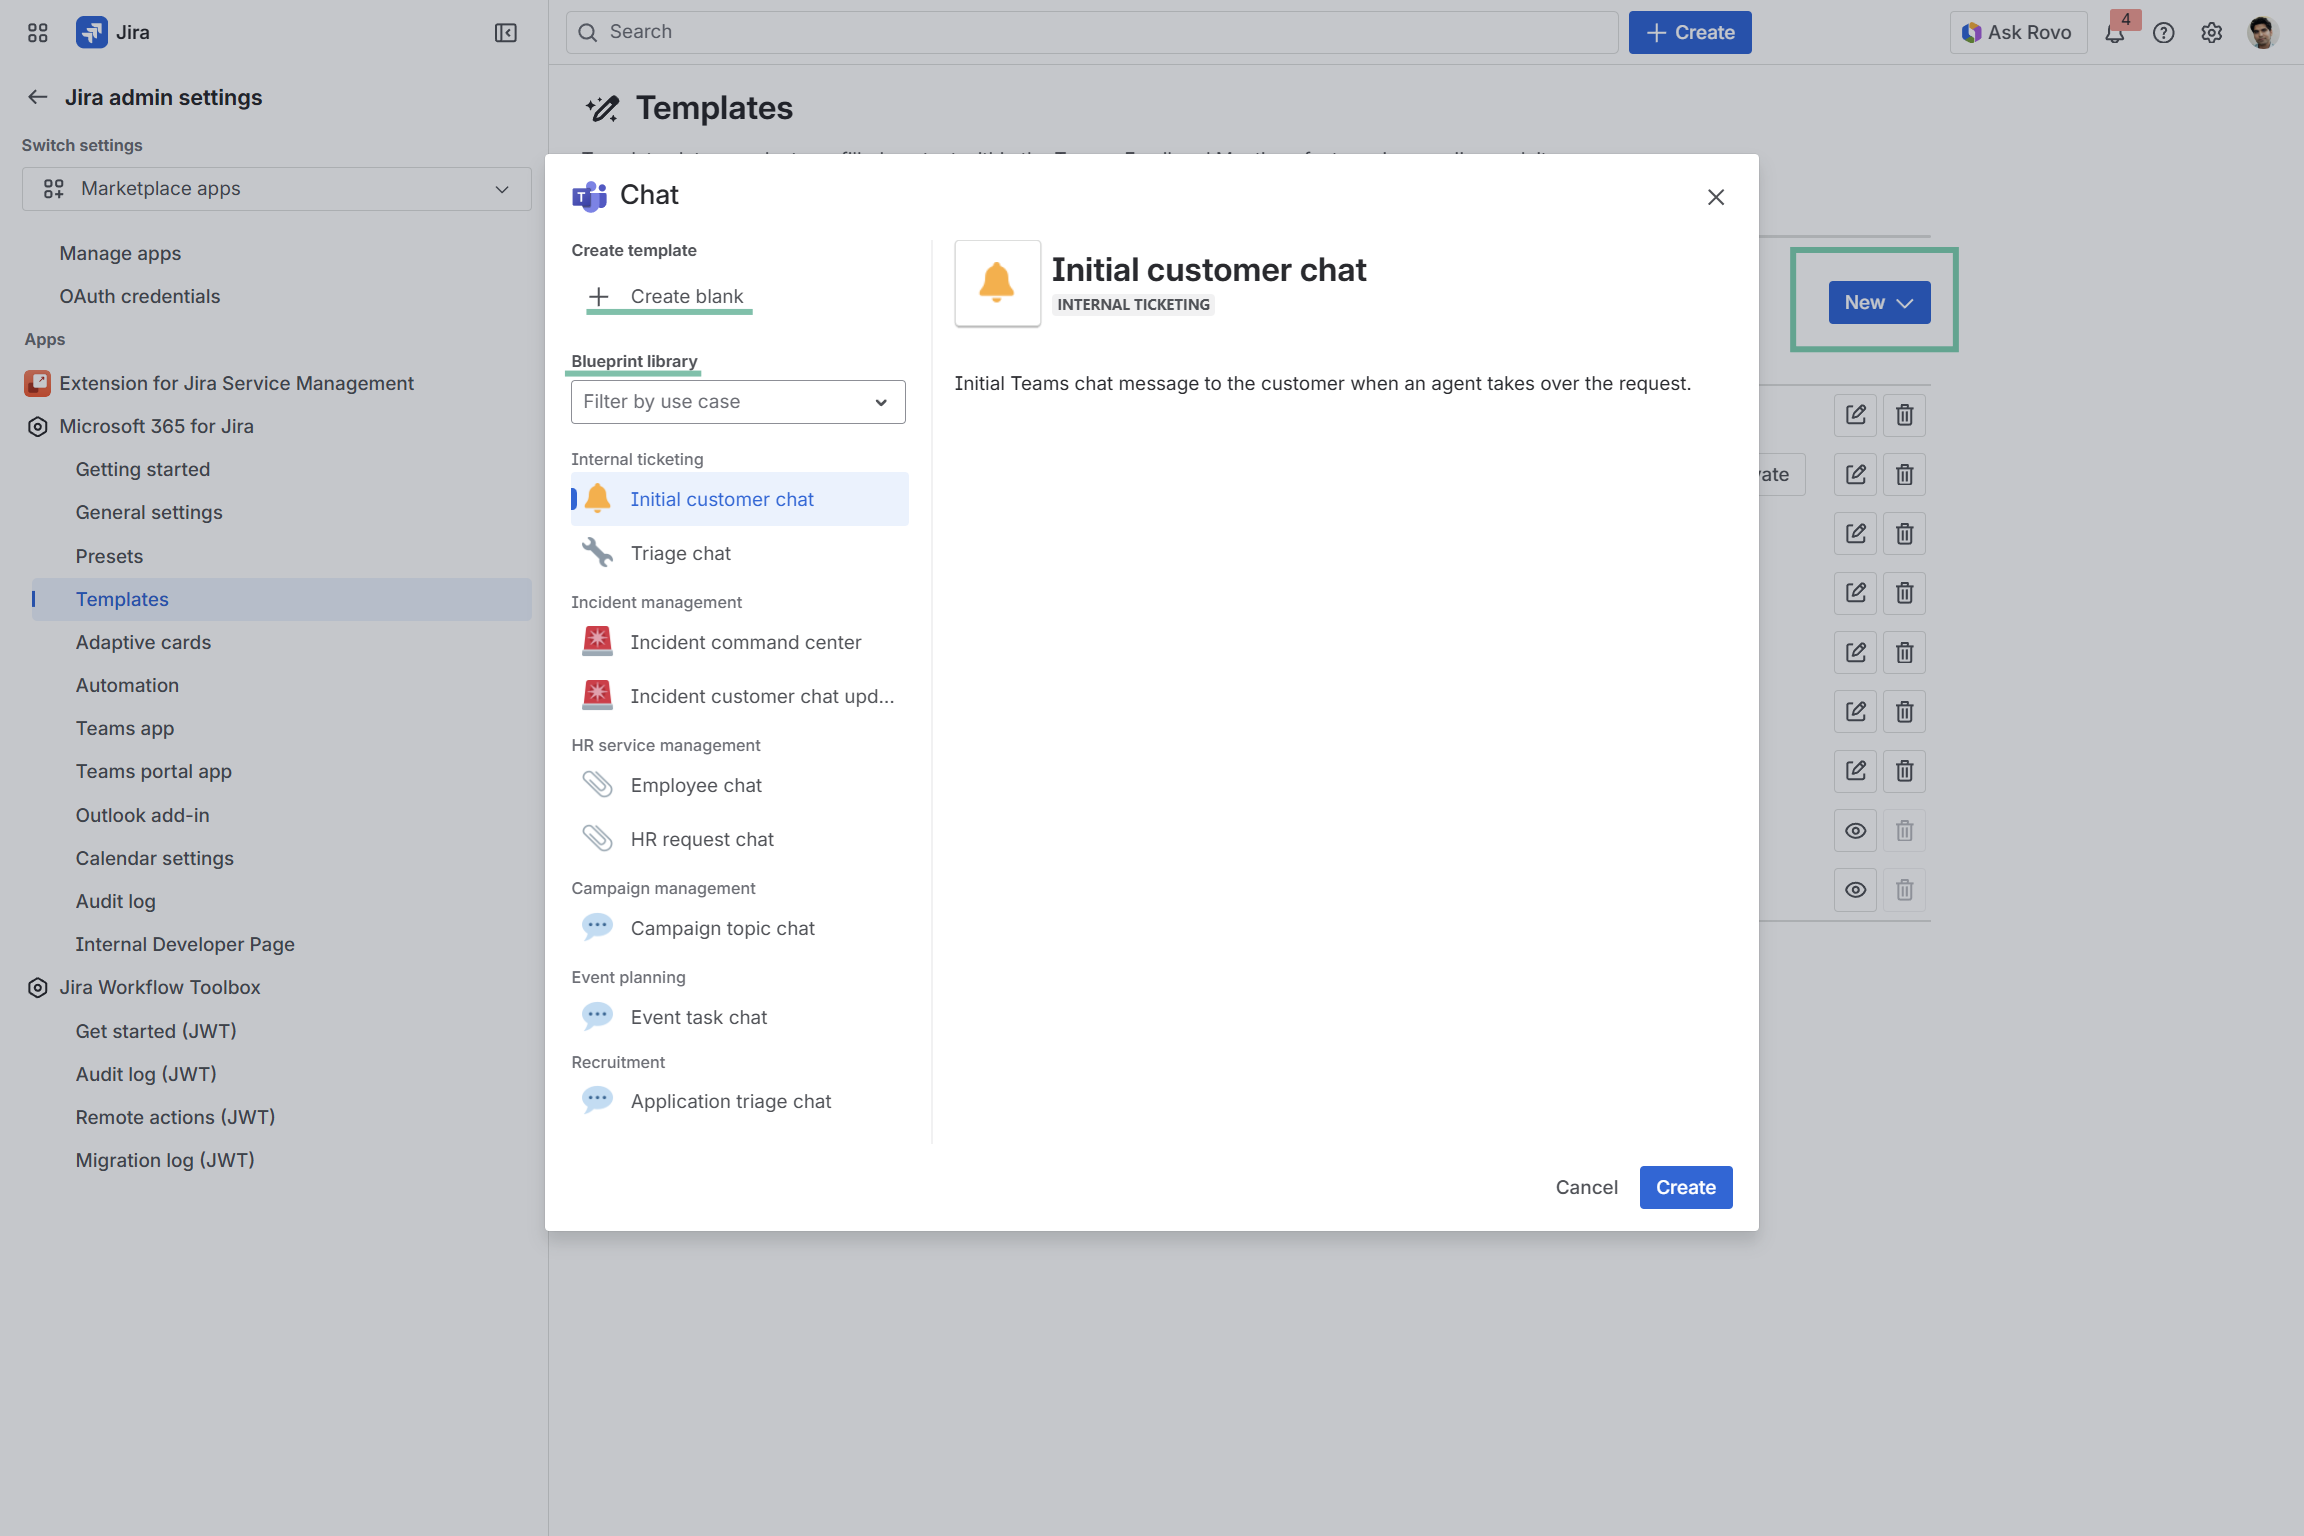
Use blueprints to start quickly
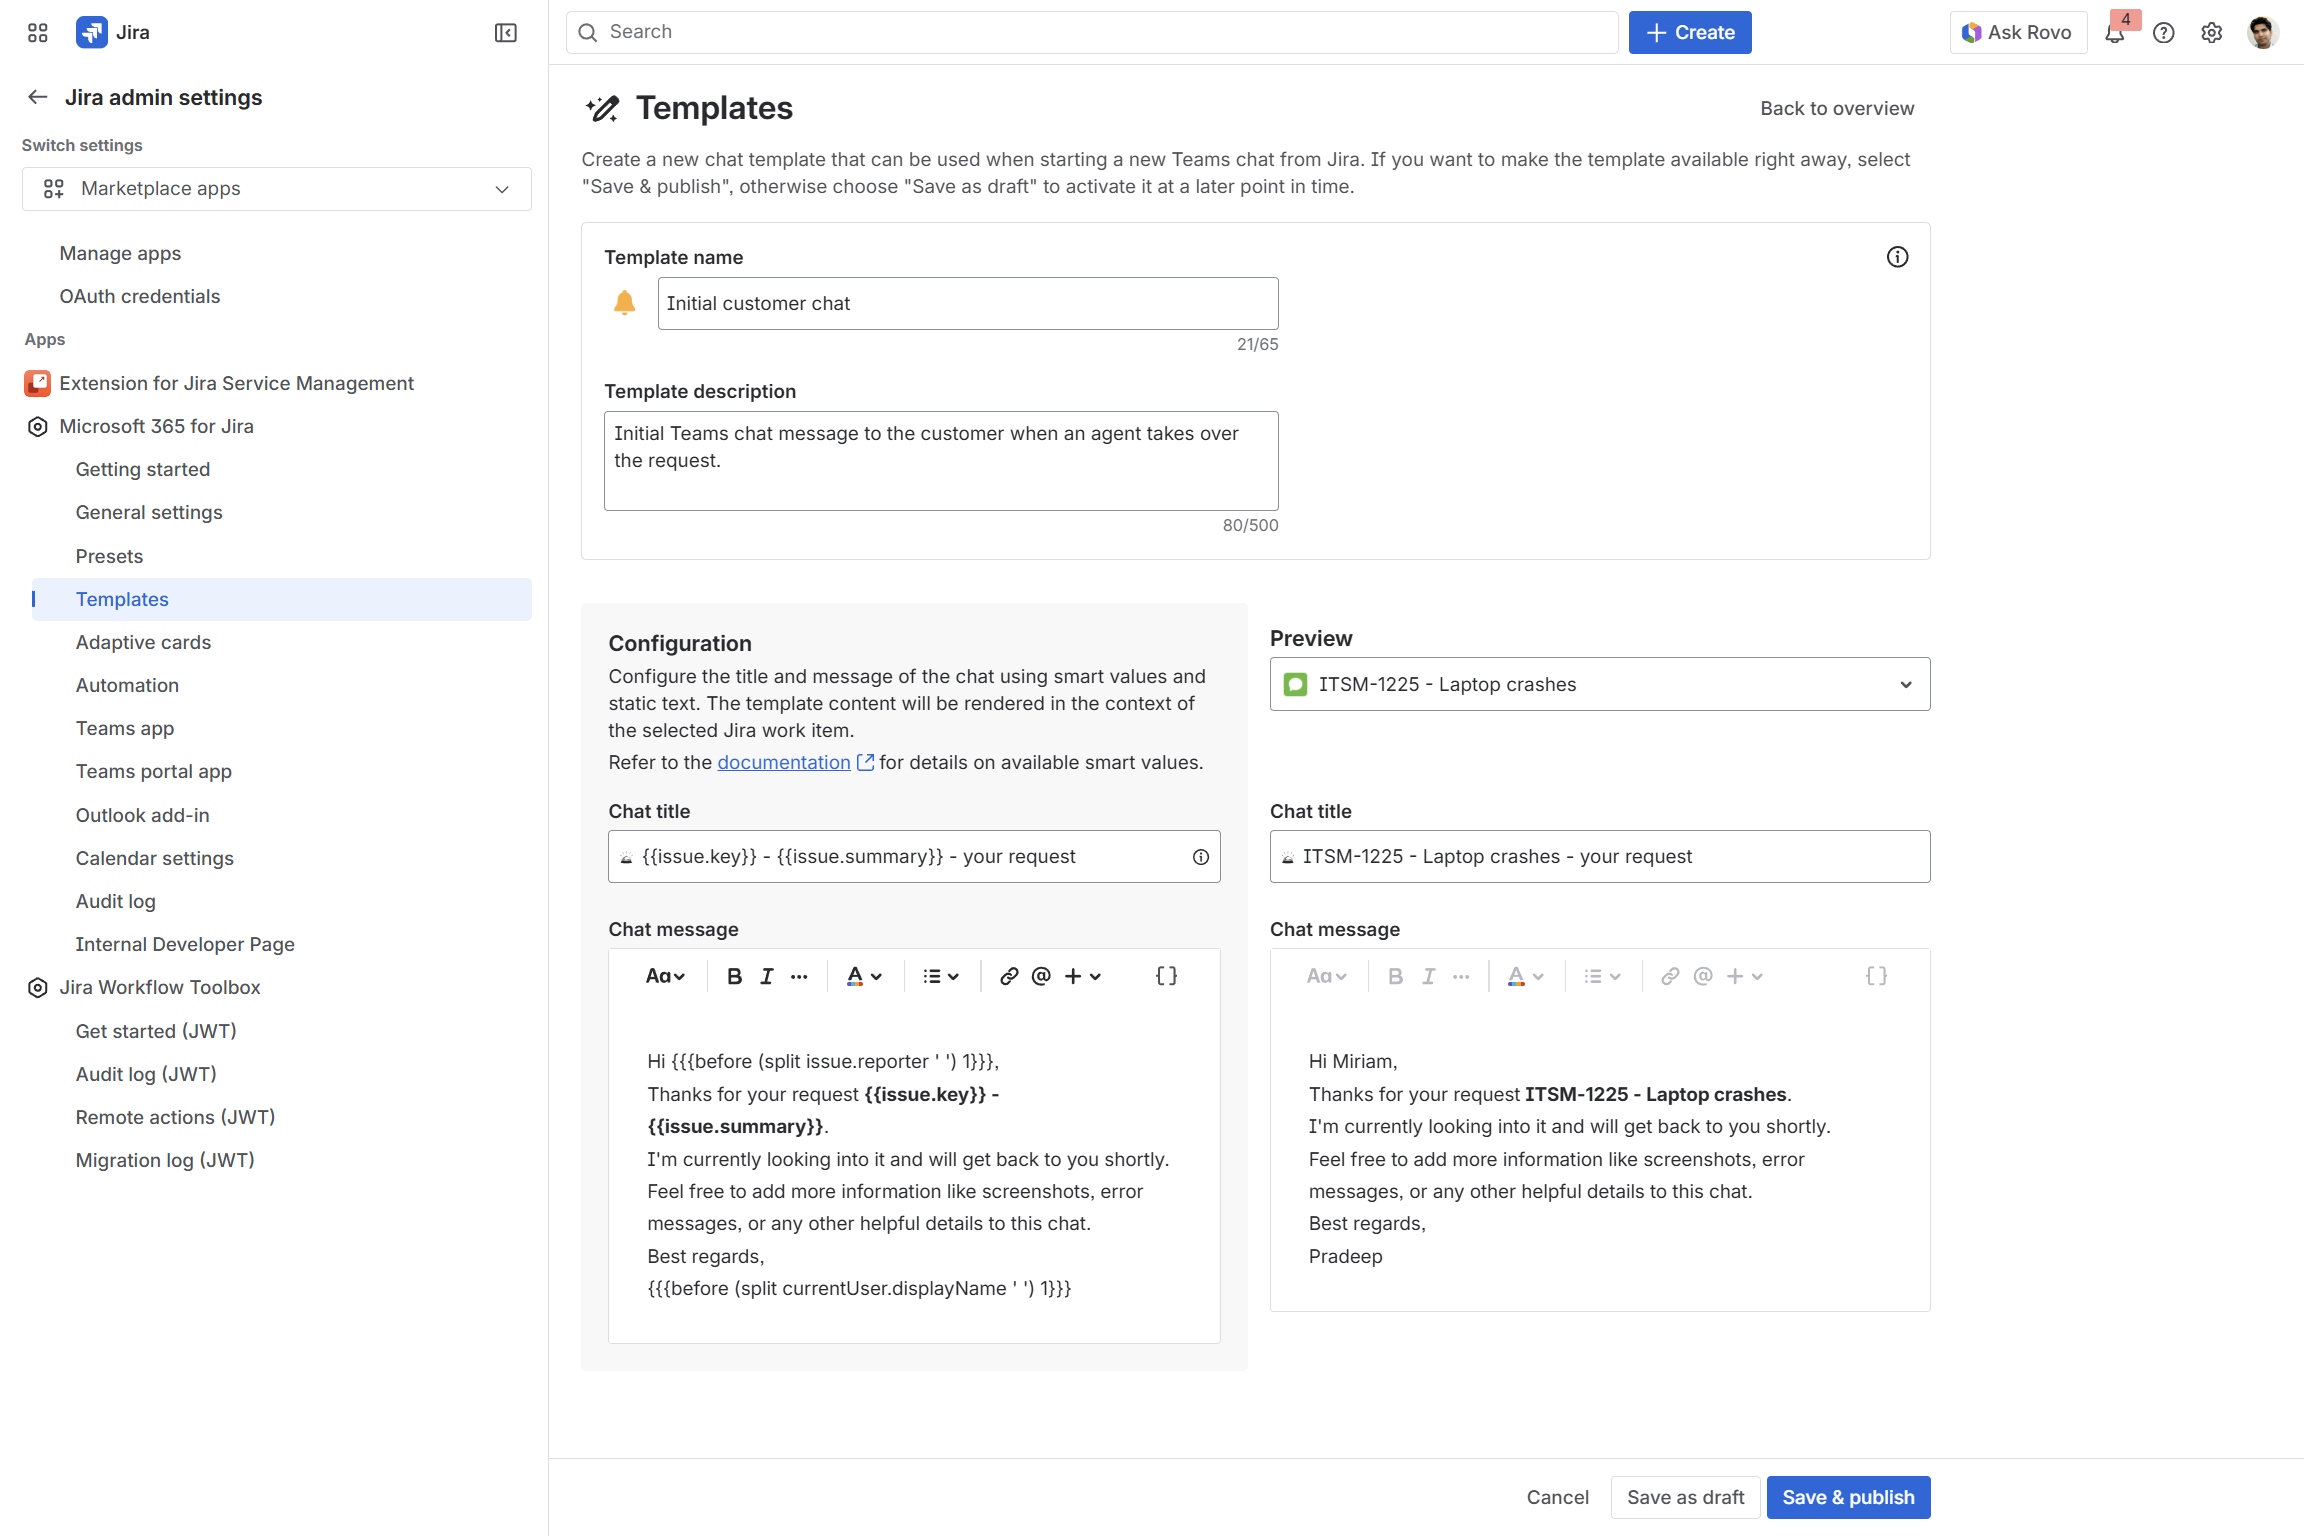
After selecting a blueprint of your choice the template title, description and message content (based on values and functions) are already prefilled.
You can now either start right away by clicking “save & publish” or you can change bits and pieces, if required.
Template blueprints function like Preset blueprints.
We recommend setting up a template before configuring a Preset.
A suitable template forms the basis for a Preset (see for reference: Preset: Teams).
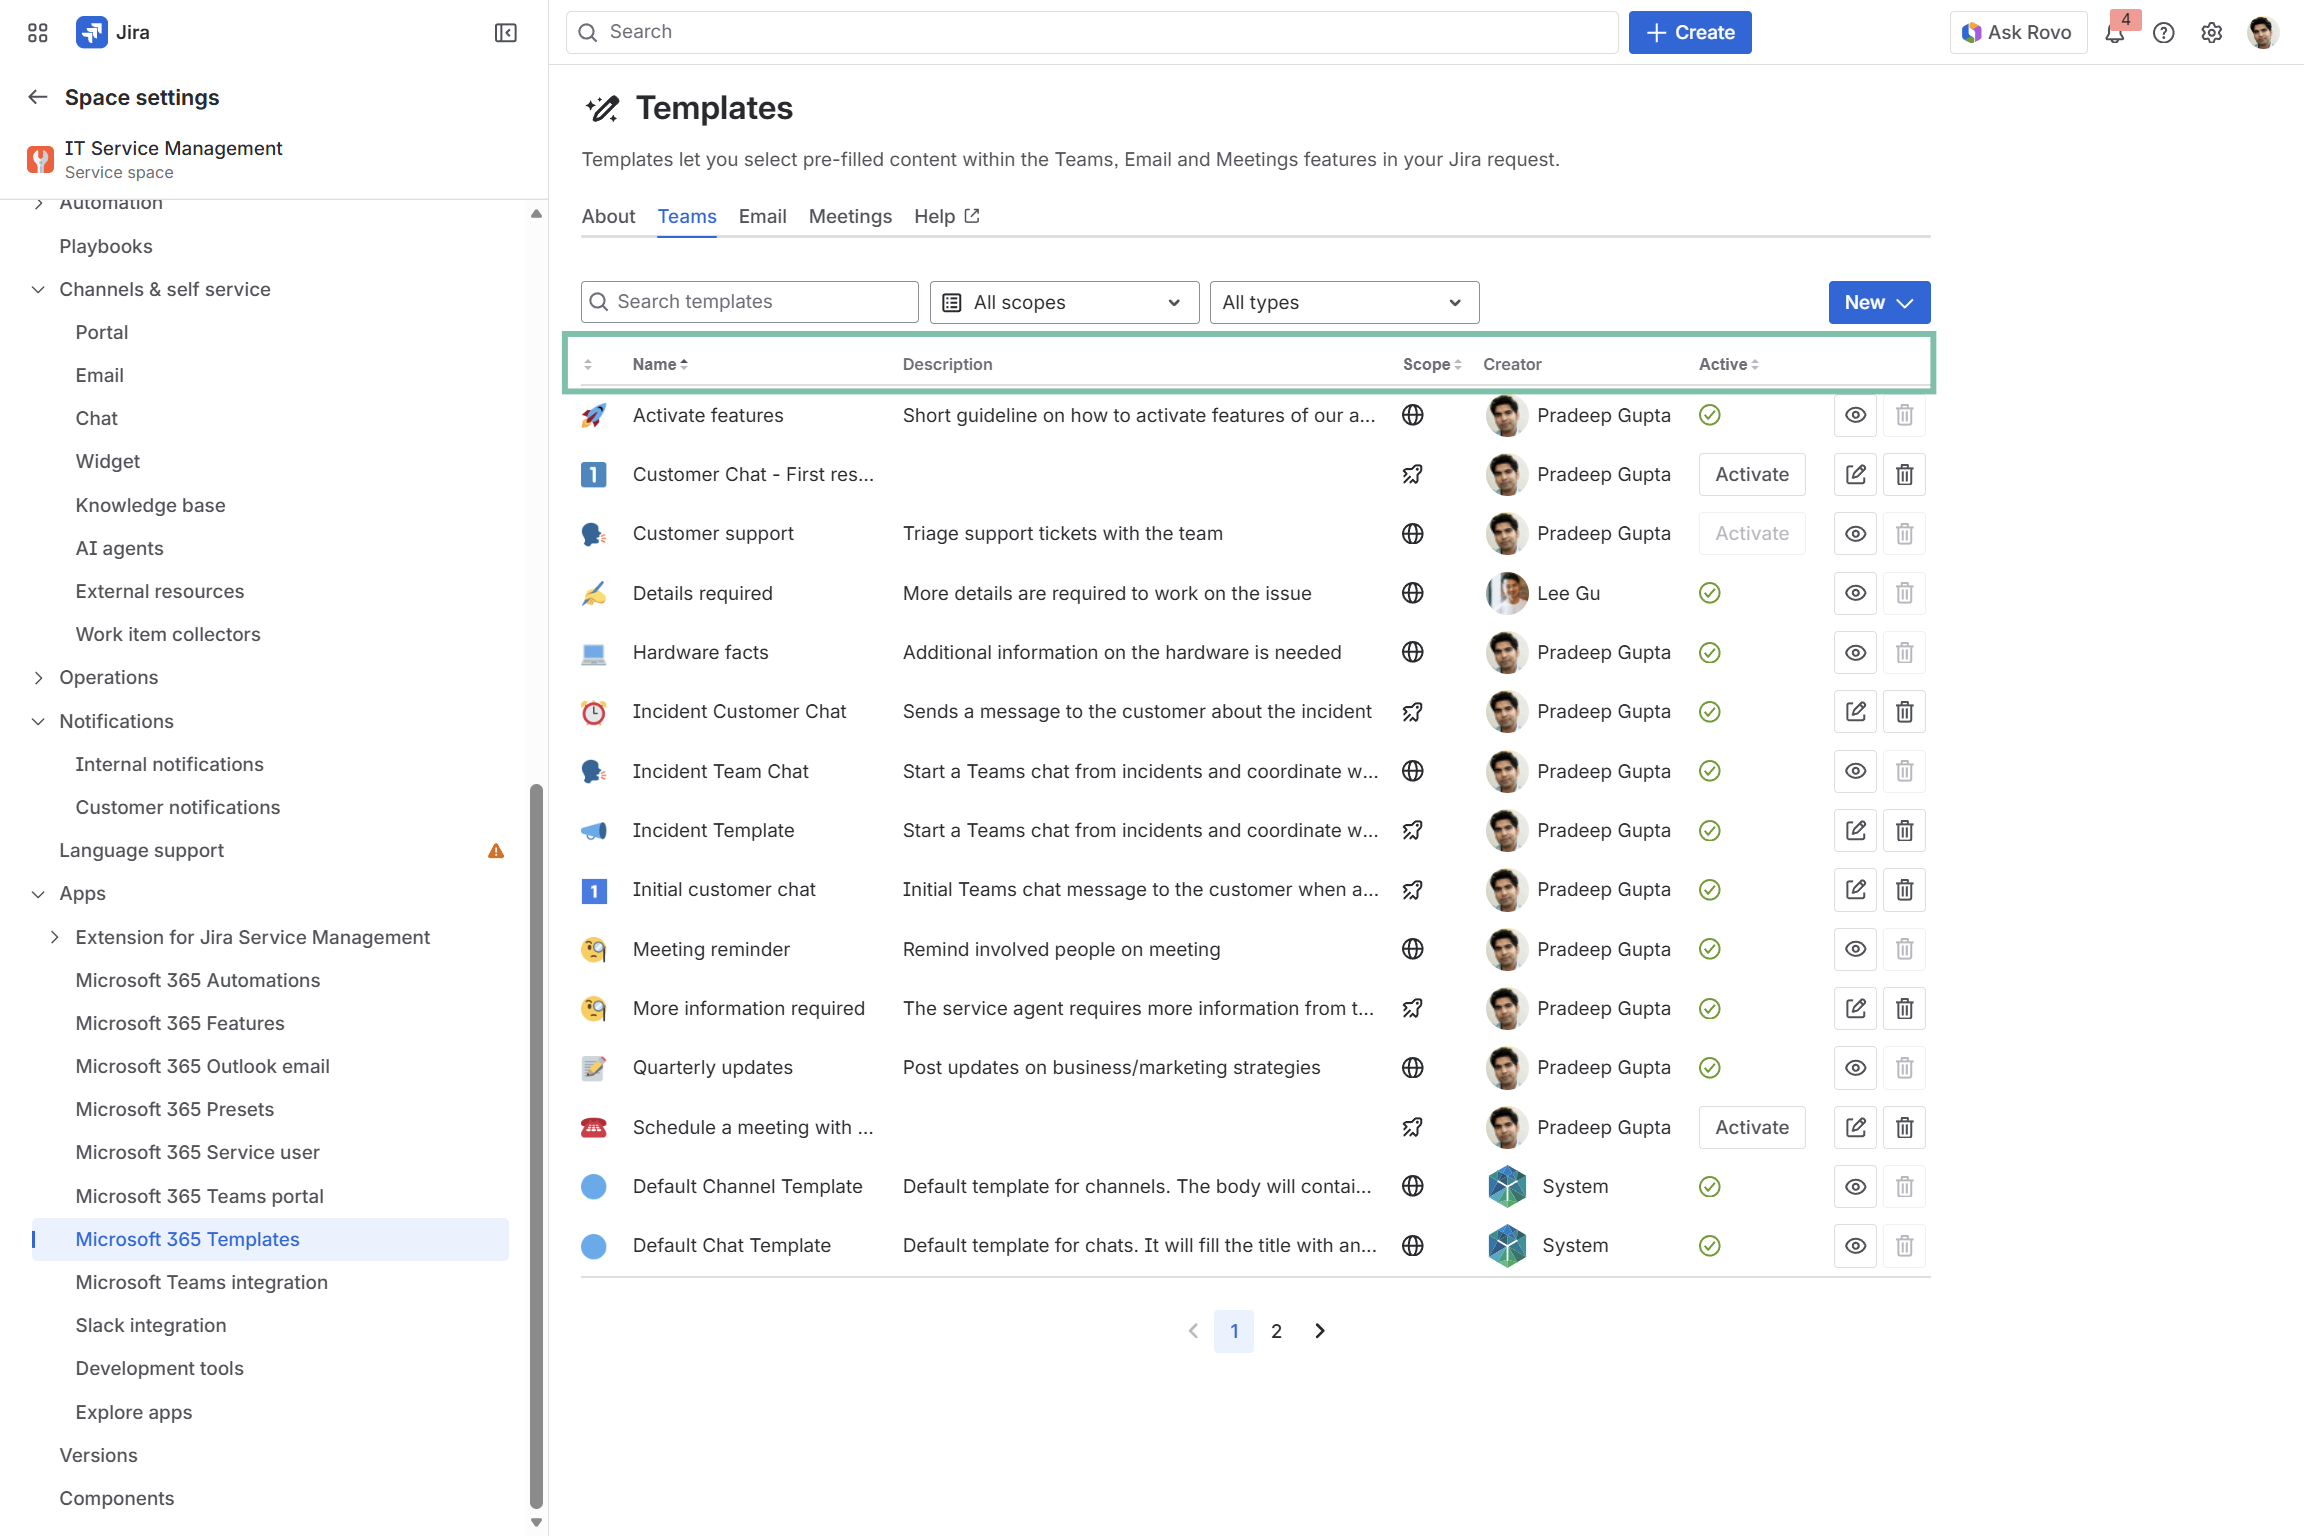
Work with global and space-specific templates
Setting up templates globally or space specifically, allows you to quickly send out messages to customers and co-workers, independently of the project level.
At space level, you get an overview of globally set templates (world icon) and those being only active in that specific space (rocket icon).
In your Jira global settings, you only see globally configured templates, not space-specific ones.
Activate or delete templates as needed (deactivating templates is not possible). Edit them to add information or adjust content, if required.
Template: Values
Template values allow you to dynamically populate templates with contextual data when being used. The contextual data are mainly the issue for which a template is being used as well as the user using the template.
Template values therefore make it possible to create templates that are flexible, especially when adding logic via template functions.
Learn more about values
Template: Functions
Templates can do more than just inserting values. With functions you can manipulate data, compare data and even work with sets (arrays) of data. It basically turns the template into a small script. We try to keep the features similar to the smart values available in Jira automation. For technical reasons we have to use a different syntax but with very similar results.
Functions can be used as inline function or as a block function.
-
Inline functions are visible on the template, so the result will be shown to the user.
-
Block functions are just structure and are invisible to the user. It is up to you to use the result of the function and display it to the user.
Learn more about functions
Template: Examples
We have some template examples at hand to make it easier for you to set it up. Check them out!
Learn more about examples
Admin Responsibilities
|
|
Responsibility |
To Do |
|---|---|---|
|
Global |
Jira global admin |
Creates templates centrally
|
|
Project |
Jira project admin |
Creates templates for their projects
|
📌 Please consider the following:
-
Default templates are created via Presets (Former “default template” do not exist anymore). As soon as a Preset is created with a template (chat, email, meetings), the user can pick this Preset in Jira and can make it a default (the Preset including the corresponding template).
-
Globally created templates are always available for selection when creating a Preset; either through the admin settings or project-specific settings.
-
Project-specific templates can only be selected when creating a Preset within a specific Jira project..
Benefits
✍️ Easy configuration
Templates are set-up the same way for emails, chats, channels and meetings. Create templates either globally for all Jira projects or only for specific ones.
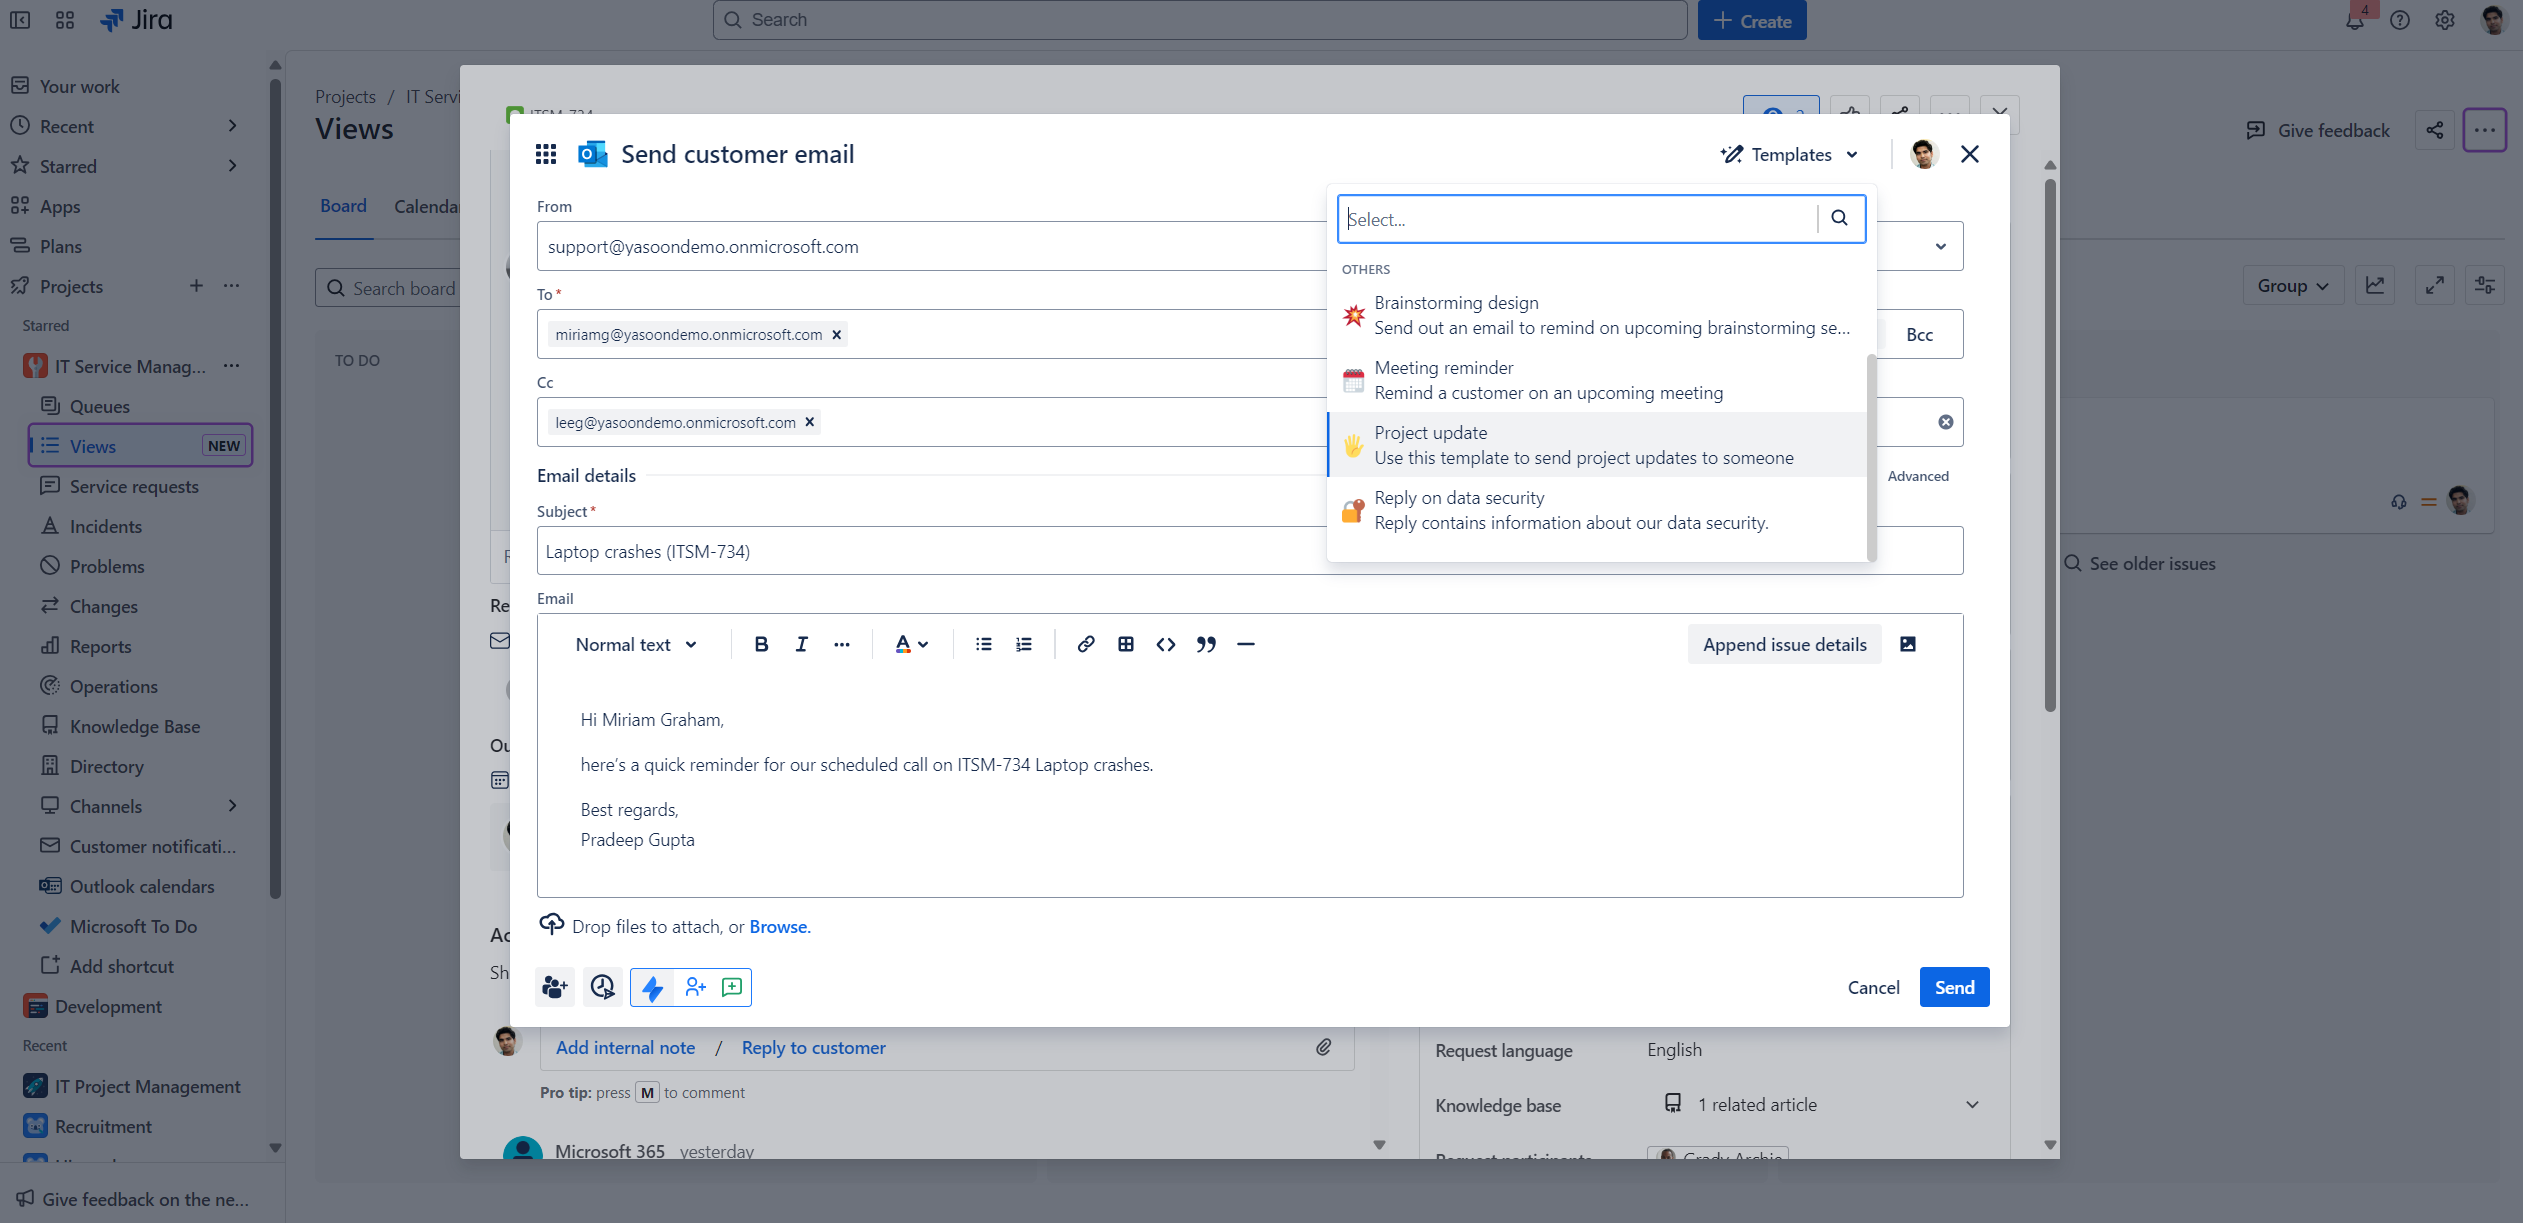
📋 Structured workflow for user
Save time by simply selecting an appropriate template when working in your Jira issue. Templates can always be edited before they are used and send.
👥 Efficient communication in Jira Service Management
This is a great feature, especially for Jira Service Agents working with Jira Service Management and Microsoft 365. It allows for efficient communication without having to type the same message repeatedly.