The Outlook email integration allows you to effortlessly share, read, and send emails or entire email conversations directly from your Jira issue. This feature empowers your team to access Outlook information seamlessly, ensuring everyone stays informed. Additionally, future replies will automatically appear in Jira through the related emails panel.
Click through demo
Feature at a glance
Using and working with emails in your Jira issues can significantly enhance communication with stakeholders. It promotes faster and more transparent information exchange, as all correspondence is stored and readily accessible in the related emails panel of the issue.
Work with Email Presets
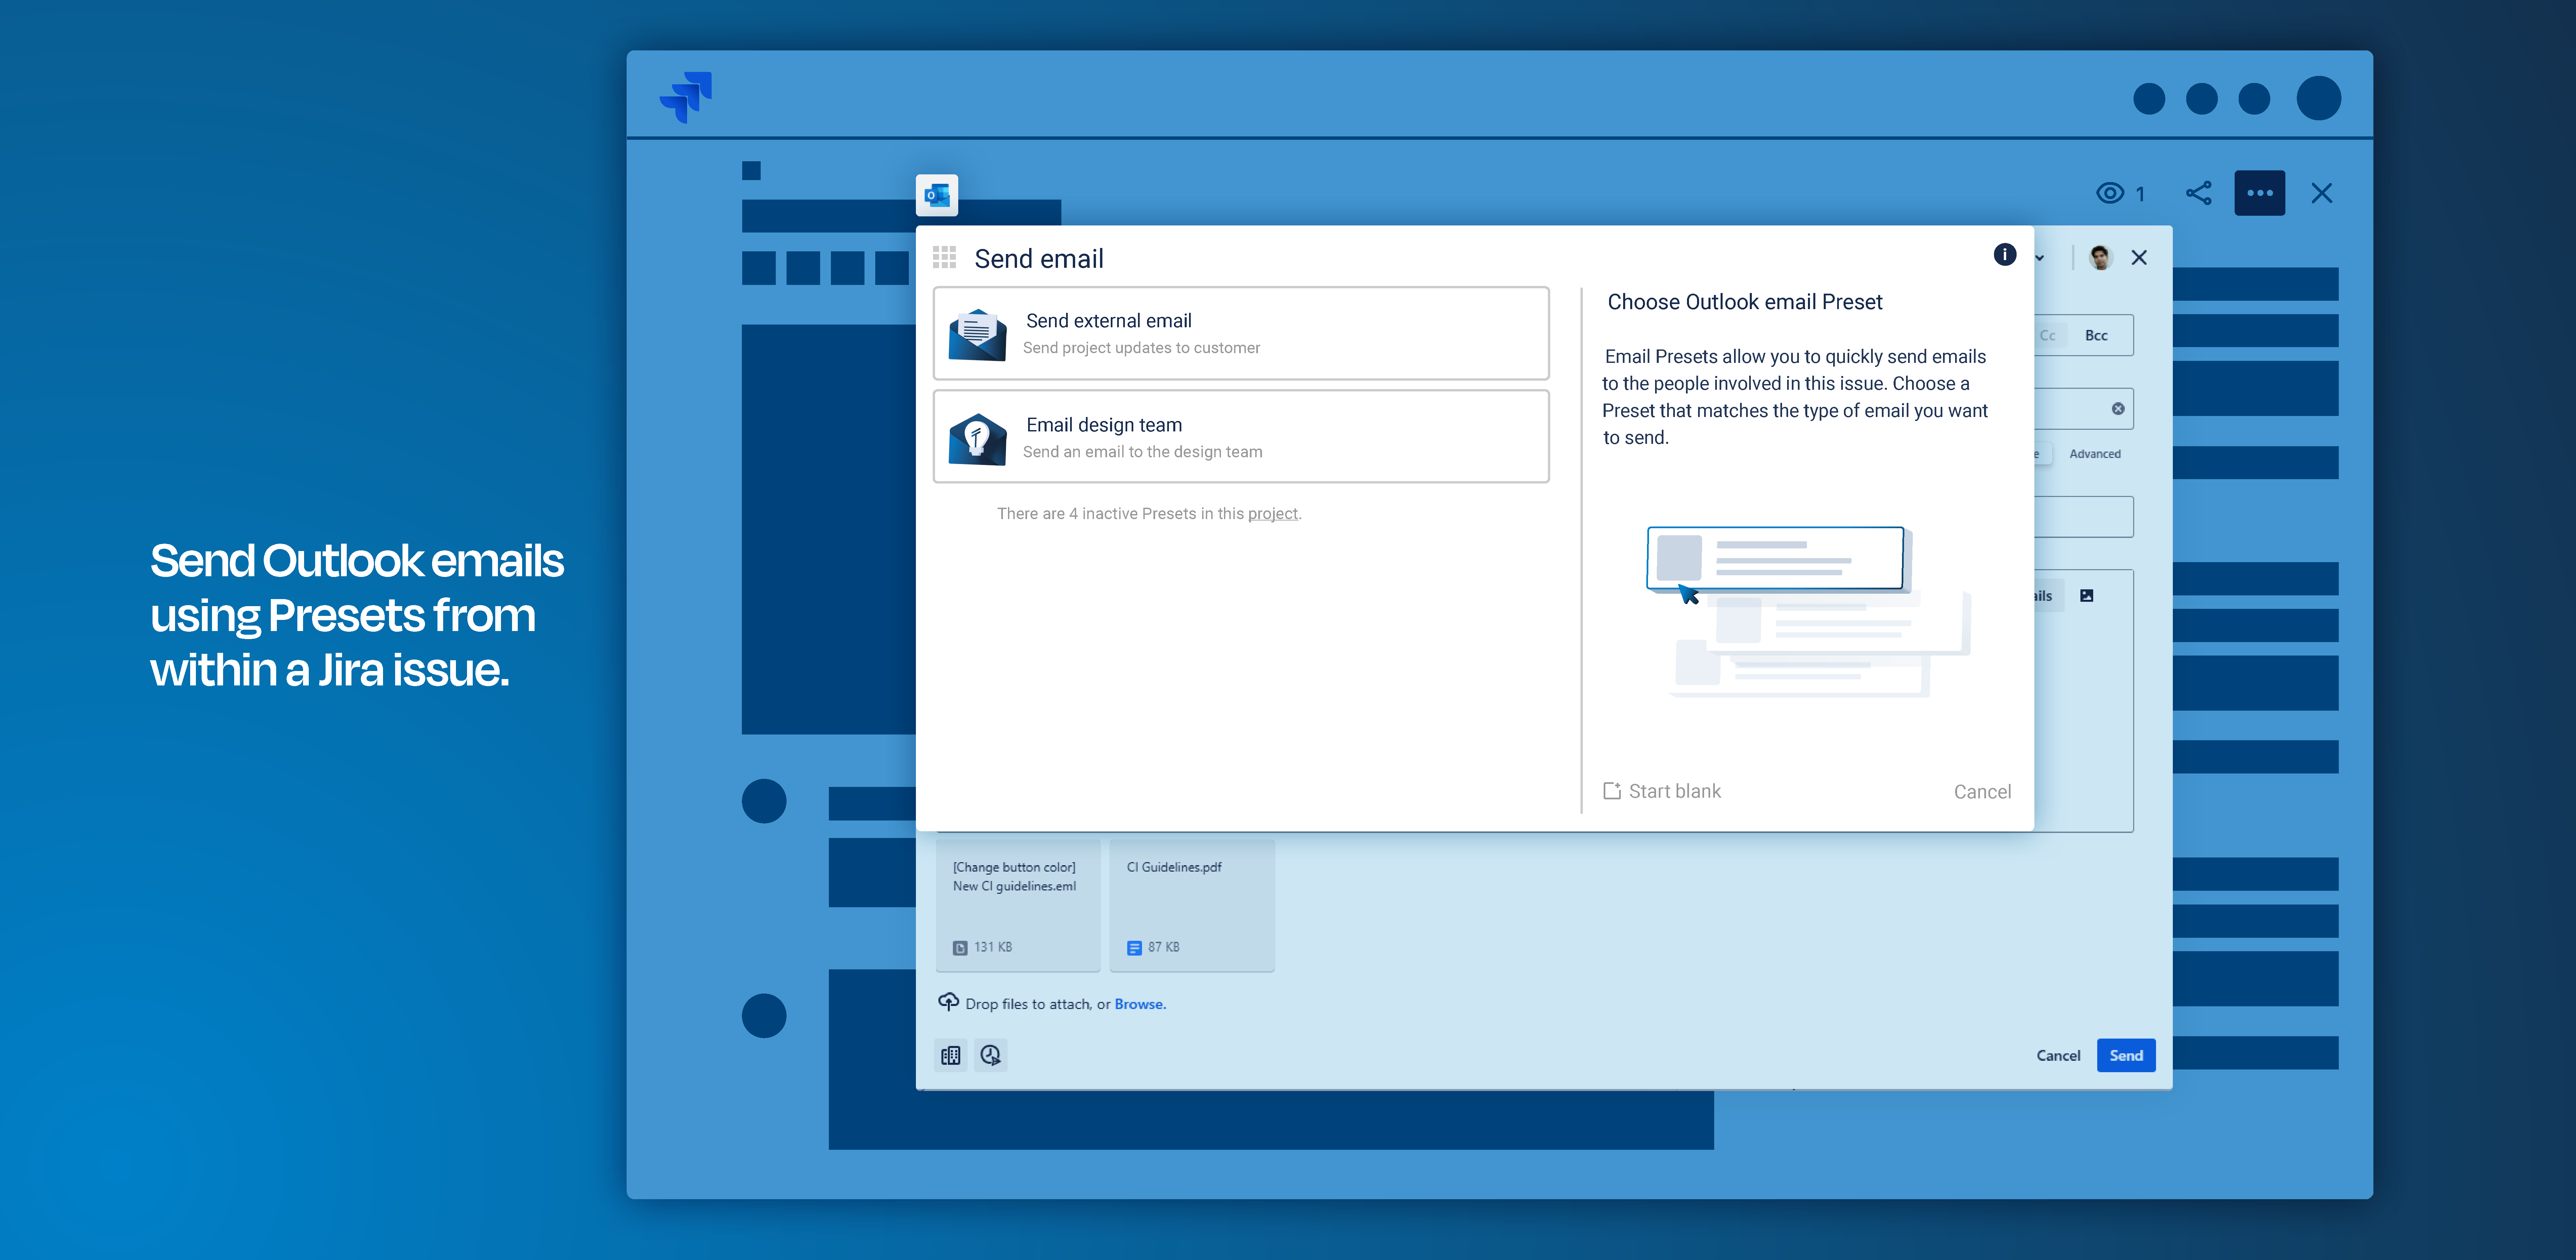
Jira administrators can configure ready-to-use email conversations for users via our Presets for Emails.
By selecting the most suitable Preset, the user is provided with pre-filled message text, designated participants, content-sharing options, and integrated automations (including Jira comments). However, some of these settings, can be adjusted by the user (e.g. content of the message via “Templates”).
This approach streamlines communication by eliminating the need for the user to create an email conversation framework from the beginning.
Initiate an email conversation
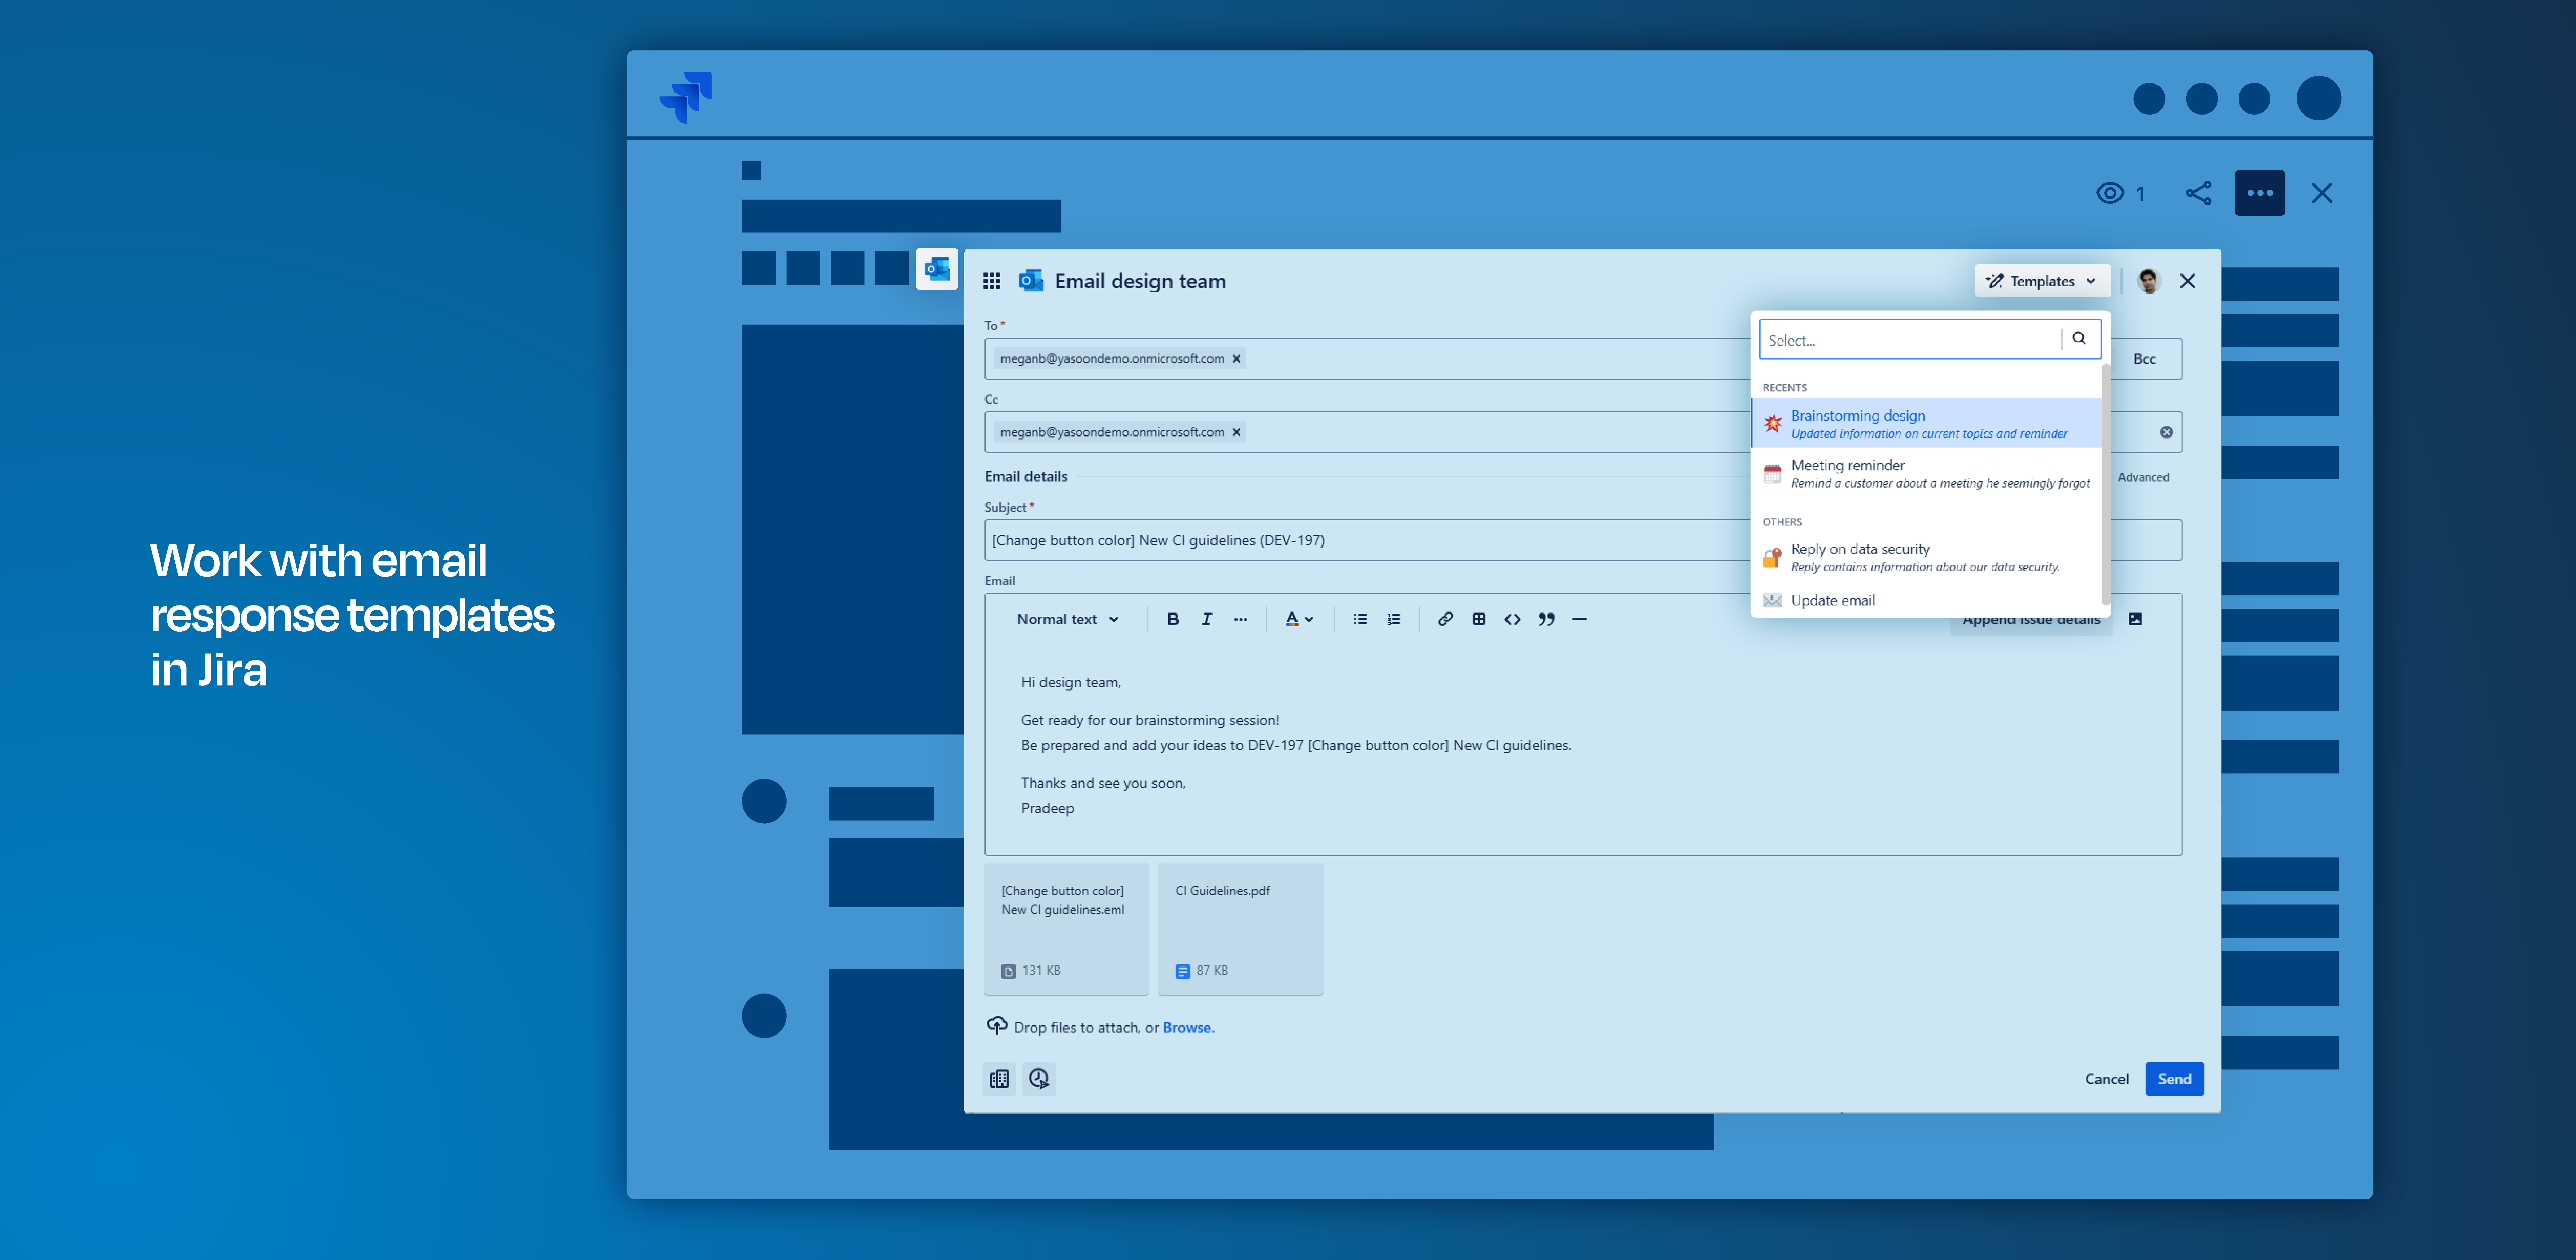
Email Presets come with pre-configured content.
However, messages can be edited directly within the description field, or replaced with an alternative template from the options available (see drop down in screenshot below).
Sharing options for emails
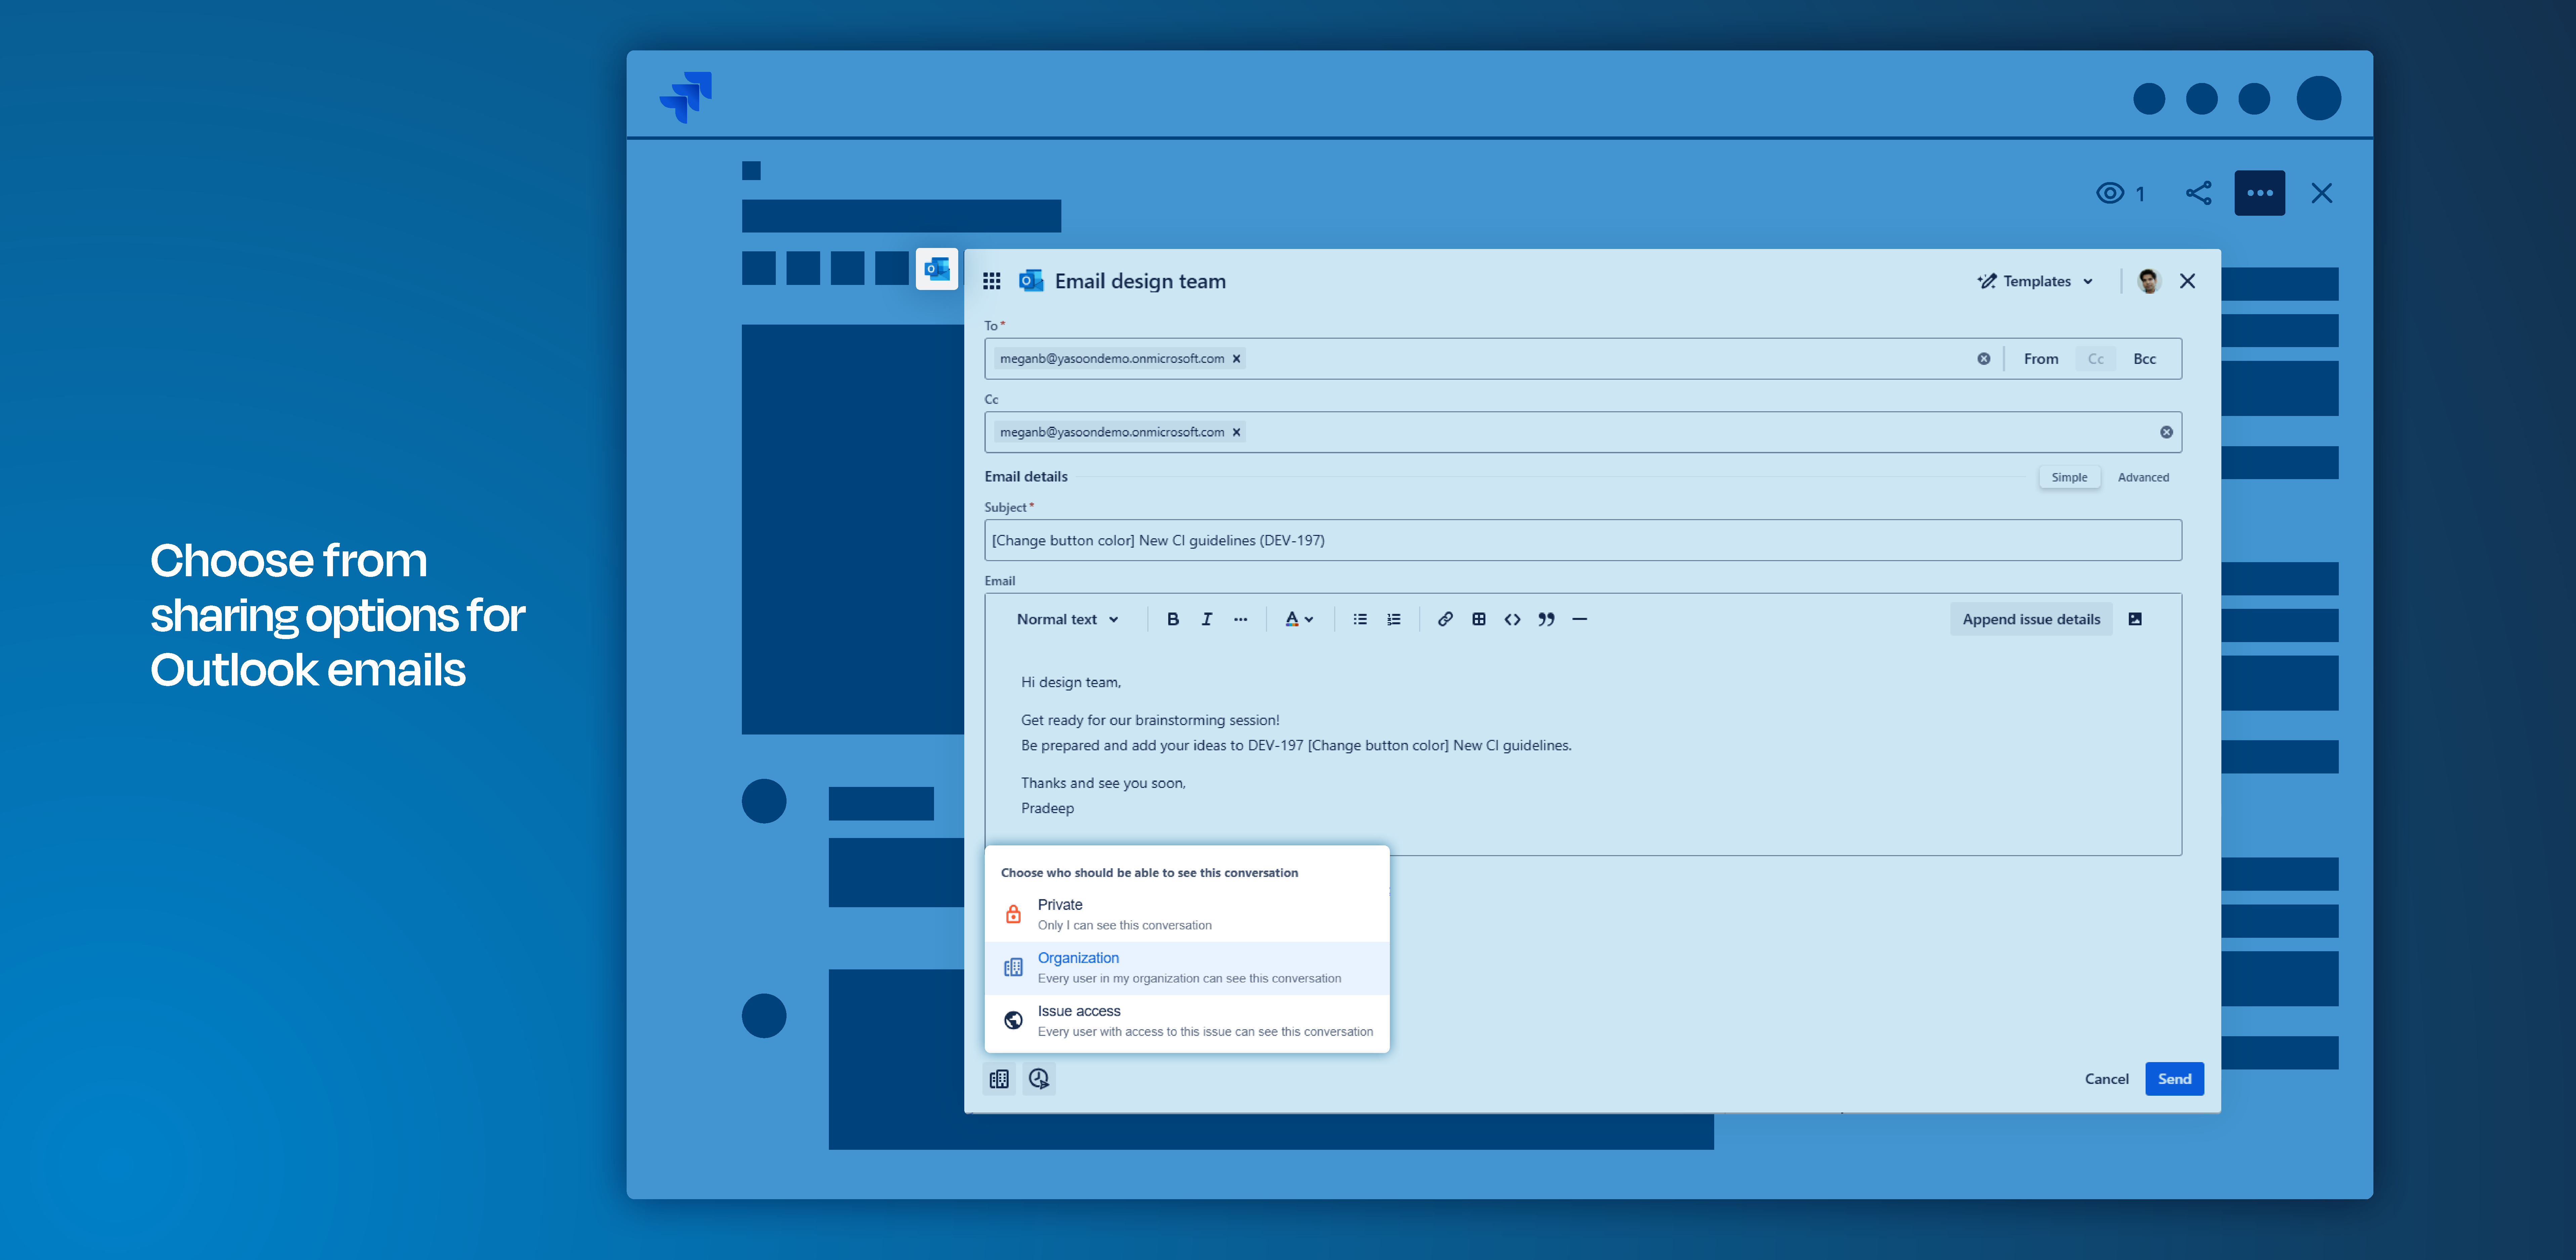
When setting up an email, you can customize the sharing settings to control who can access the email conversation within the ticket. Especially when the message contains sensitive information, this feature comes in handy.
🔐 Private: This respects all Email default permissions, e.g. only users being part of the email conversation can access chat contents.
🏢 Organization: This gives read-only access to all users in the organization that have access to this issue, and are logged in with their MS 365 account. currently reworked
🗣 Issue access: This gives read-only access to all Jira users that have access to this issue. In addition, if a user wants to participate in the conversation, they need to log in with their MS 365 account to reply to an email.
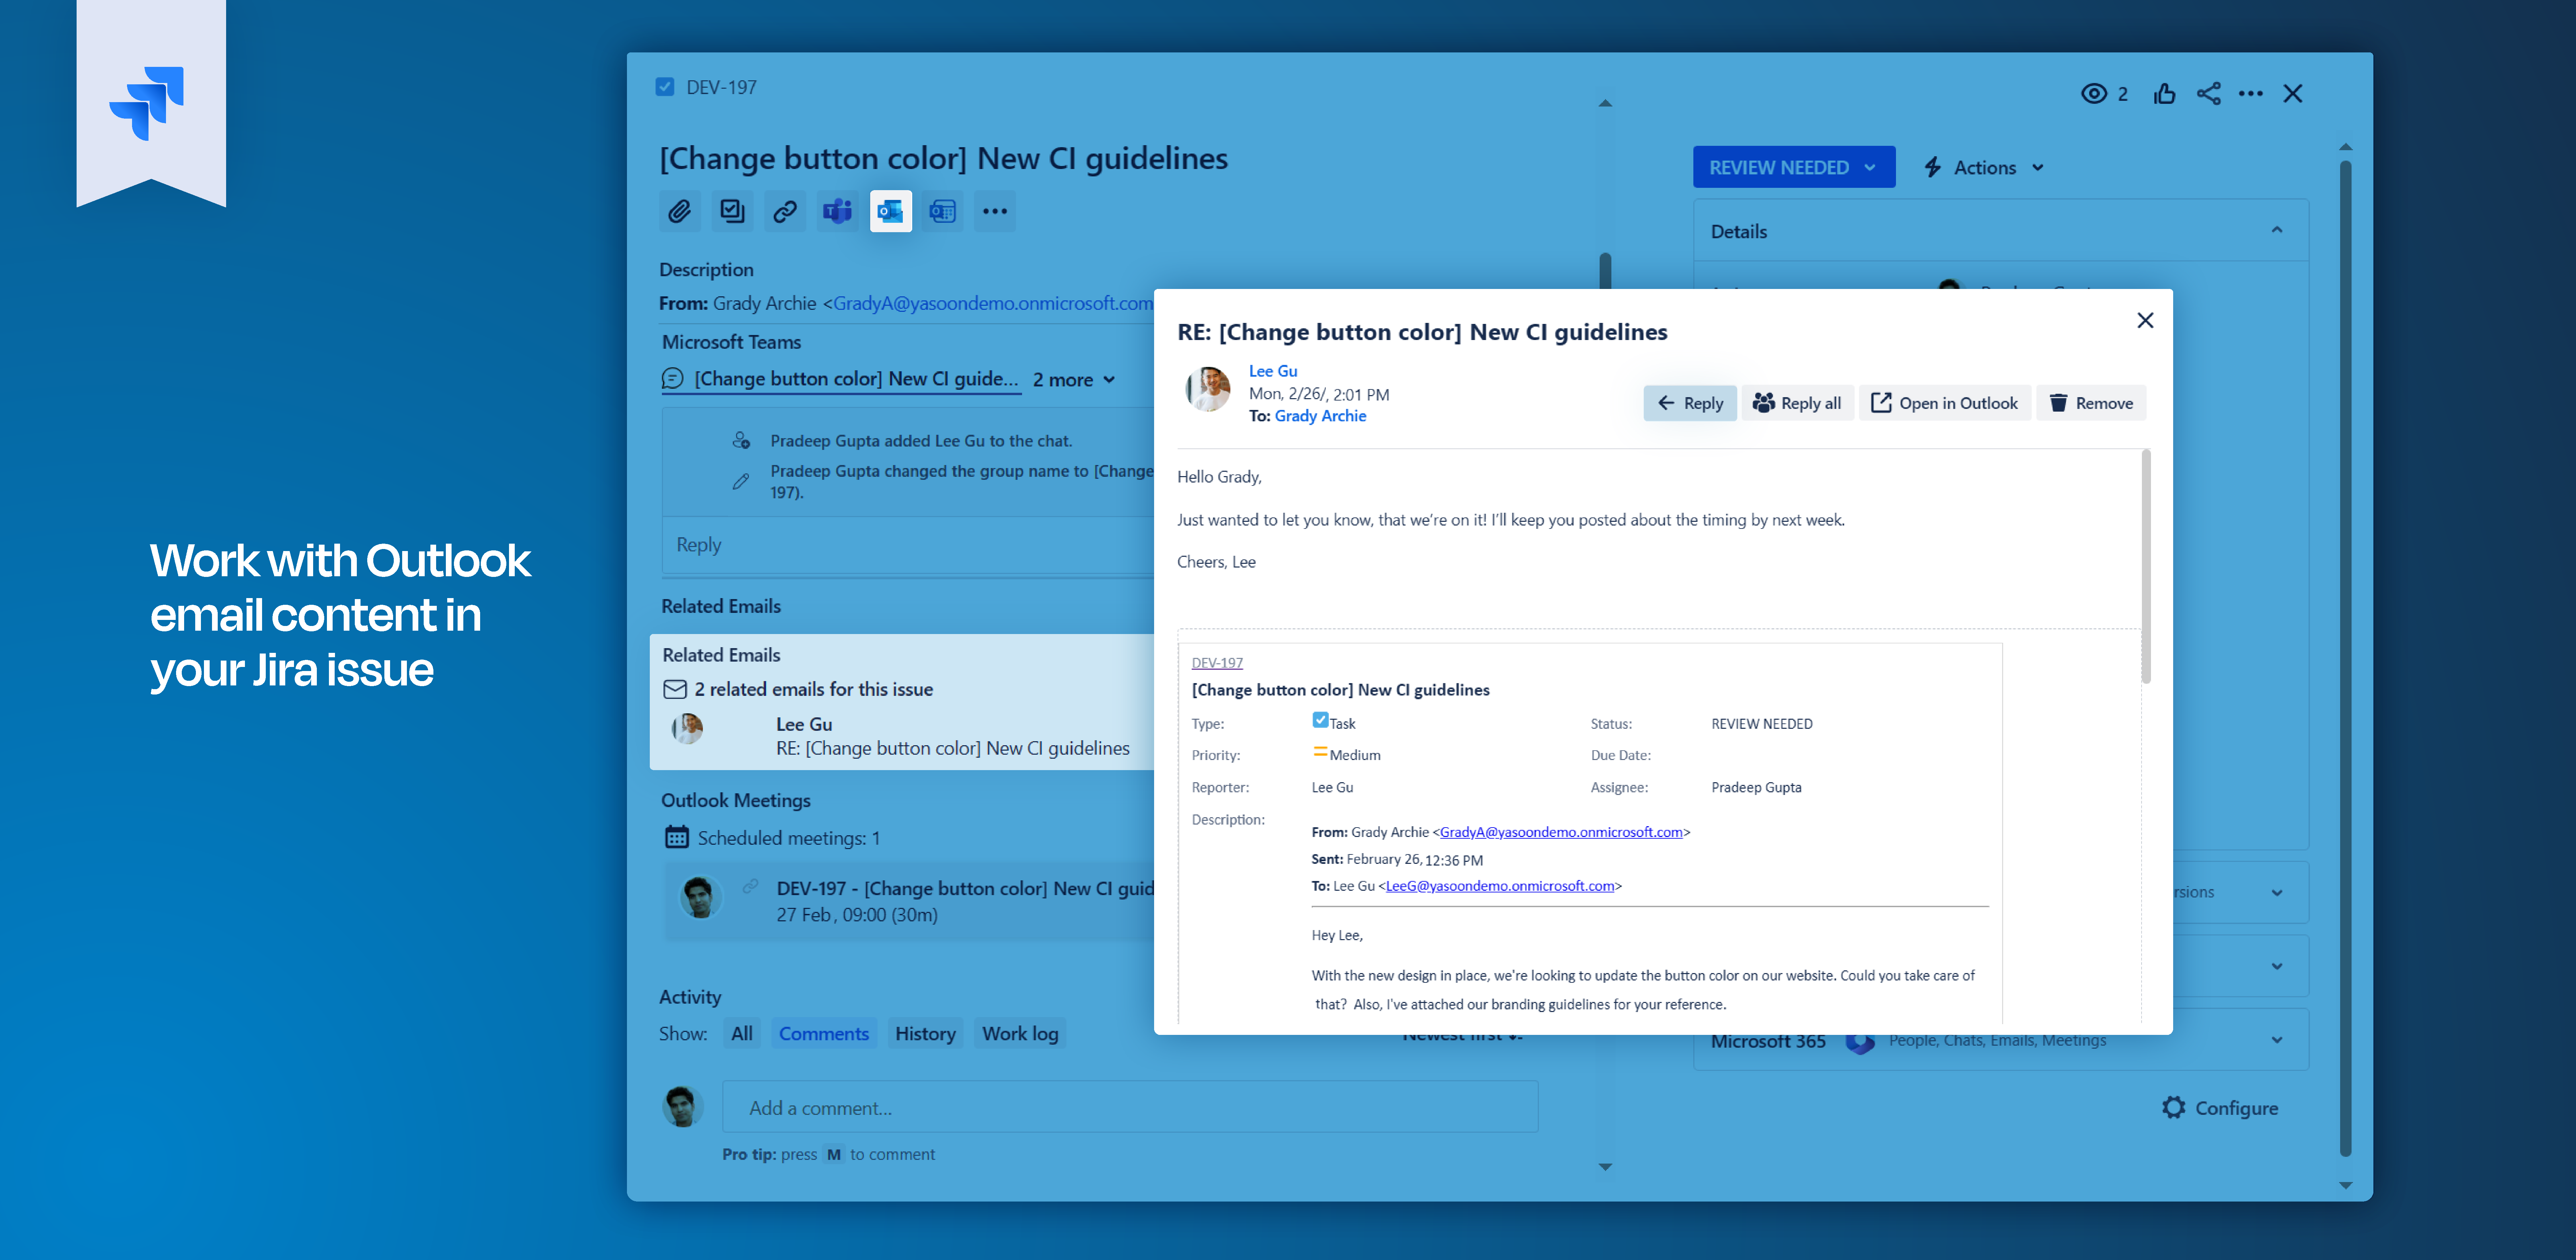
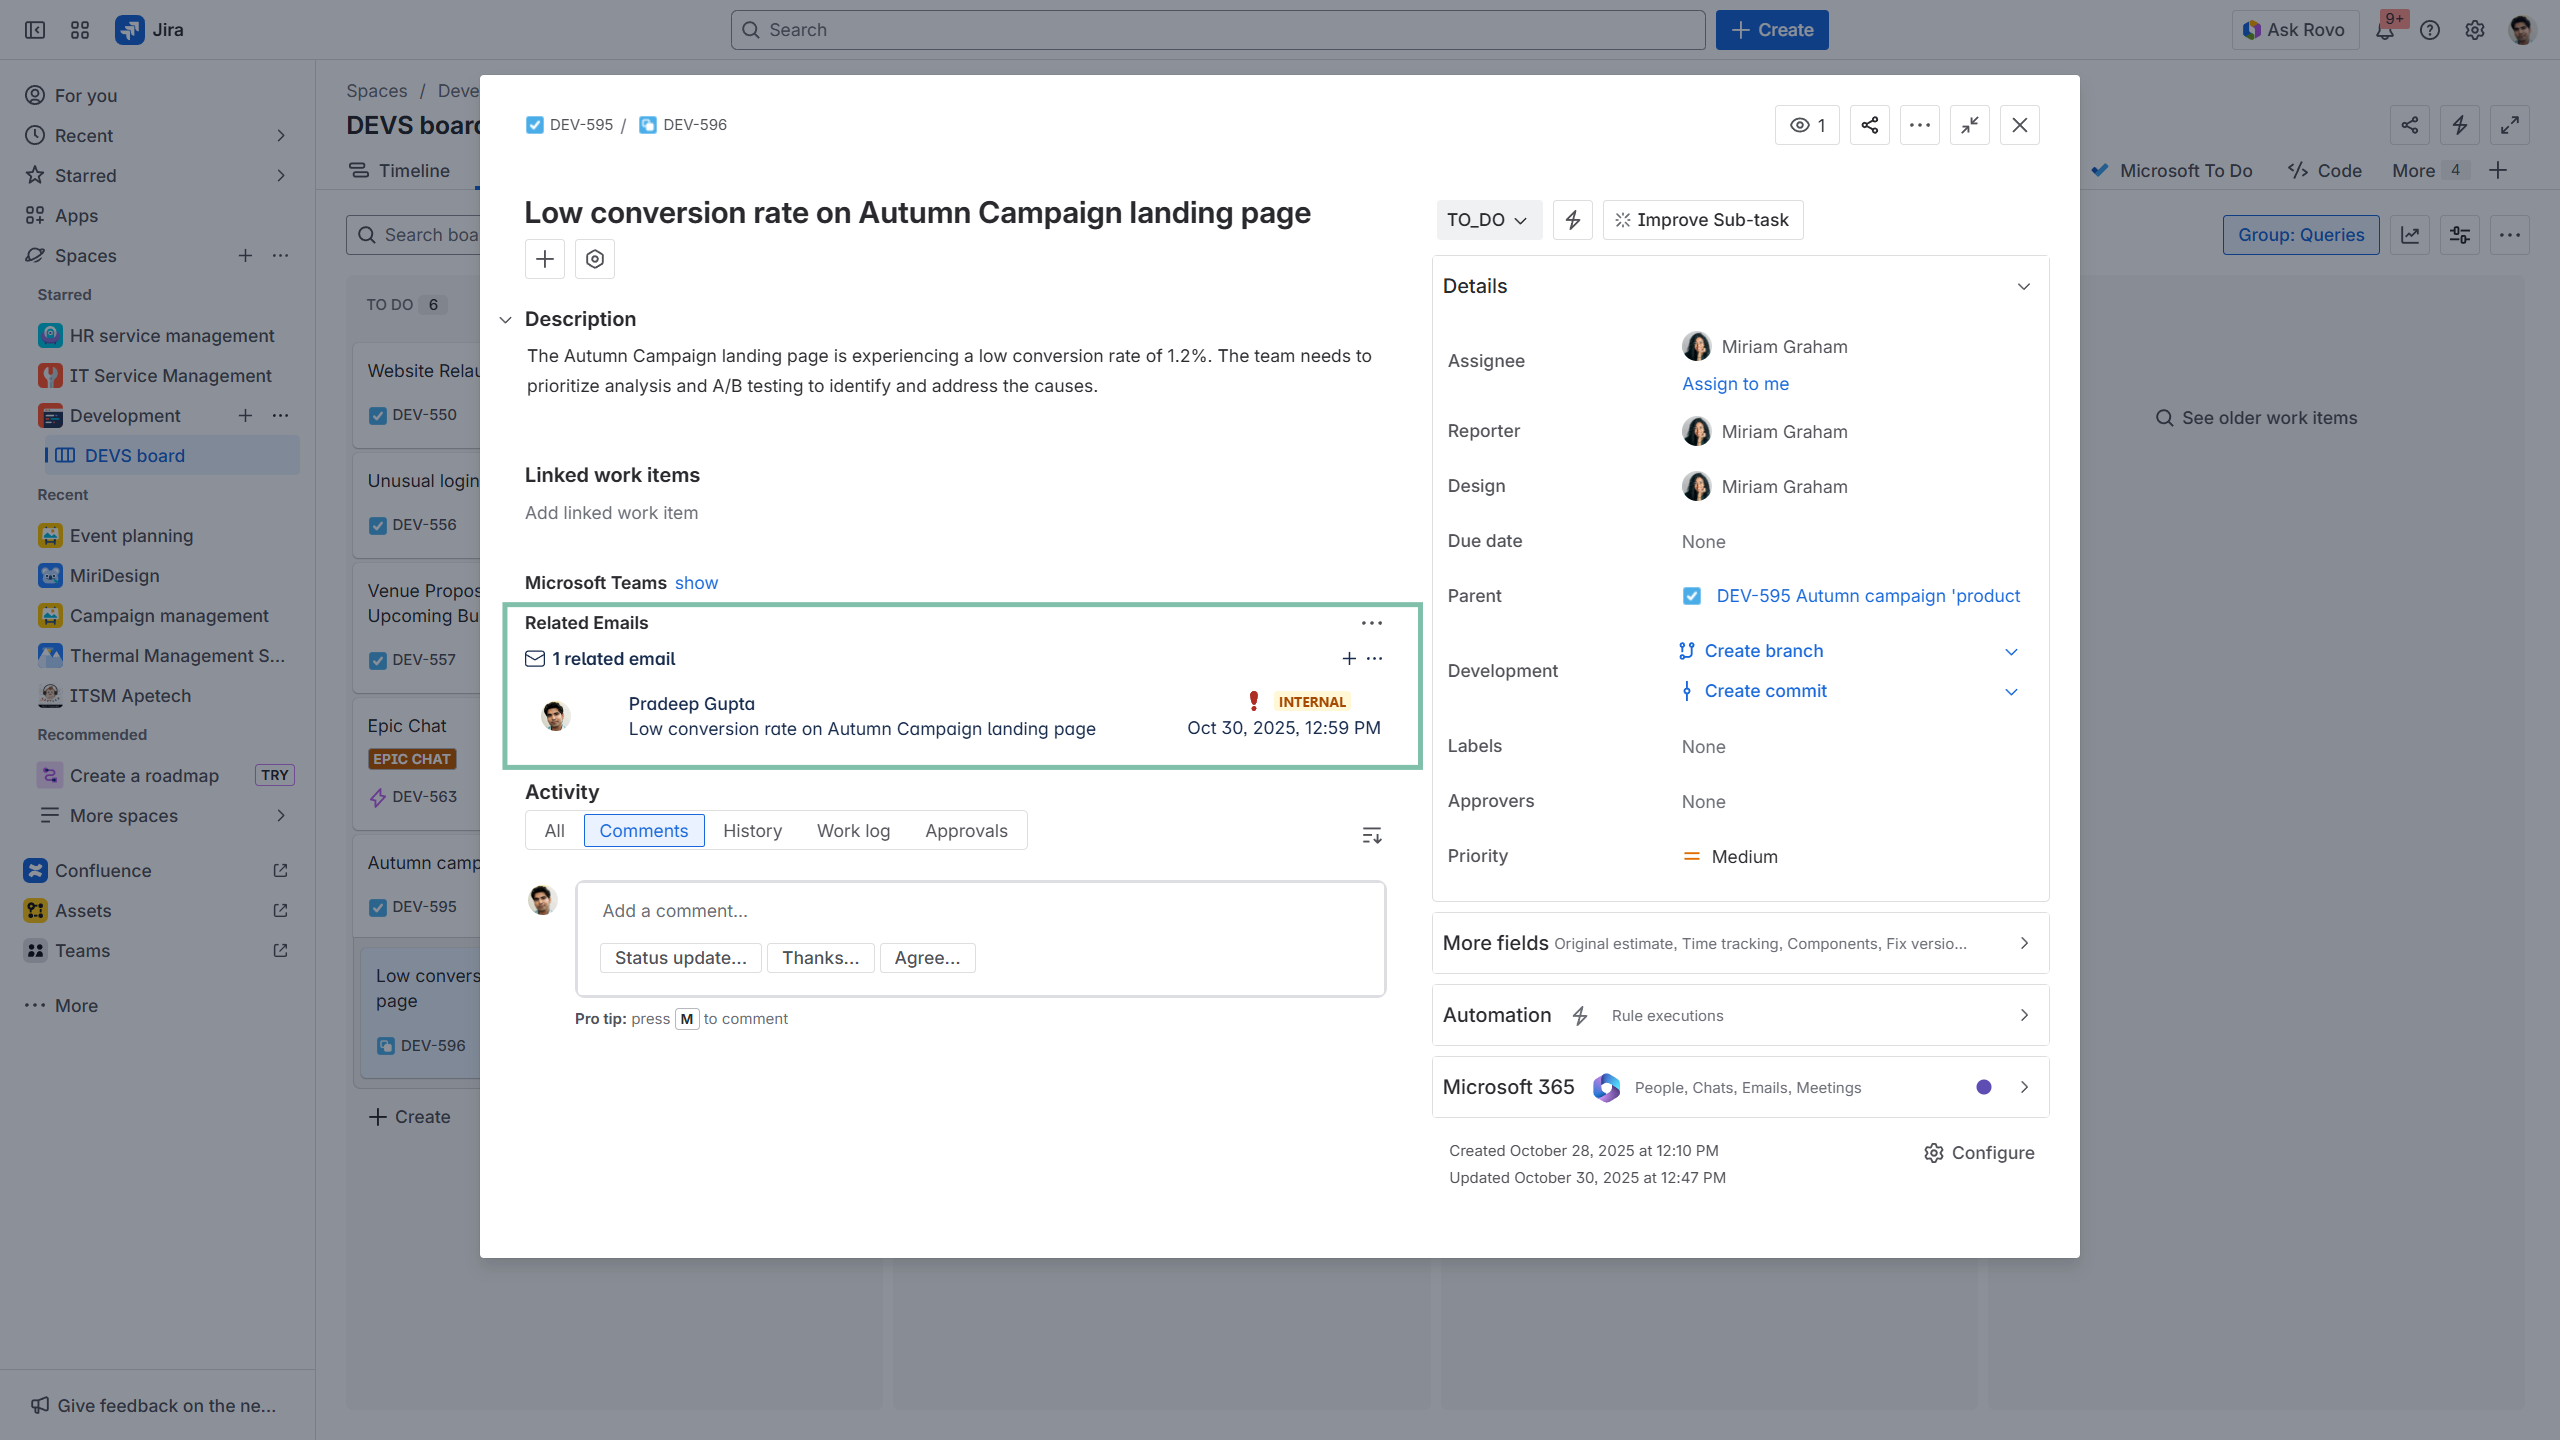
Access information centrally
Our email integration centralizes all email conversations directly within Jira issues, providing easy access to the complete communication history. This allows you to seamlessly switch between emails and reply directly to ongoing conversations.
When composing a new email, you can append issue details to include the necessary information for the recipient.
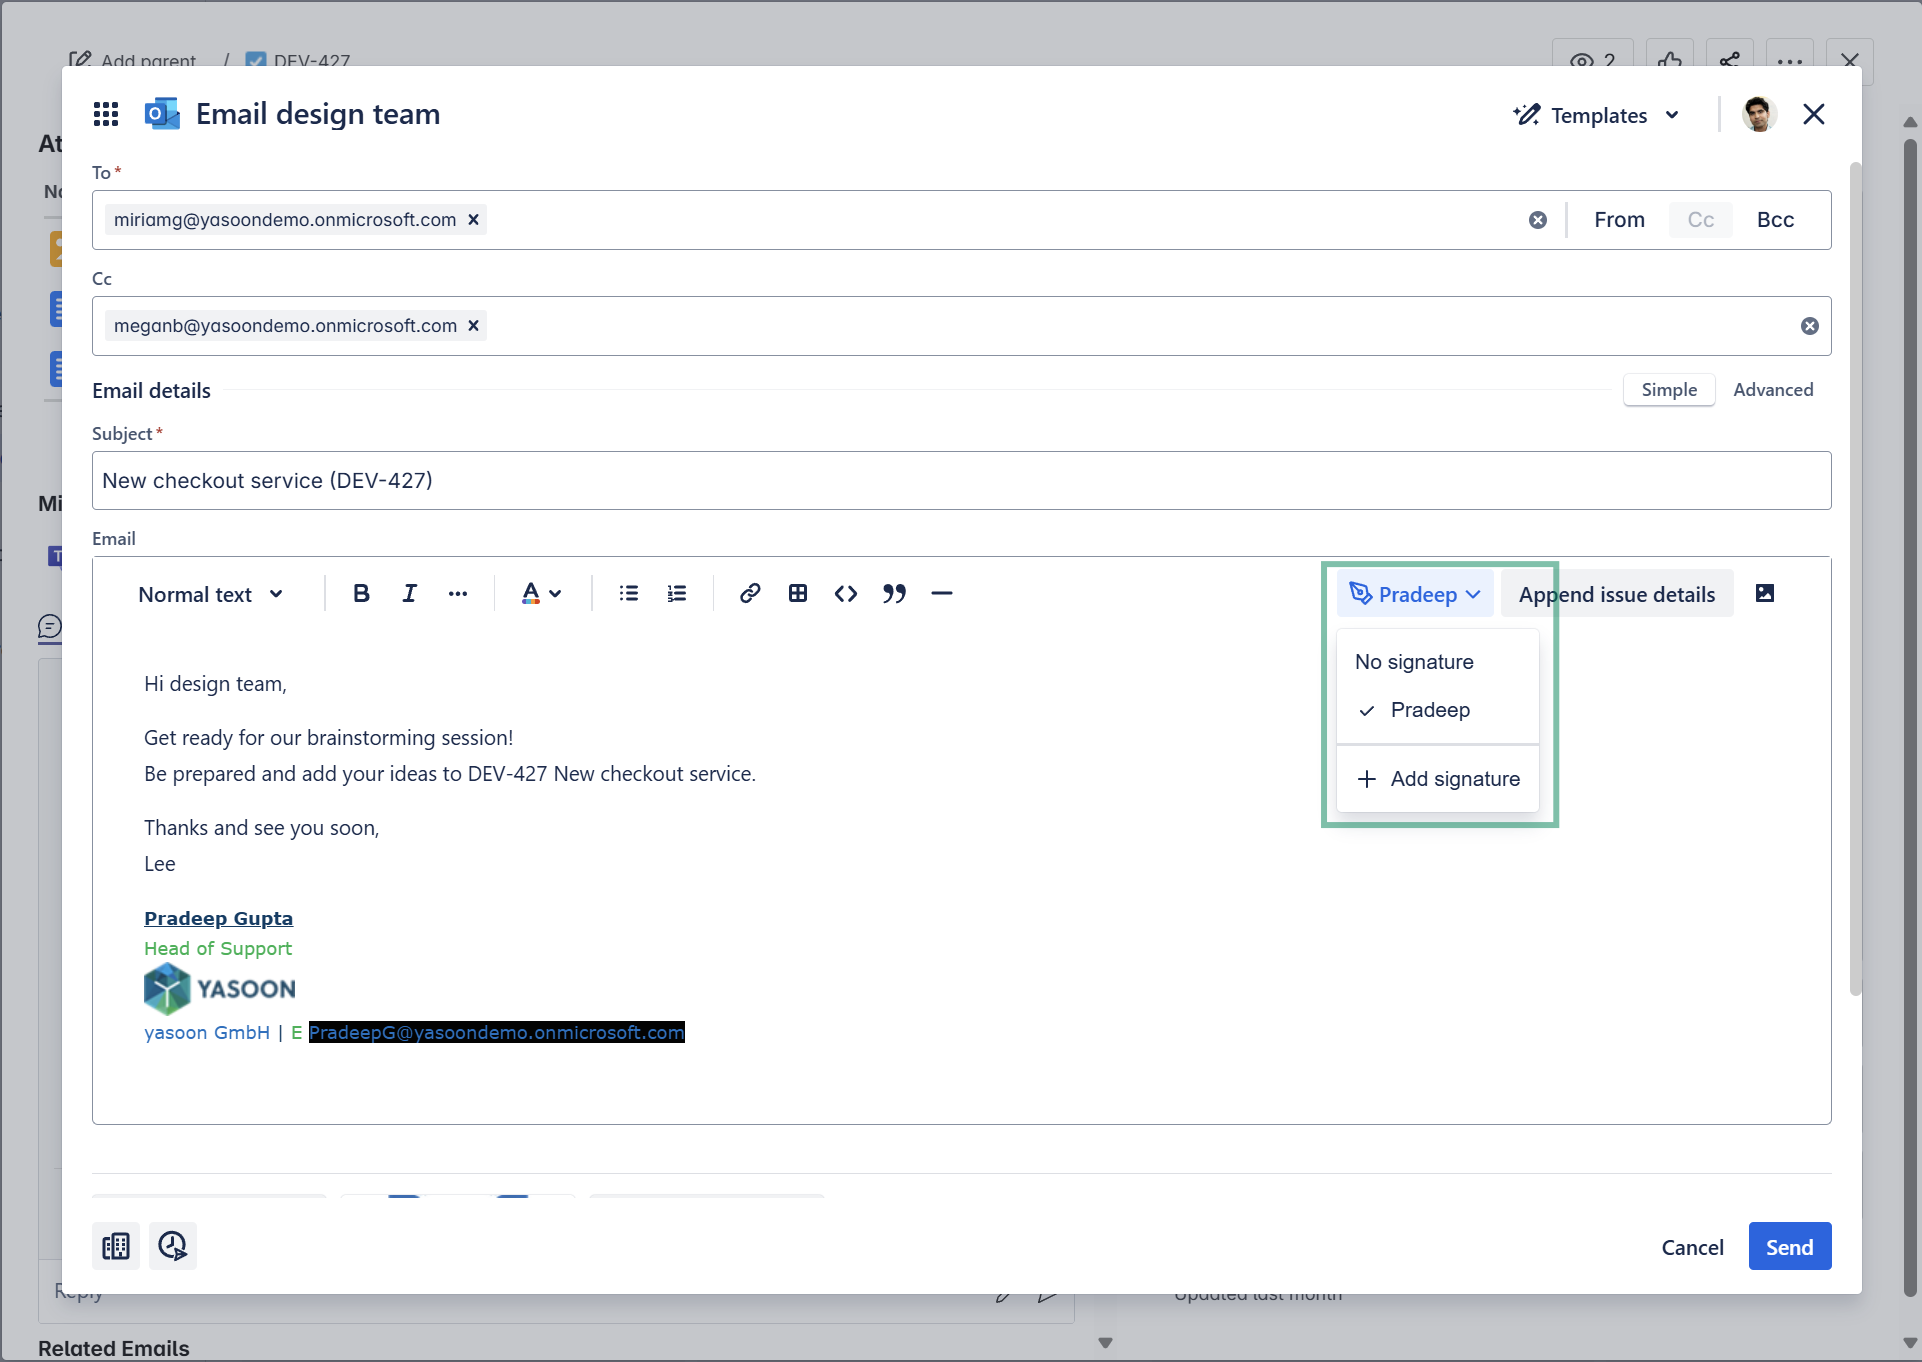
Use your email signatures
When composing a new email (or replying to an existing one), you can choose among signatures. Use your own, add a new one or rather send the email with no signature.
When adding a new signature, you’ll be brought to the project settings for configuration. Learn how to set-up an email signature.
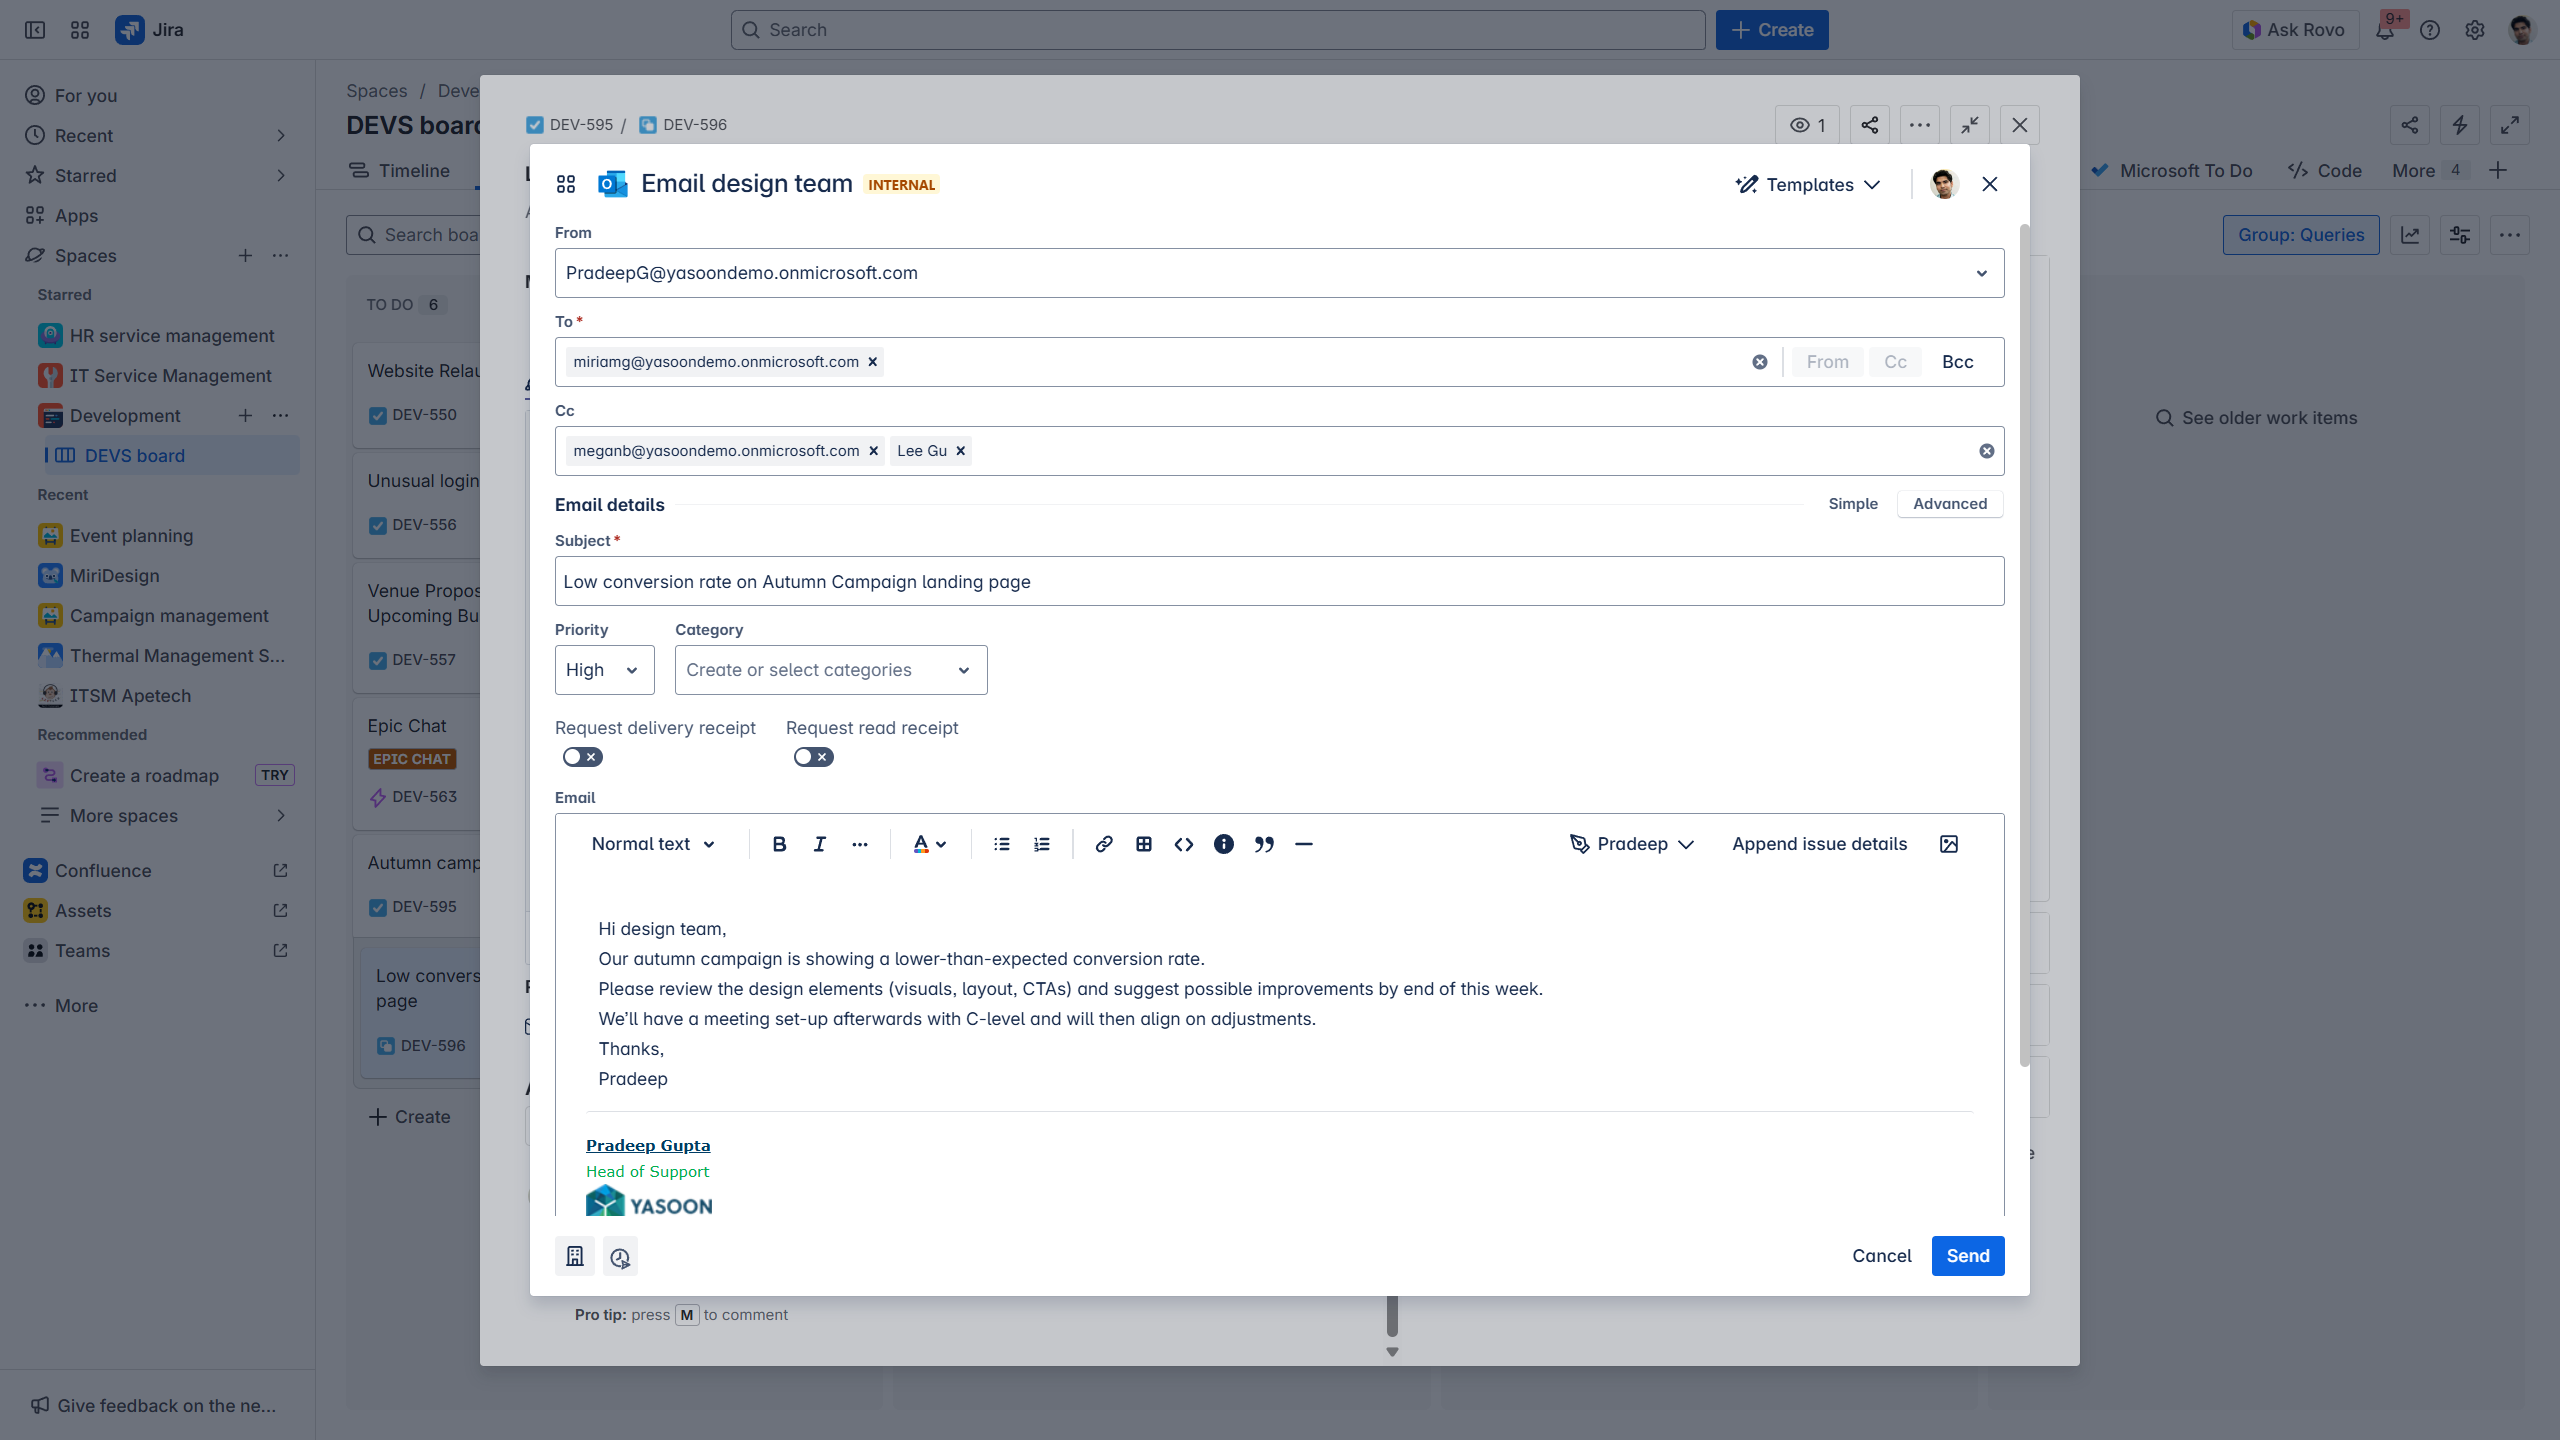
Send emails with high/low priority
When sending new emails or replying to existing ones from a work item, you can set high or low priority. The related label appears next to the email immediately after sending the message.
-
High priority: exclamation mark
-
Low priority: arrow showing down
Feature configuration
We provide primary configuration options at the admin level (refer to: admin configuration) and additional smaller configurations tailored for individual users (refer to: user configuration).
Thanks to Presets for Emails, it is beneficial for the admin to preconfigure Email Presets when working in Jira. This approach allows team members to easily select the most appropriate Preset for their specific use case.
User configuration
When working in Jira and using our Email integration, the user can execute a few actions via the email panel in Jira. Learn more about configuration options below.
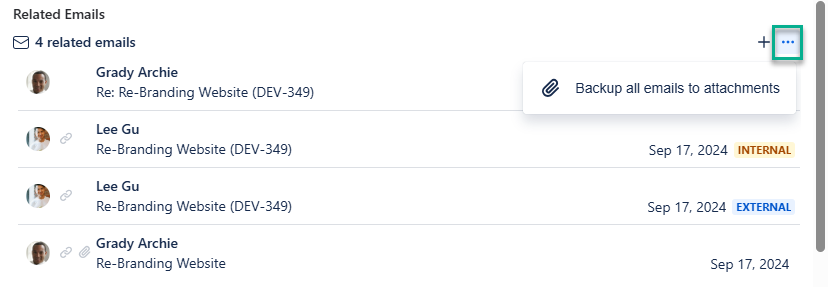
Backup emails
Emails can be backed up as PDF attachments to the issue. Basically, every user can backup emails. However, only those emails being visible to the user can also be backed up.
Emails marked as "private" by a sender are inaccessible and therefore cannot be backed up by that specific user. However, if the recipient opens the email, they can then access and back it up in Jira.
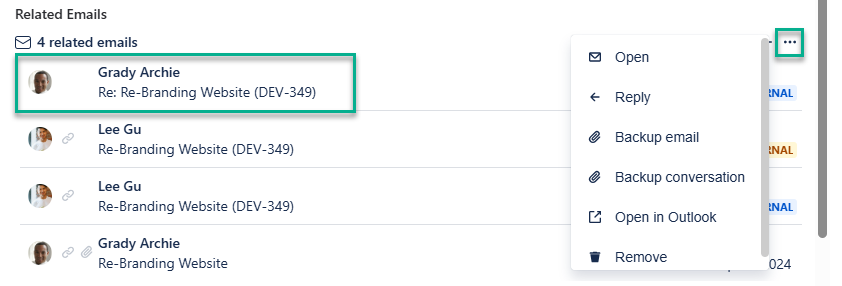
Additional options
Selecting an email provides the user with several additional actions. Choose between replying from Jira, backing up the email (or the entire conversation), or deleting the email if it's no longer needed.
Signatures in Jira
Because the Microsoft API lacks the necessary information, we can't directly retrieve your signature. Instead, please use this workaround.
To use your Outlook signature when sending emails from Jira, simply use our built-in feature. Check out our short demo video on how-to set-up a signature for your emails in Jira.
Admin configuration
Main configurations are done via our Presets for Emails 🚀
Email Presets include the following configuration options:
-
Mail subject and body
-
Sender and recipients (JSM projects: add “issue participants”)
-
Email access (sharing options from within Jira)
-
Receipts (delivery and read receipt)
-
-
e.g. email sent >> add as “issue participant”: You can choose whether you would like to add the recipients of an email (to, cc) as request participants for existing users or create new customer users, if necessary.
-
Requirements & information
📧 Working with Outlook emails in Jira does not need specific requirements to be met.
The Jira administrator must enable the email feature within the global settings. Once this feature is activated, users will have the capability to manage (their) Outlook emails directly within their Jira issues, allowing them to compose new emails and respond to existing ones.
☑️ Using Jira features in Outlook requires the installation of our Outlook add-in (free)
Additionally, to also use Jira features in Outlook (e.g. to create new issues based on emails), the installation of our Outlook add-in (free) is required. The Jira admin checks on the prerequisites while the Microsoft admin installs and deploys the add-in for the team.
📝 Check on initial admin configurations
After activating the email feature, please take a moment to check out the initial admin configurations. Follow links to learn more on:
Please note: Sharing and accessing email content in Jira is not available for Outlook exchange on-premise hostings. However, in these environments you can still use our Outlook add-in to use the Outlook features.
Useful links
-
Further information as well as the technical reference on shared office items can be found here: https://support.yasoon.com/M365FJ/sharing-access-to-microsoft-365-items
-
Detailed explanation of the sharing options from Outlook can be found here under “Feature at a glance”: https://support.yasoon.com/M365FJ/create-new-jira-issues-in-outlook#CreatenewJiraissuesinOutlook-Featureataglance
-
Want to use Jira features in your Outlook inbox to e.g. create new issues based on email content? Find out more here: https://support.yasoon.com/M365FJ/features-in-outlook