We’re adopting the new Atlassian Design Guidelines. This helps users which are new to Jira to feel right at home and fields can be filled out even more intuitively.
With our email integration, you can create or update issues directly from your emails, including attachments and text formatting like lists, colors, and tables. The interface is similar to Jira, allowing easy navigation. You can fill out necessary fields in Outlook, and your email content will be converted to Jira markup.

Click through demo
Feature at a glance
Emails frequently contain important or at least relevant information that is also pertinent to team members who are primarily working in Jira instead of Outlook. Effective information sharing is thus, essential for maintaining team productivity and efficiency.
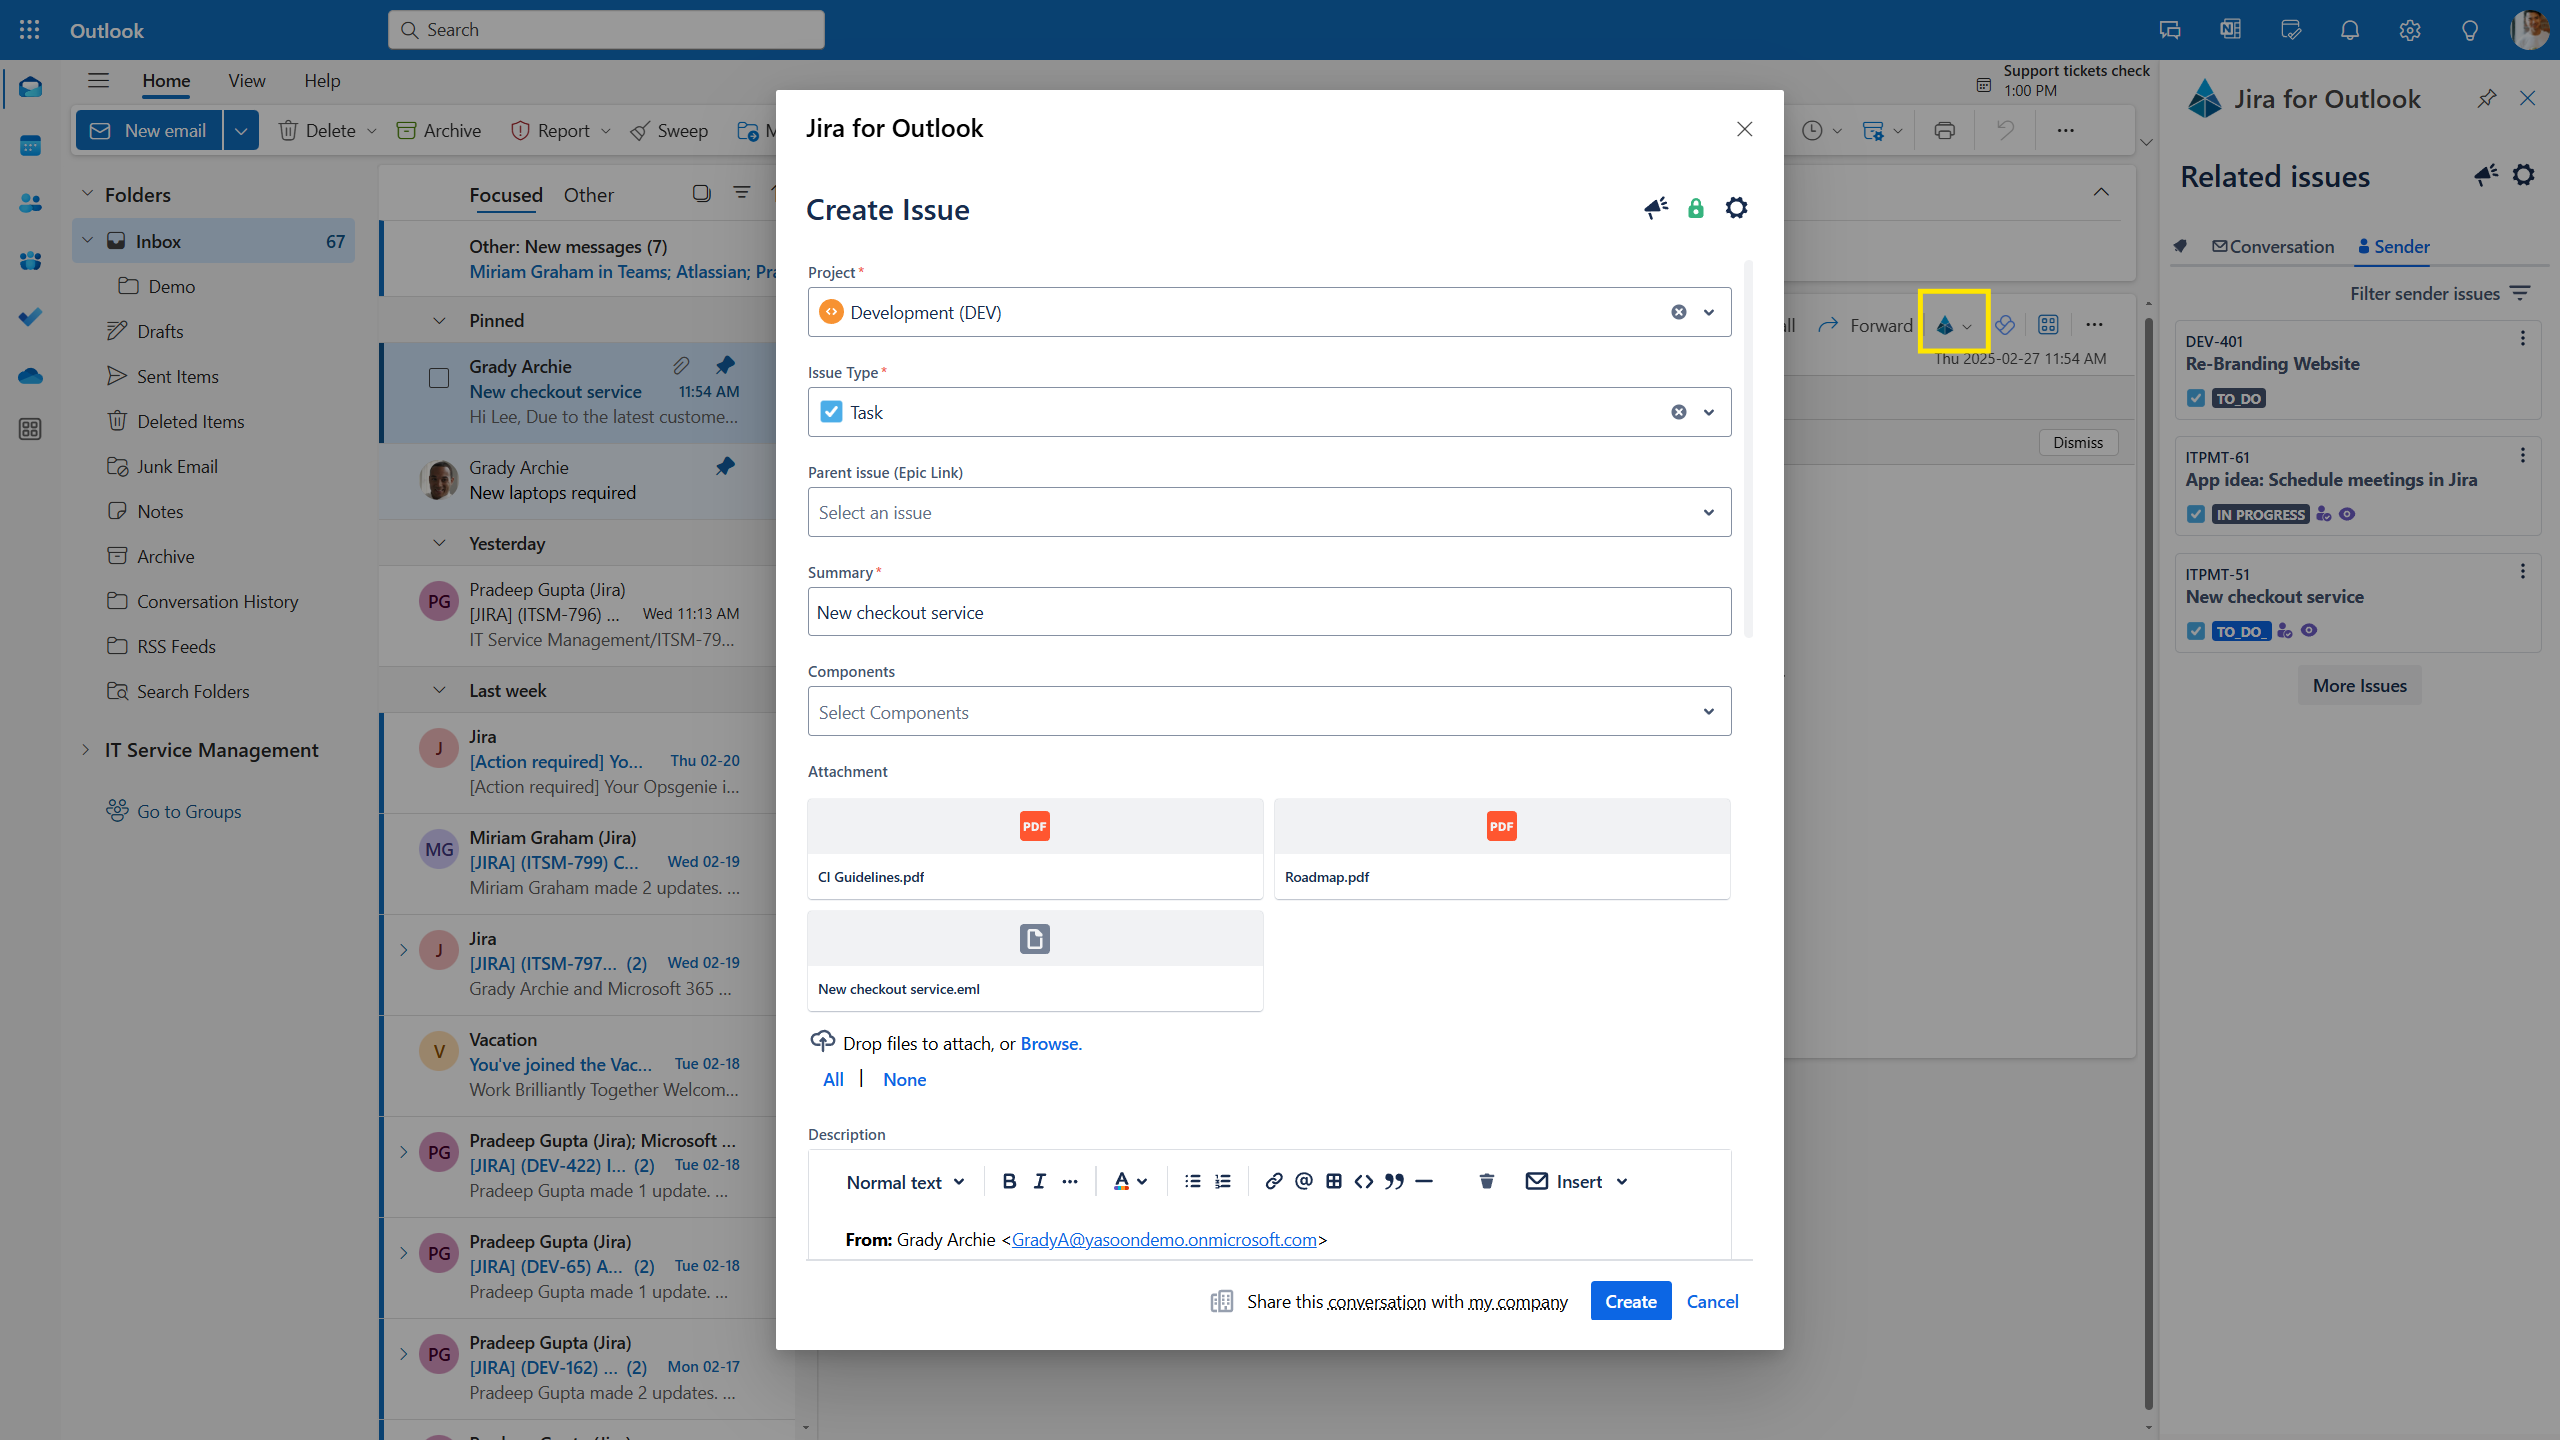
Create new issues based on emails incl. custom fields
With our Jira integration in Outlook, you can open the “new issue” dialogue via the icon at the top of your email to create an issue based on the email conversation.
Any custom fields defined in Jira are automatically taken over by the Outlook add-in. Some third-party apps (e.g., Tempo Timesheet or Jira Portfolio) are not supported: https://support.yasoon.com/M365FJ/email-supported-custom-fields
The dialogue/drop-down shows you all Jira projects you have access to. Based on the selected project type, the related issue types are provided in the drop-down.
If you select a sub-task issue type, the add-in opens a new field type issue. This will be the parent of your new sub task, allowing you to search for keys or descriptions filtered by the selected project.
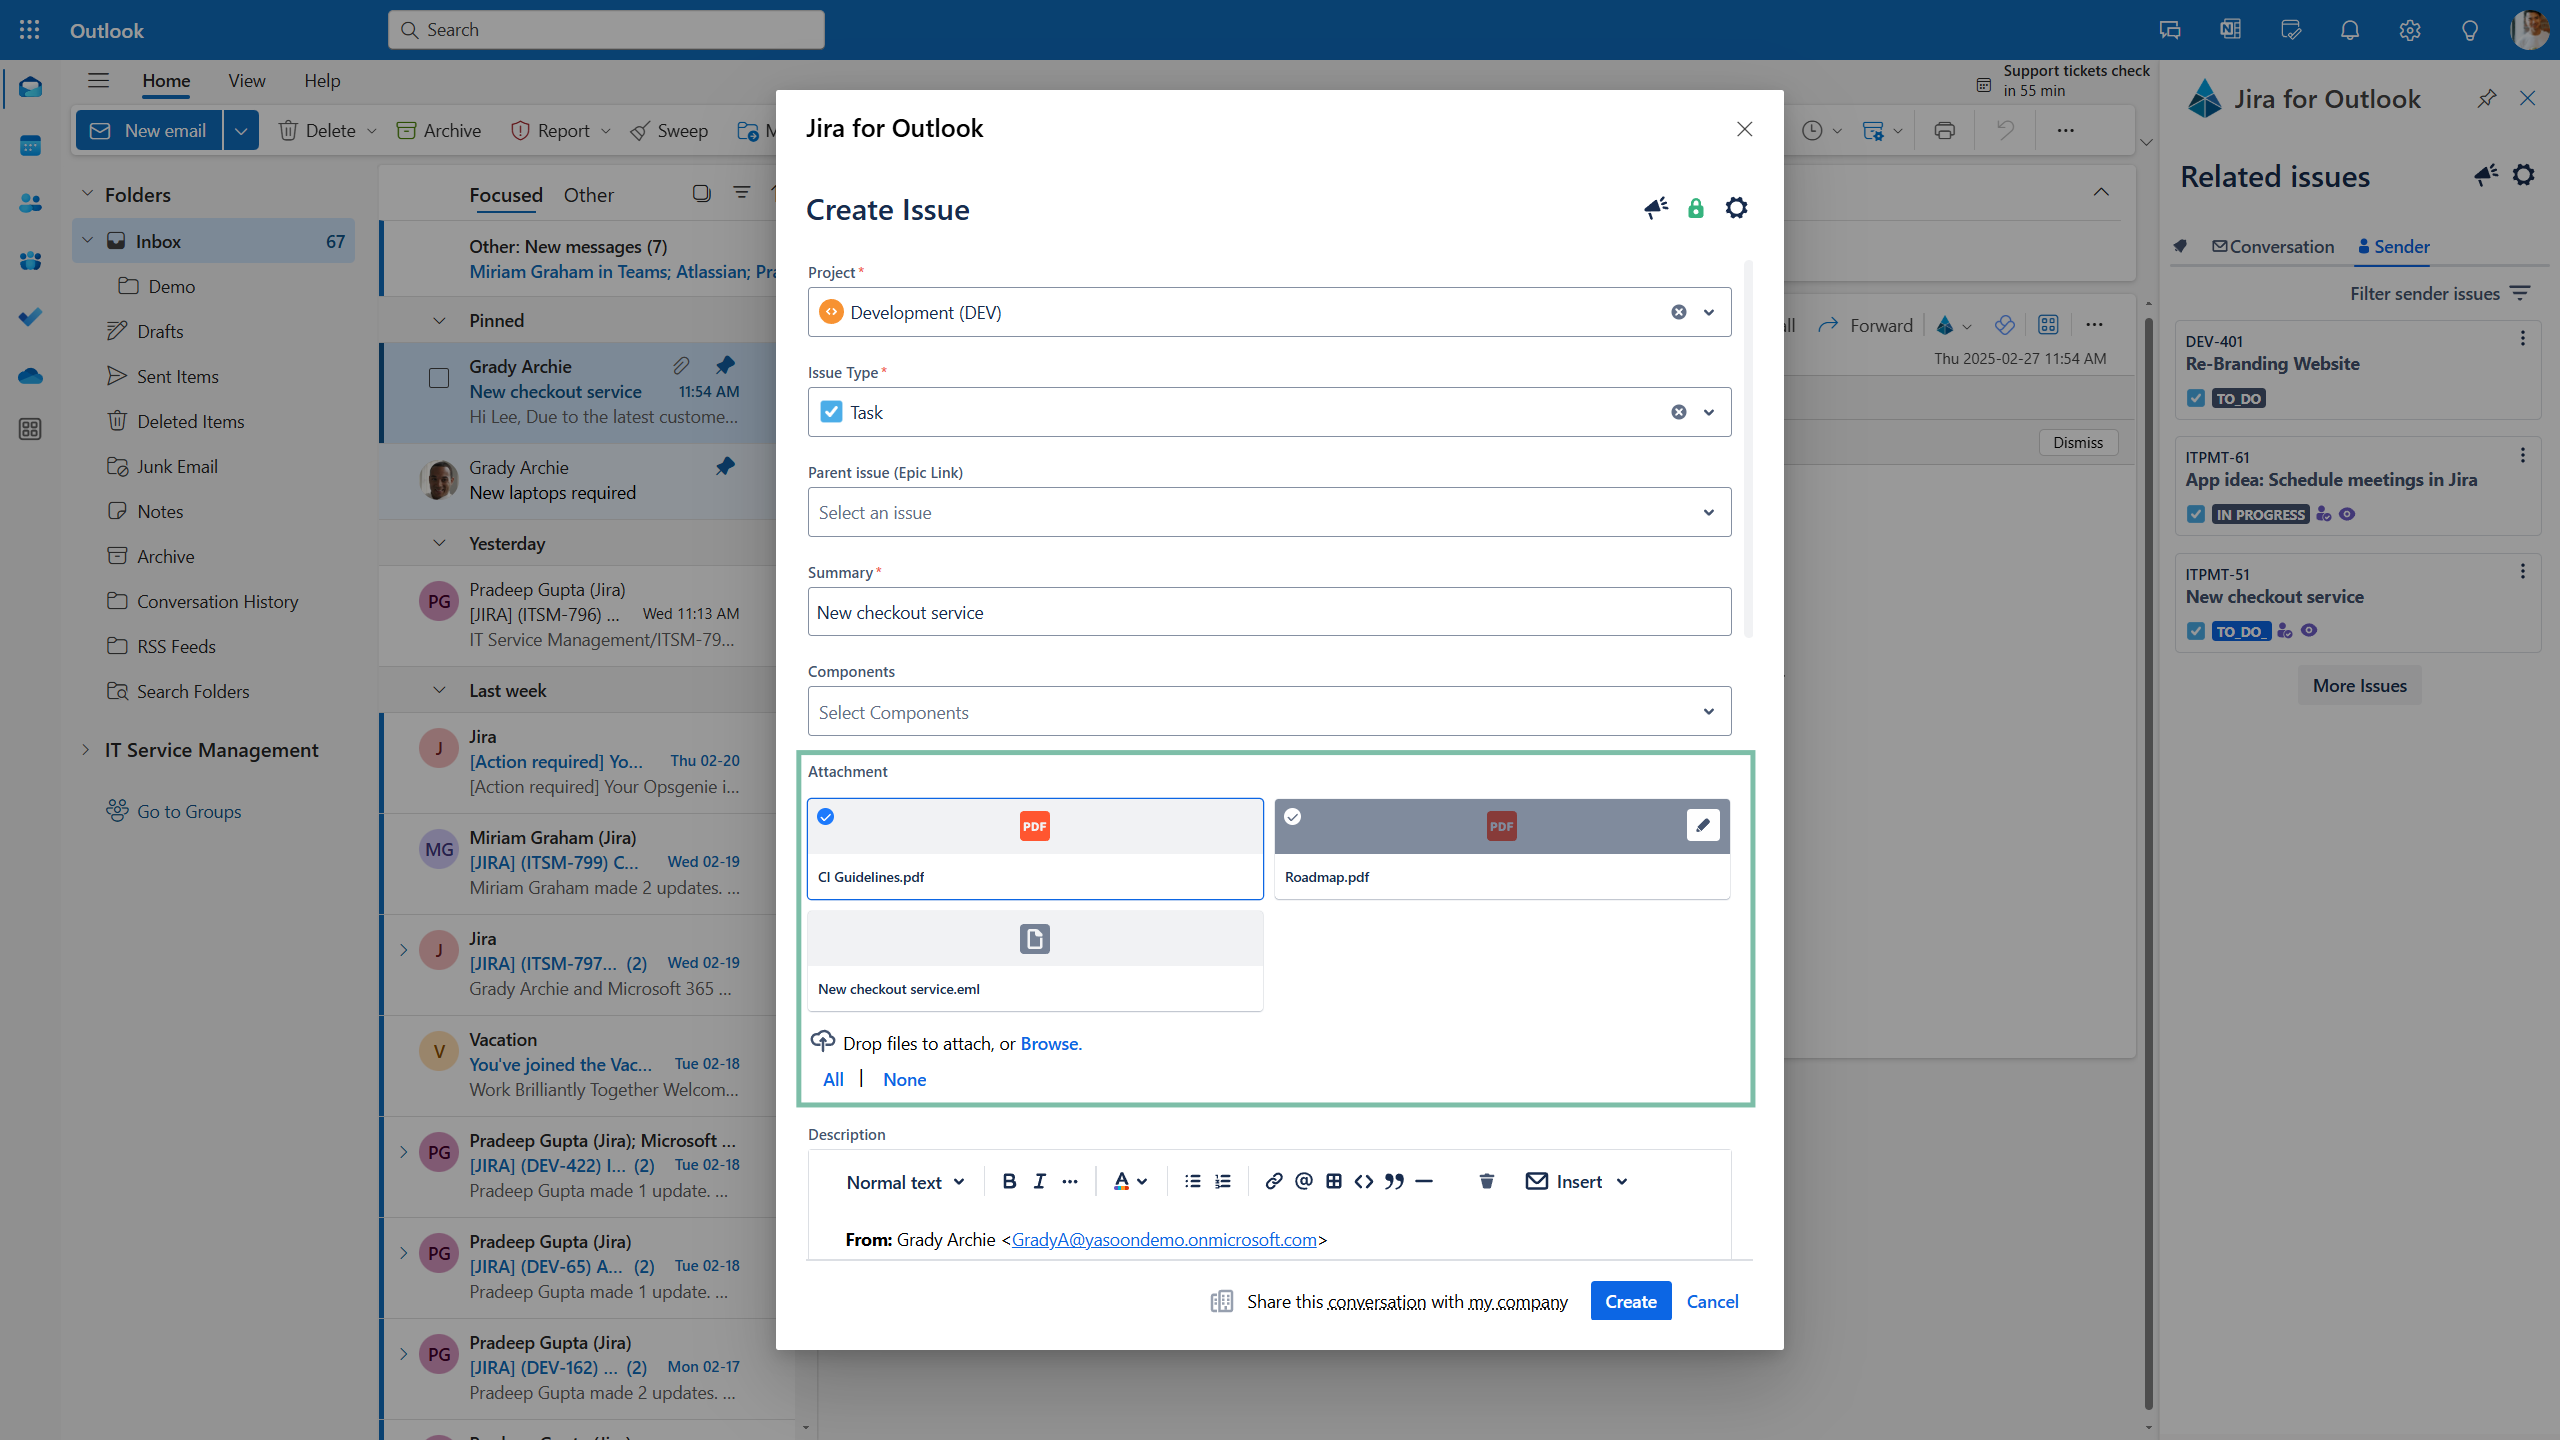
Work with attachments
Outlook Email for Jira supports four types of attachments:
-
file attachments (e.g. when you forward an email, the email itself is an attachment)
-
inline images (e.g. signatures are oftentimes declared as inline images)
-
files from your local file system (e.g. pictures, excel sheets you wish to share with your colleagues)
-
the whole email as a file (.msg /.eml format) (e.g. emails from a supplier which is relevant for the project)
Via the Outlook settings, you can configure attachments to be automatically included by default when creating an issue.
You can also manually select or remove attachments as needed or add attachments by dragging and dropping them from your device, or by choosing “All” or “None” in the dialogue box.
Email sharing
A shared email conversation is linked to your MS 365 login. Other users will see it as you do. Logging out may break visibility for other Jira users.
If the user opens the Outlook add-in for the first time (e.g. new issue screen) they need to log-in with their MS 365 account first, in order to select from the sharing options provided.
To log in, the “share email” toggle needs to be turned on (see below screenshot).

Sometimes, the user can choose from the sharing options directly, if they are already logged in from Jira (see screenshot below).
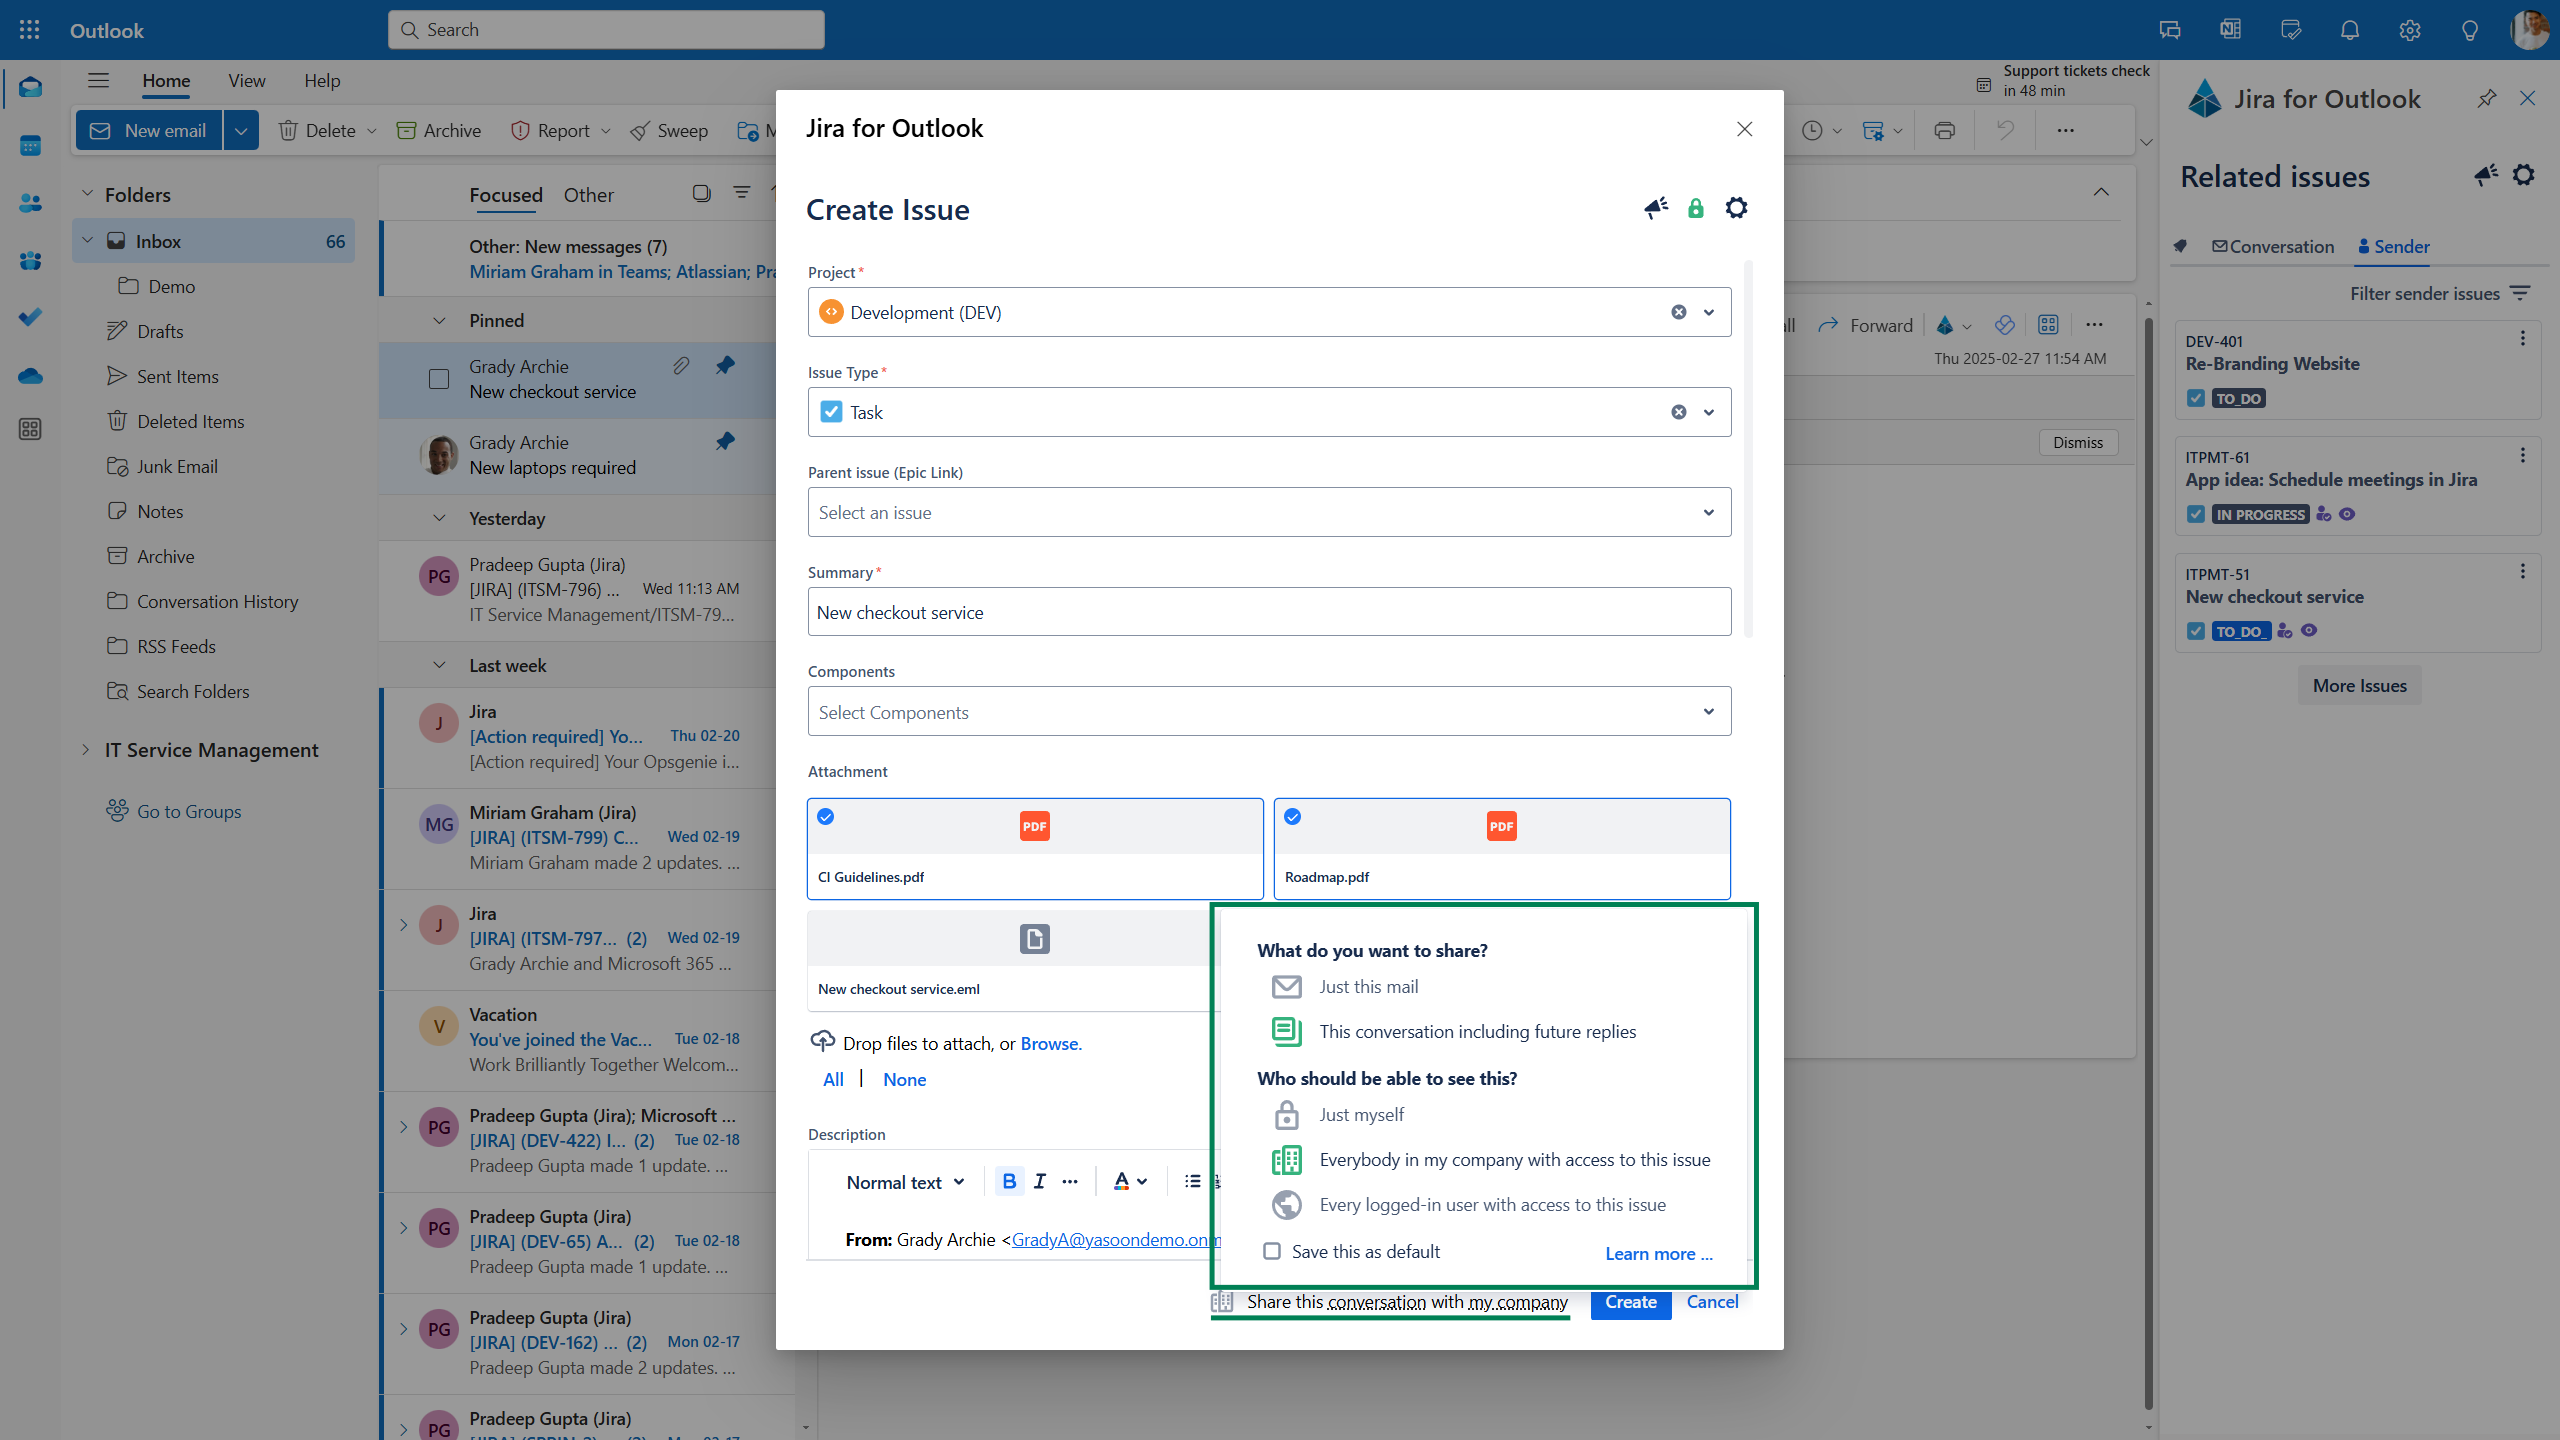
Decide among the content and access options (see table below). Sharing a conversation or email from Outlook to Jira enables users not having access to Outlook to follow up on the communication.
In Jira, the email (conversation) will then appear in the dedicated related emails panel.
|
What do you want to share? |
Just this email: Only the email will be shared, excluding other emails in the conversation. This conversation including future replies: The email and all related emails in the conversation will be shared, excluding drafts and deleted mails (moved to “Deleted Items” are still shared). |
|
Who should be able to see this? |
Just myself: Only your personal logged-in Jira and Microsoft 365 users can see this shared item in Jira. Everybody in my company with access to this issue: A logged-in Jira user can see this item only if logged in with a Microsoft 365 account from the sharing user's organization. Every logged-in user with access to this issue: Any logged-in Jira user can see this shared item. |
Please note: When using the email feature in Jira, sharing and accessing email content is unavailable for Outlook exchange on-premise hostings. However, you can still use our Outlook add-in for the Outlook features.
Why a Microsoft 365 log-in is required
Sharing options from Outlook rely on a Microsoft 365 log in. Otherwise, it cannot work properly and the email feature cannot be used to its full extent.
📍 Benefits and requirements:
-
Create issue (in Outlook): sharing emails and conversations enables teams to access the same level of information in Outlook and Jira. As shared emails are available in the related emails panel in the issue, even users with no access to Outlook can join and follow up on the communication.
-
(Related) emails in Jira: Accessing emails, starting new and replying to existing emails only works if the user is logged in with their Microsoft 365 account. Otherwise, working with emails in Jira will not be possible.
-
Add to issue (in Outlook): The same applies here. Shared conversations and emails are then available in the issue the email is added to providing sufficient (background/additional) information to all users involved.
-
Image display (create issue): If not logged-in, images cannot be displayed properly in the description field when creating the issue from Outlook. Previews might not be available. However, the images will be displayed correctly in Jira (after creation).
-
Outlook add-in setting: If not logged-in, the Outlook add-in will only take over (and share) the latest reply to Jira.
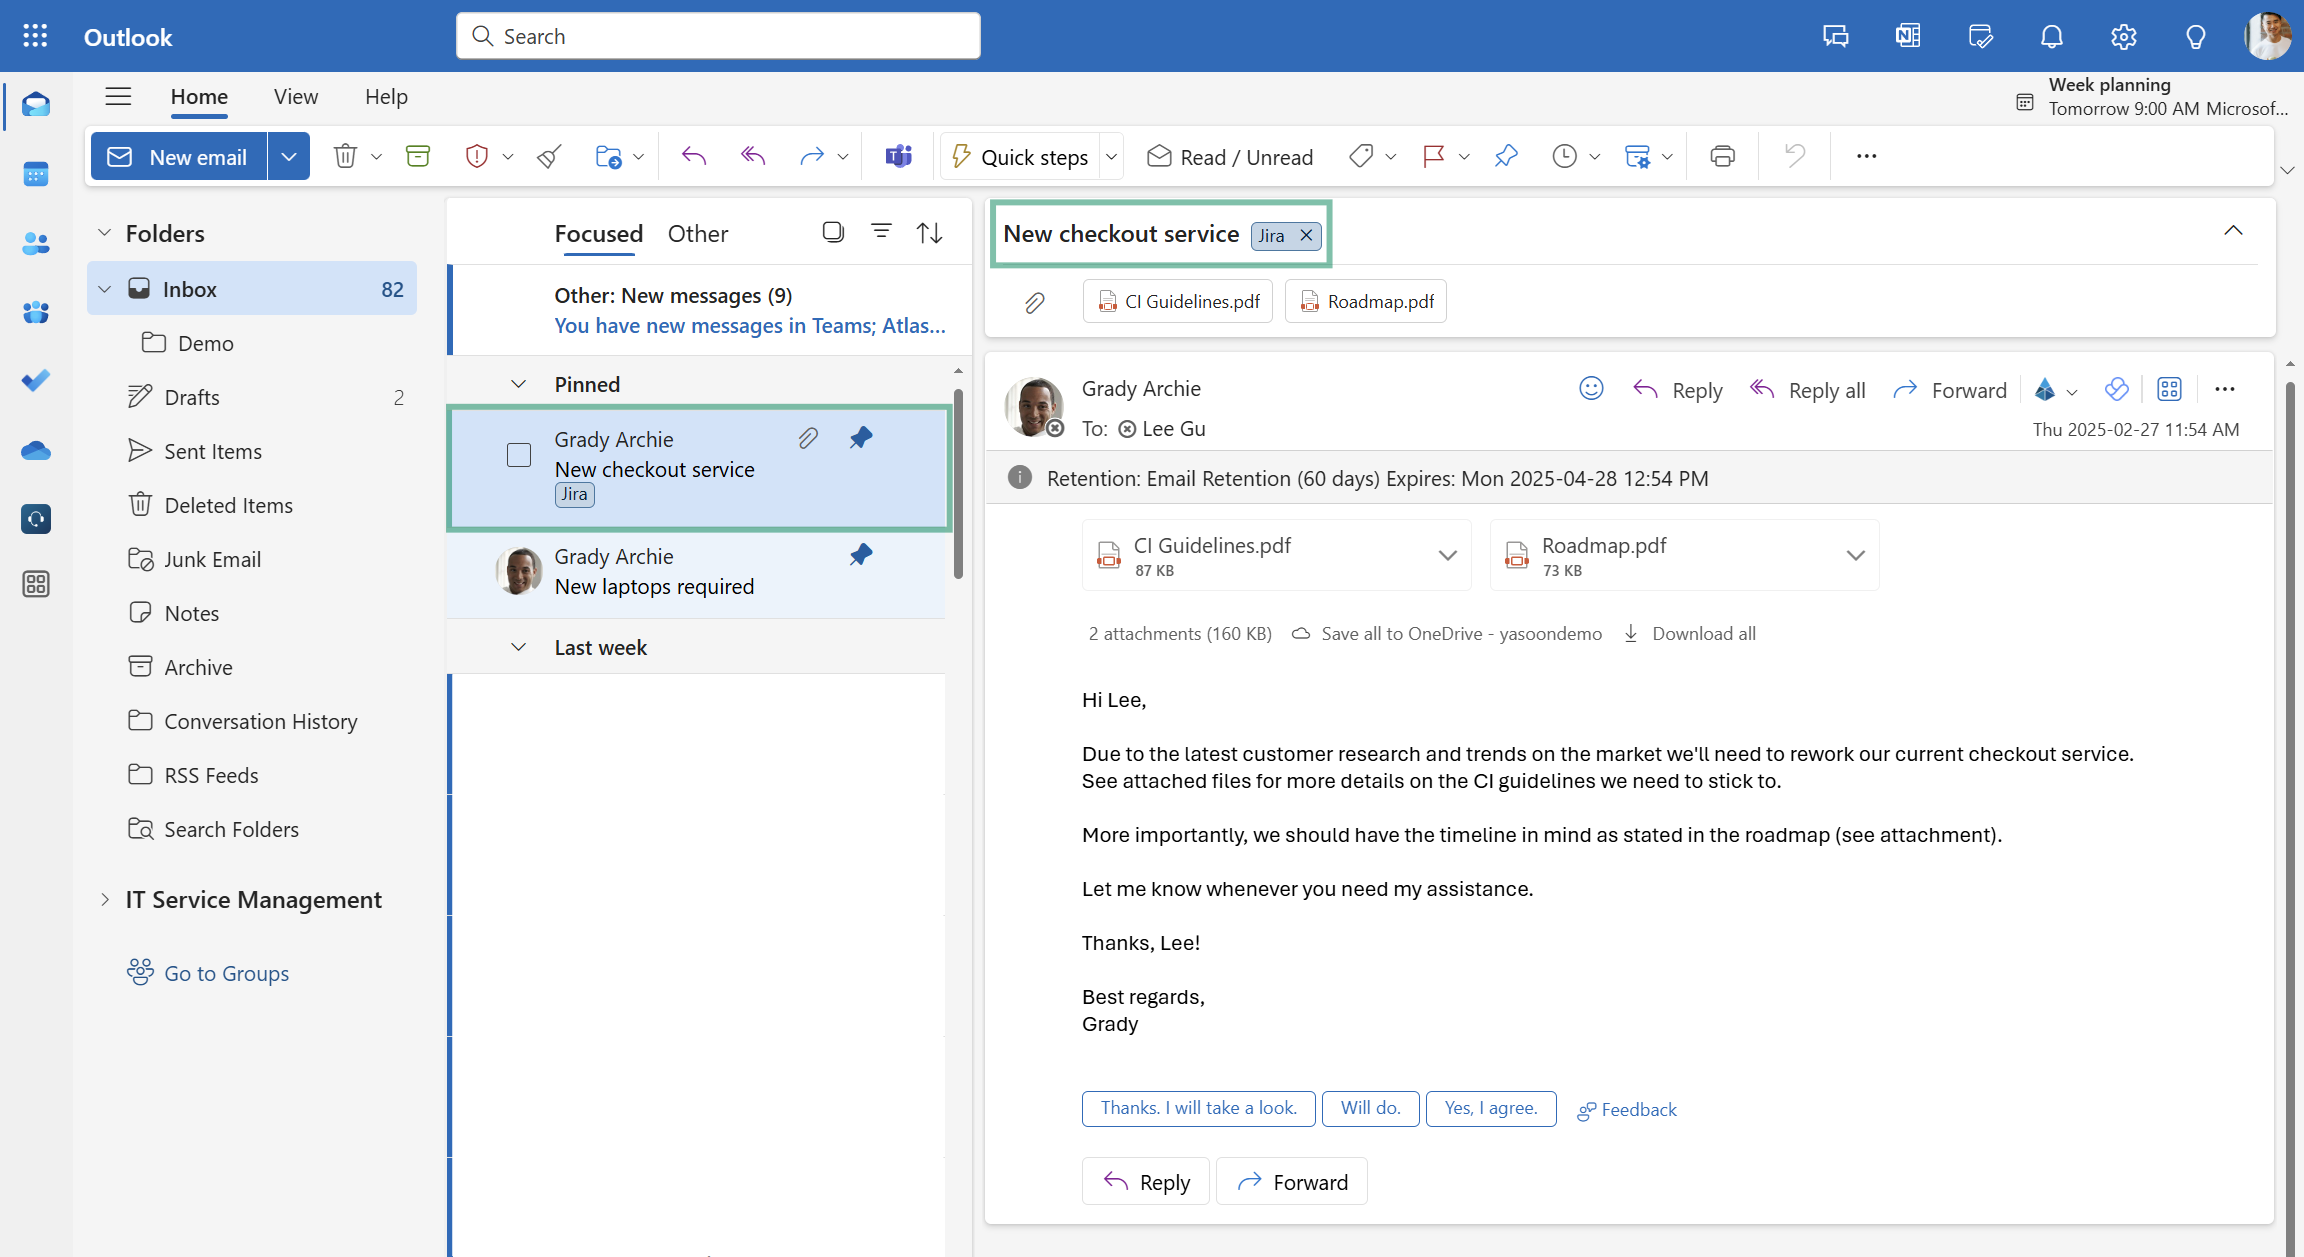
See notification next to email
Once an issue is created, a small notification “Jira” appears next to the email, helping you quickly identify conversations with corresponding issues in Jira.
Access email panel in Jira issue
Enhance your productivity by using our sidebar in Outlook, which allows you to seamlessly access and manage Jira issues directly from your inbox.
By selecting a specific issue, you will be automatically redirected to Jira, where you will find yourself guided straight to the “related emails panel” associated with that issue. All essential information is organized and integral to the project.

Field Mappings
We use default values from Jira when possible. Learn more about our Field Mappings here.
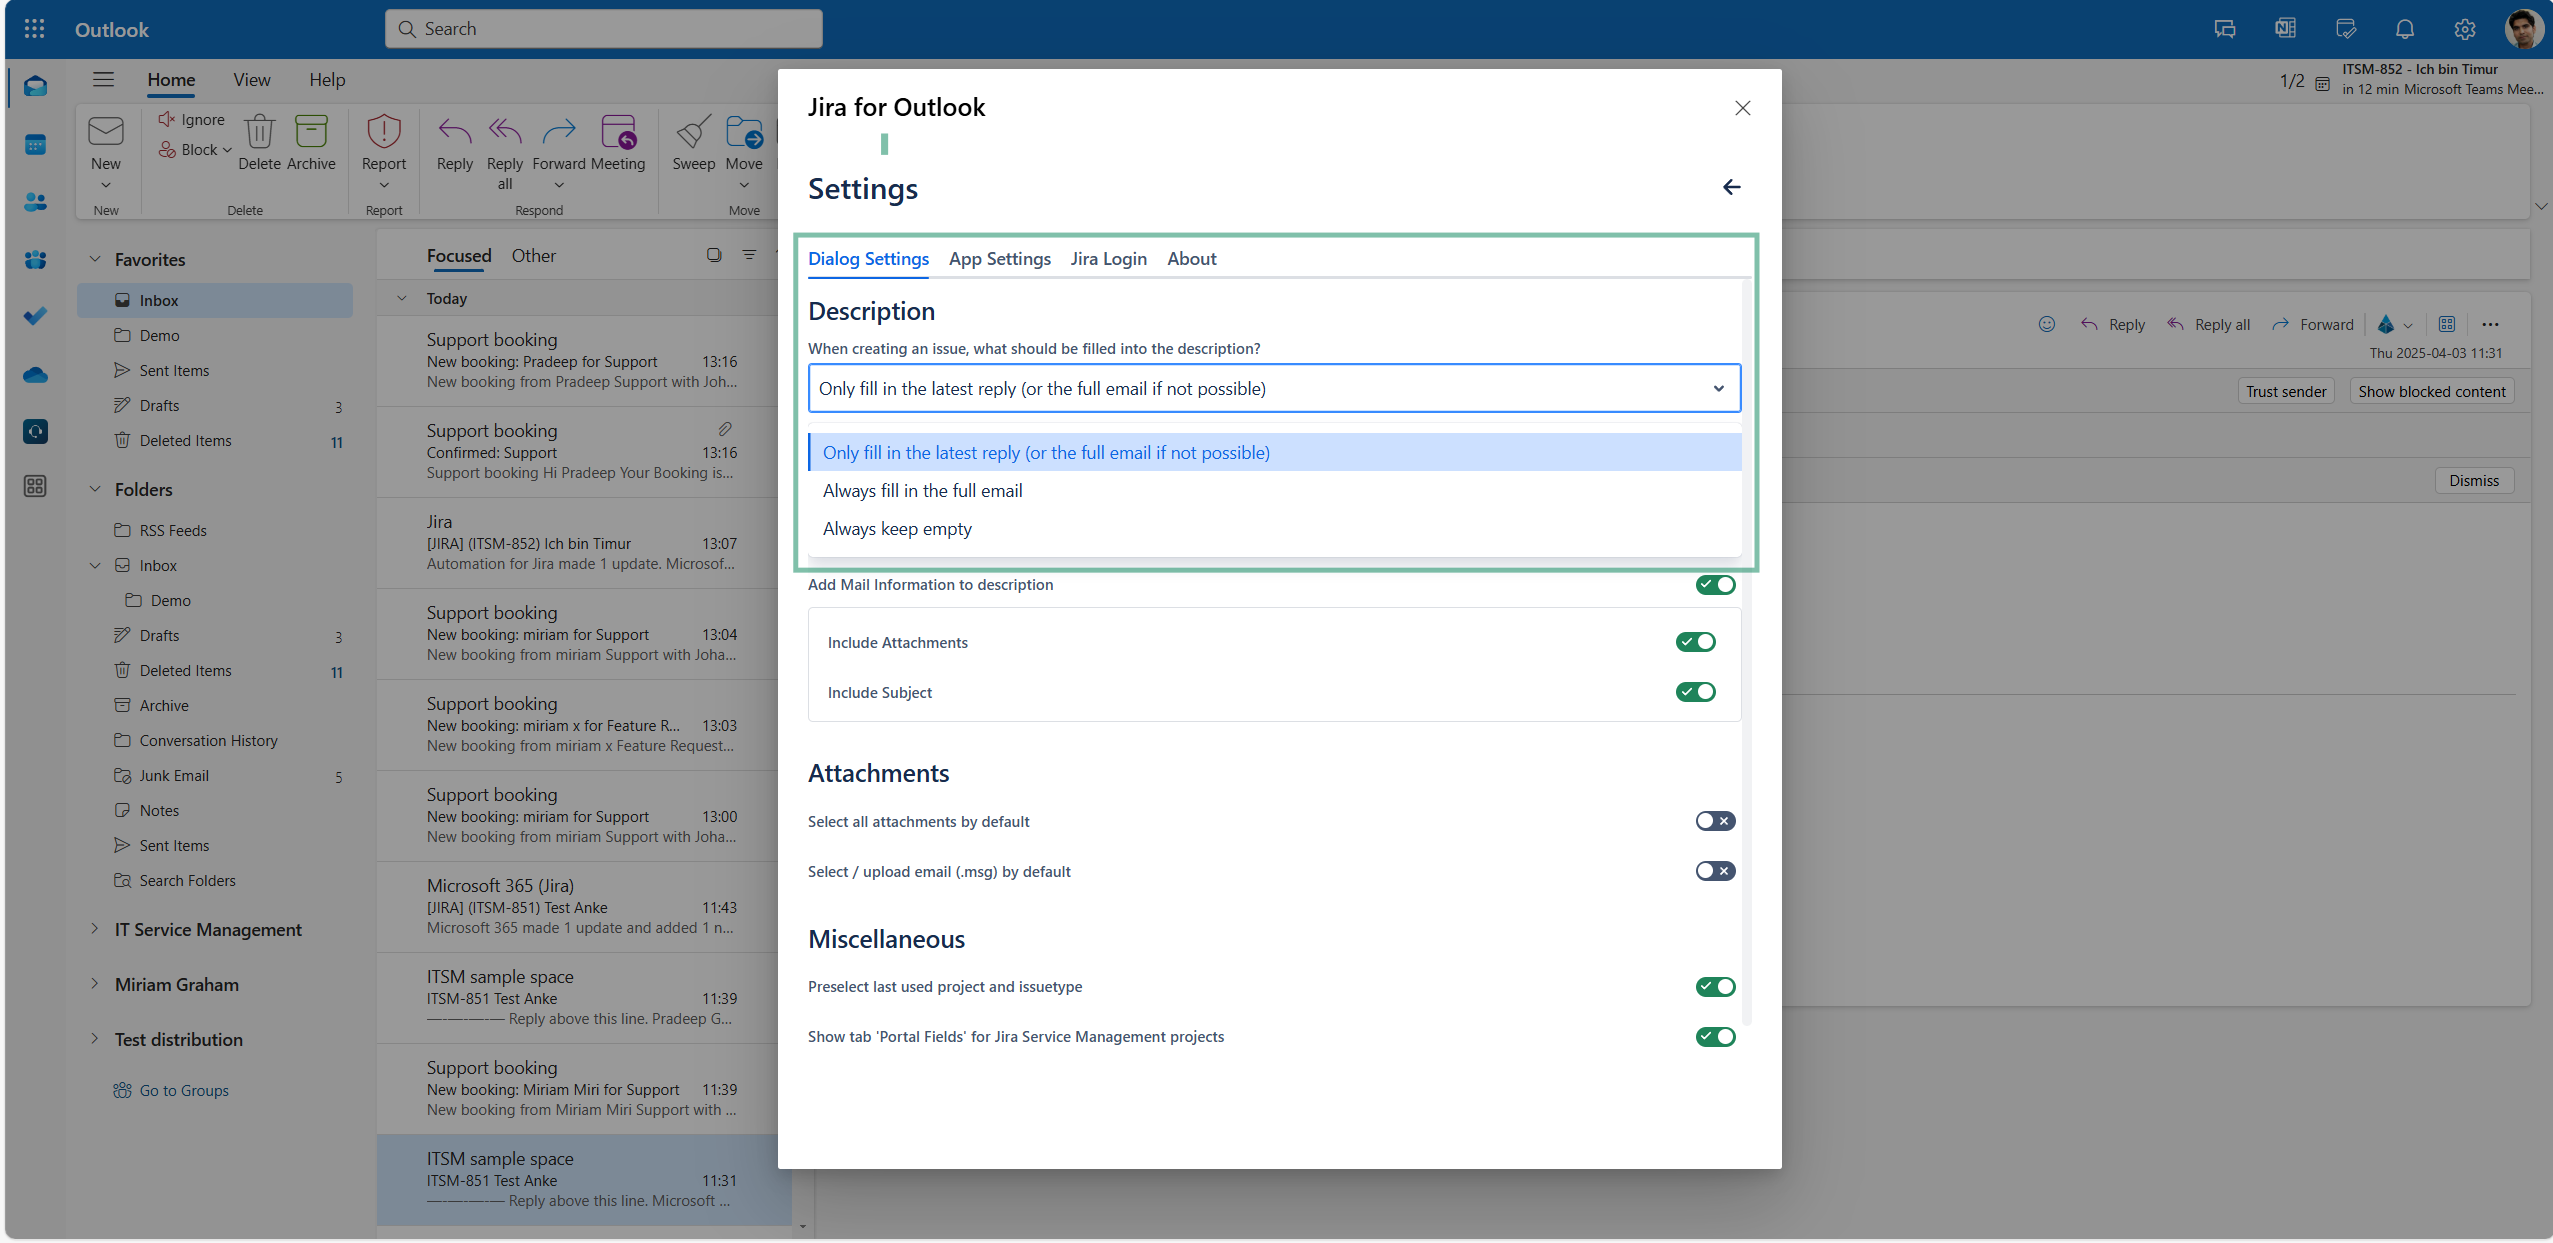
The Outlook add-in offers customizable templates defined by the Jira admin, determining which email information is available in Jira. This is the default:
-
The email subject is automatically the summary of the Jira issue
-
The whole email body is the description of the Jira issue
-
The sender of the email is the reporter of the Jira issue
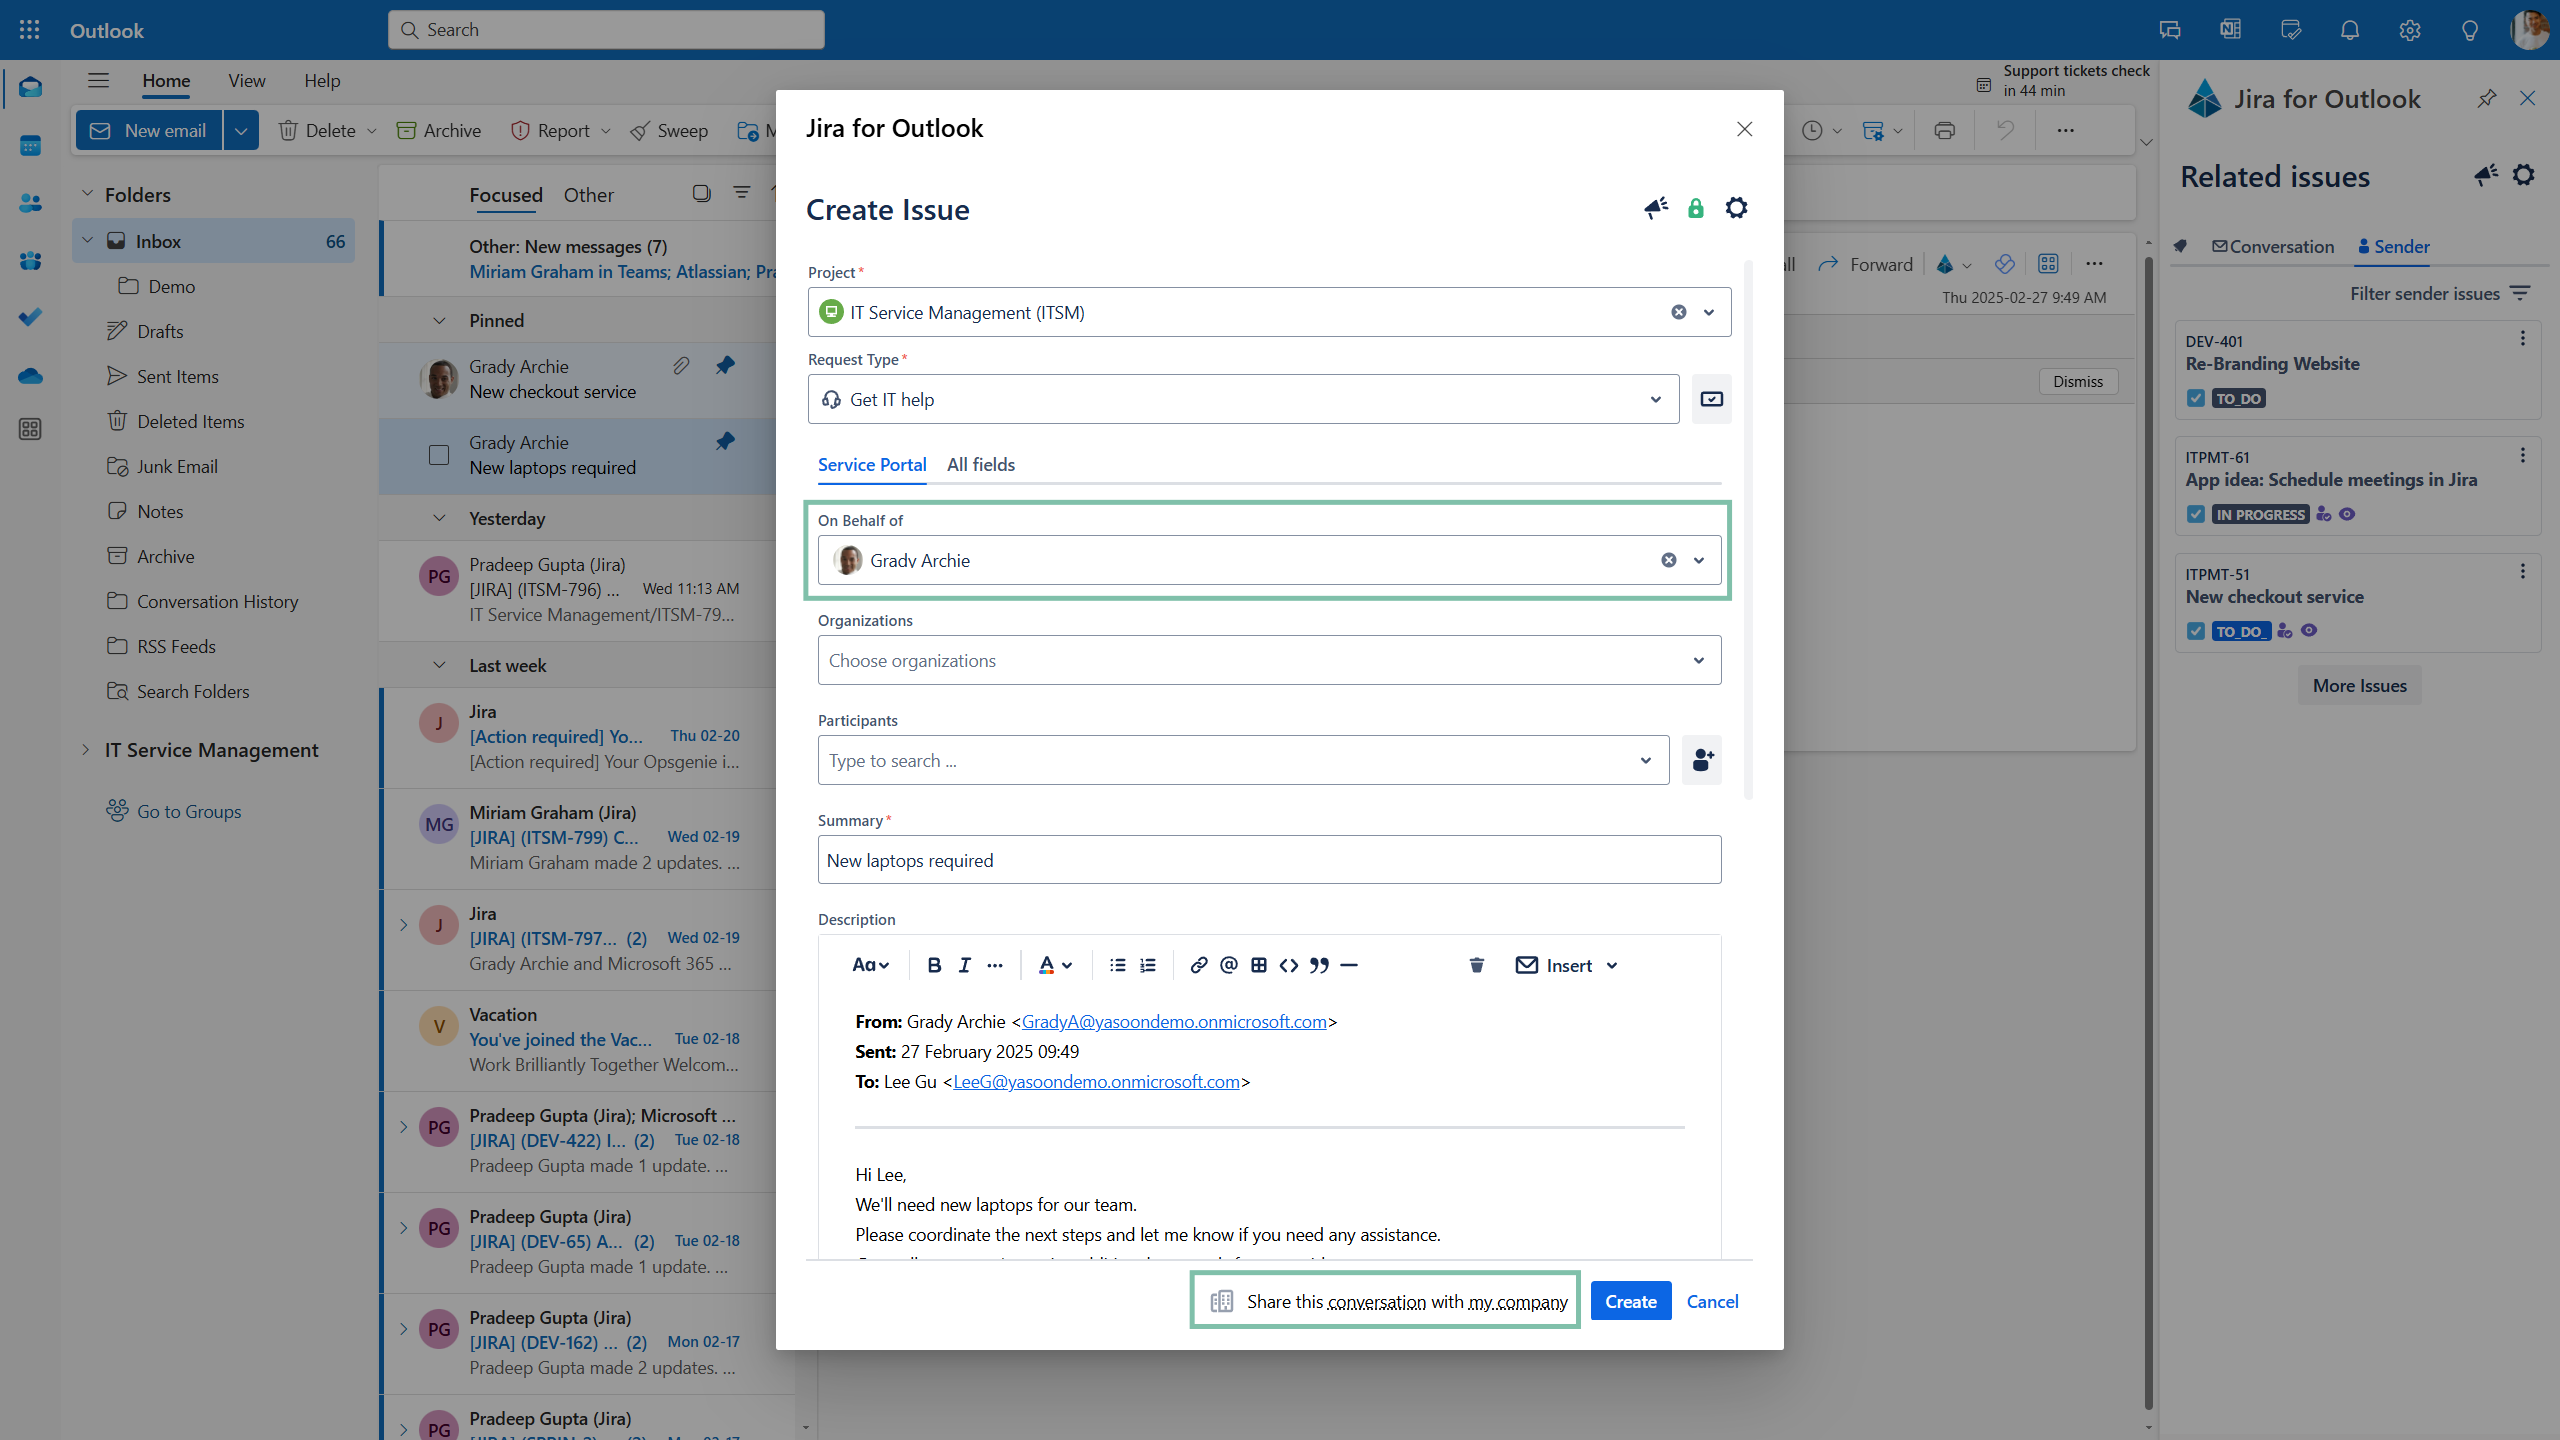
Jira Service Management specifics
The Outlook add-in offers features for Jira Service Management agents, allowing them to create tickets on behalf of the email sender.
|
Project and request type |
The add-in will work with Request Types (instead of Issue Types). |
|
Tab: Service portal |
It shows a tab called Service Portal that includes fields just as configured in your JSM portal. |
|
Tab: All fields |
If you want to add information that is not visible for customers, you can use the tab “All fields”. |
|
Reporter field
|
The reporter field will check, if the sender of the email has a JSM account. If yes, our add-in allows to create a new one (if allowed by the portal settings). |
|
Email participants |
Other persons on CC will be added as request participants when they have a JSM account. |
You can disable Service Portal fields in the settings under default settings.
Refer to this article on how to raise support tickets from Outlook via the Jira Service Management Portal in Outlook.
Troubleshooting: Don’t create customers automatically
At this time, we do not provide an option to completely remove this feature. However, you can disable it or find alternative solutions in several ways:
-
Remove the “Modify reporter” permission for your agents in Jira Service Management to prevent raising issues on behalf of customers.
-
Change the default template for the “Reporter” field from <SENDER> to <USER> to auto-fill the current Outlook add-in user as the default reporter.
-
Use the issue type instead of the request type to create new issues.
-
Manually remove the value for the “On behalf of” field when creating an issue.
COM add-in specifics
The COM add-in will soon be deprecated.
We recommend, that you switch to our Office add-in (based on MS 365).
Create issues based on text
When using the COM add-in, you can select a text section in the email and create a new issue for only the selected text selection.
-20241218-103921.png?cb=df4ccac4847162bb24f0e3ebbc8d7c60)
Notification (icon) on issue creation
When using the COM add-in, a separate Jira-icon next to your email will show you, that an issue has been created to this email (see green markup).
-20241218-104005.png?cb=4d4087cddd06573283548211ea0e0432)
Feature configuration
To use Jira features in Outlook (like creating Jira issues from emails), a connection between Jira and Outlook must be established by your Jira and Microsoft admin (refer to: Admin configuration).
Admin configuration
To get started, the installation and deployment of our Outlook add-in (free) is necessary.
This task should be carried out by the Jira admin and Microsoft admin:
-
The Jira admin needs to prepare the set-up.
-
The Microsoft admin deploys the add-in centrally to all users/team.
The installation process is straightforward and can be completed in a just a few clicks by following the instructions available within the Jira admin settings (in the first place).
User configuration
Main configuration can be done via the Outlook settings by the user.
Useful links
-
Further information as well as the technical reference on shared office items can be found here: https://support.yasoon.com/M365FJ/sharing-access-to-microsoft-365-items
-
Interested in managing emails within Jira? This functionality is available without specific prerequisites: https://support.yasoon.com/M365FJ/emails-see-send-emails-from-within-jira
-
Detailed explanation of the sharing options from Jira can be found here under “Feature at a glance”: https://support.yasoon.com/M365FJ/emails-see-send-emails-from-within-jira#Emails:WorkwithemailsinJira-Featureataglance
-
-
Interested in managing your meetings and bringing information to Jira? Create new issues based on your Outlook meetings: https://support.yasoon.com/M365FJ/create-new-jira-issues-from-outlook-meetings