Outlook add-in
Connect your emails to Jira issues right in your Outlook inbox and get the most of our Email feature by installing our Outlook add-in (free).
The installation process can be completed in a few clicks by following provided instructions from within the Jira admin settings (see below screenshot).
With Jira Cloud an application link needs to be set-up. After configuring the application link, decide on the right Outlook add-in to be installed at your company.
Check out deployment options, to finalize the set-up 🚀
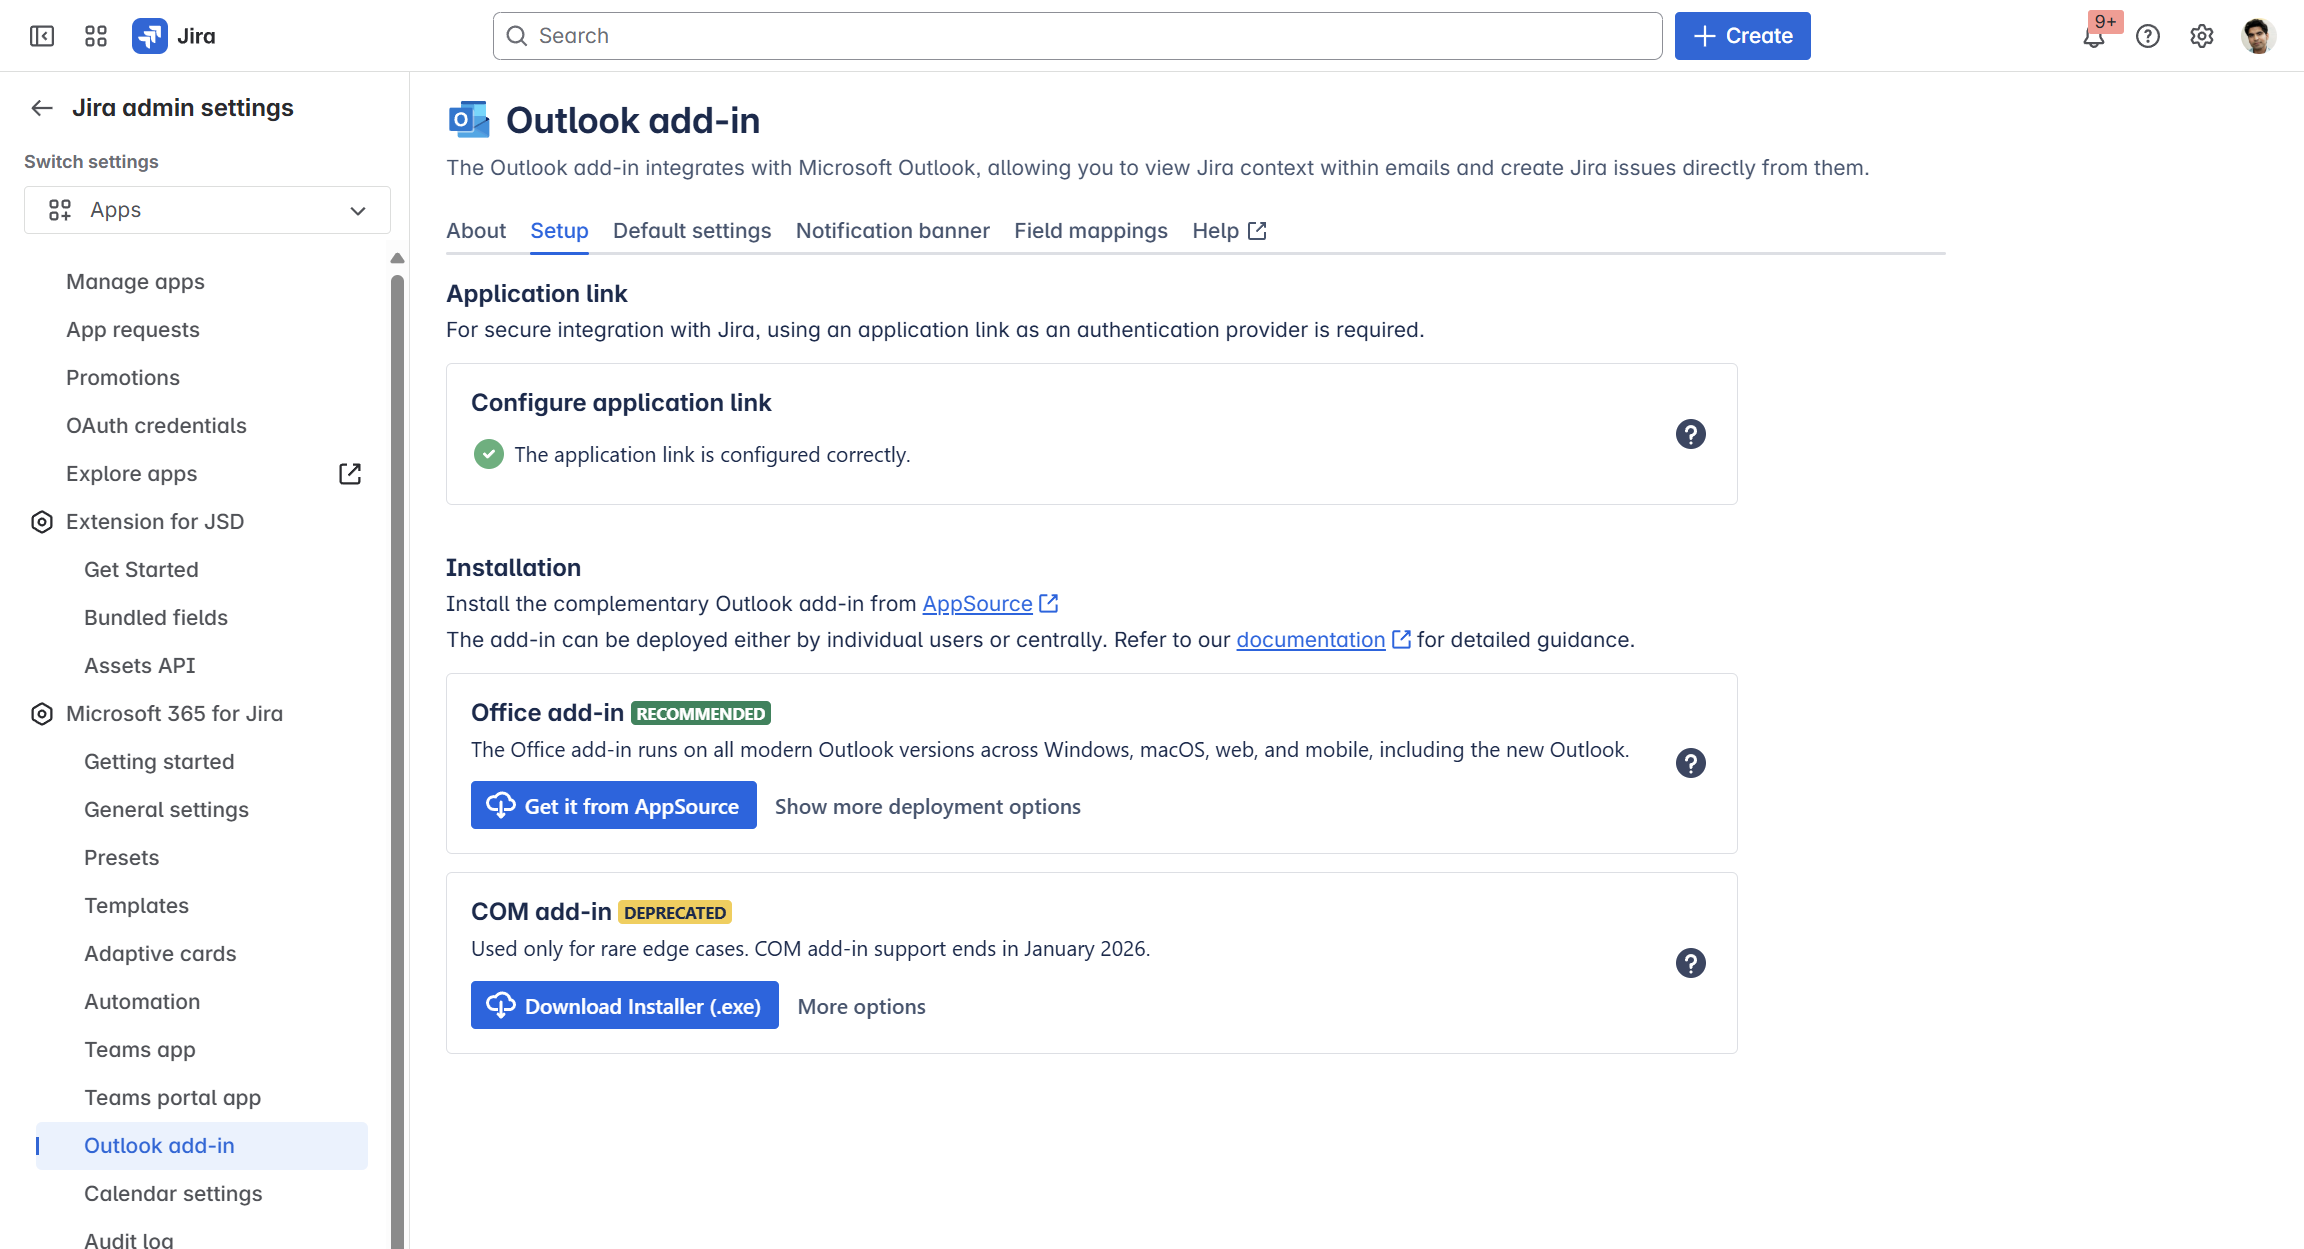
Admin settings to configure the Outlook add-in
Get the Outlook add-in
Admin responsibilities
With the Outlook add-in there are different steps which require action from different admins. Main responsibilities have the Jira and MS admin.
Jira admin: sets up the application link for Jira Cloud and decides on the right Outlook add-in to be installed.
Microsoft admin: deploys the Office and COM add-in centrally to the users.
User: With the COM add-in the individual user can install the add-in independently.
| Responsibility | To Do | |
|---|---|---|---|
Step 1a | JIRA ADMIN | Activates Email feature globally or for specific projects | |
Step 1b | JIRA ADMIN | Creates the application link | |
Step 2 | JIRA ADMIN | ||
Step 3 | MICROSOFT ADMIN and | ||
Step 4 | MICROSOFT ADMIN | ||
Requirement: application link
JIRA ADMIN ACTION

This only applies for Jira Cloud.
For Jira Data Center the link is created automatically after the installation of the app.
The secure way to connect your Jira Cloud instance with Outlook.
The Outlook app uses OAuth 1.0a to connect to your Jira instance. You need to create a new application link, so Outlook can connect safely. Please make sure to select the option “Direct application link using OAuth 1.0” when being prompted to create the link:
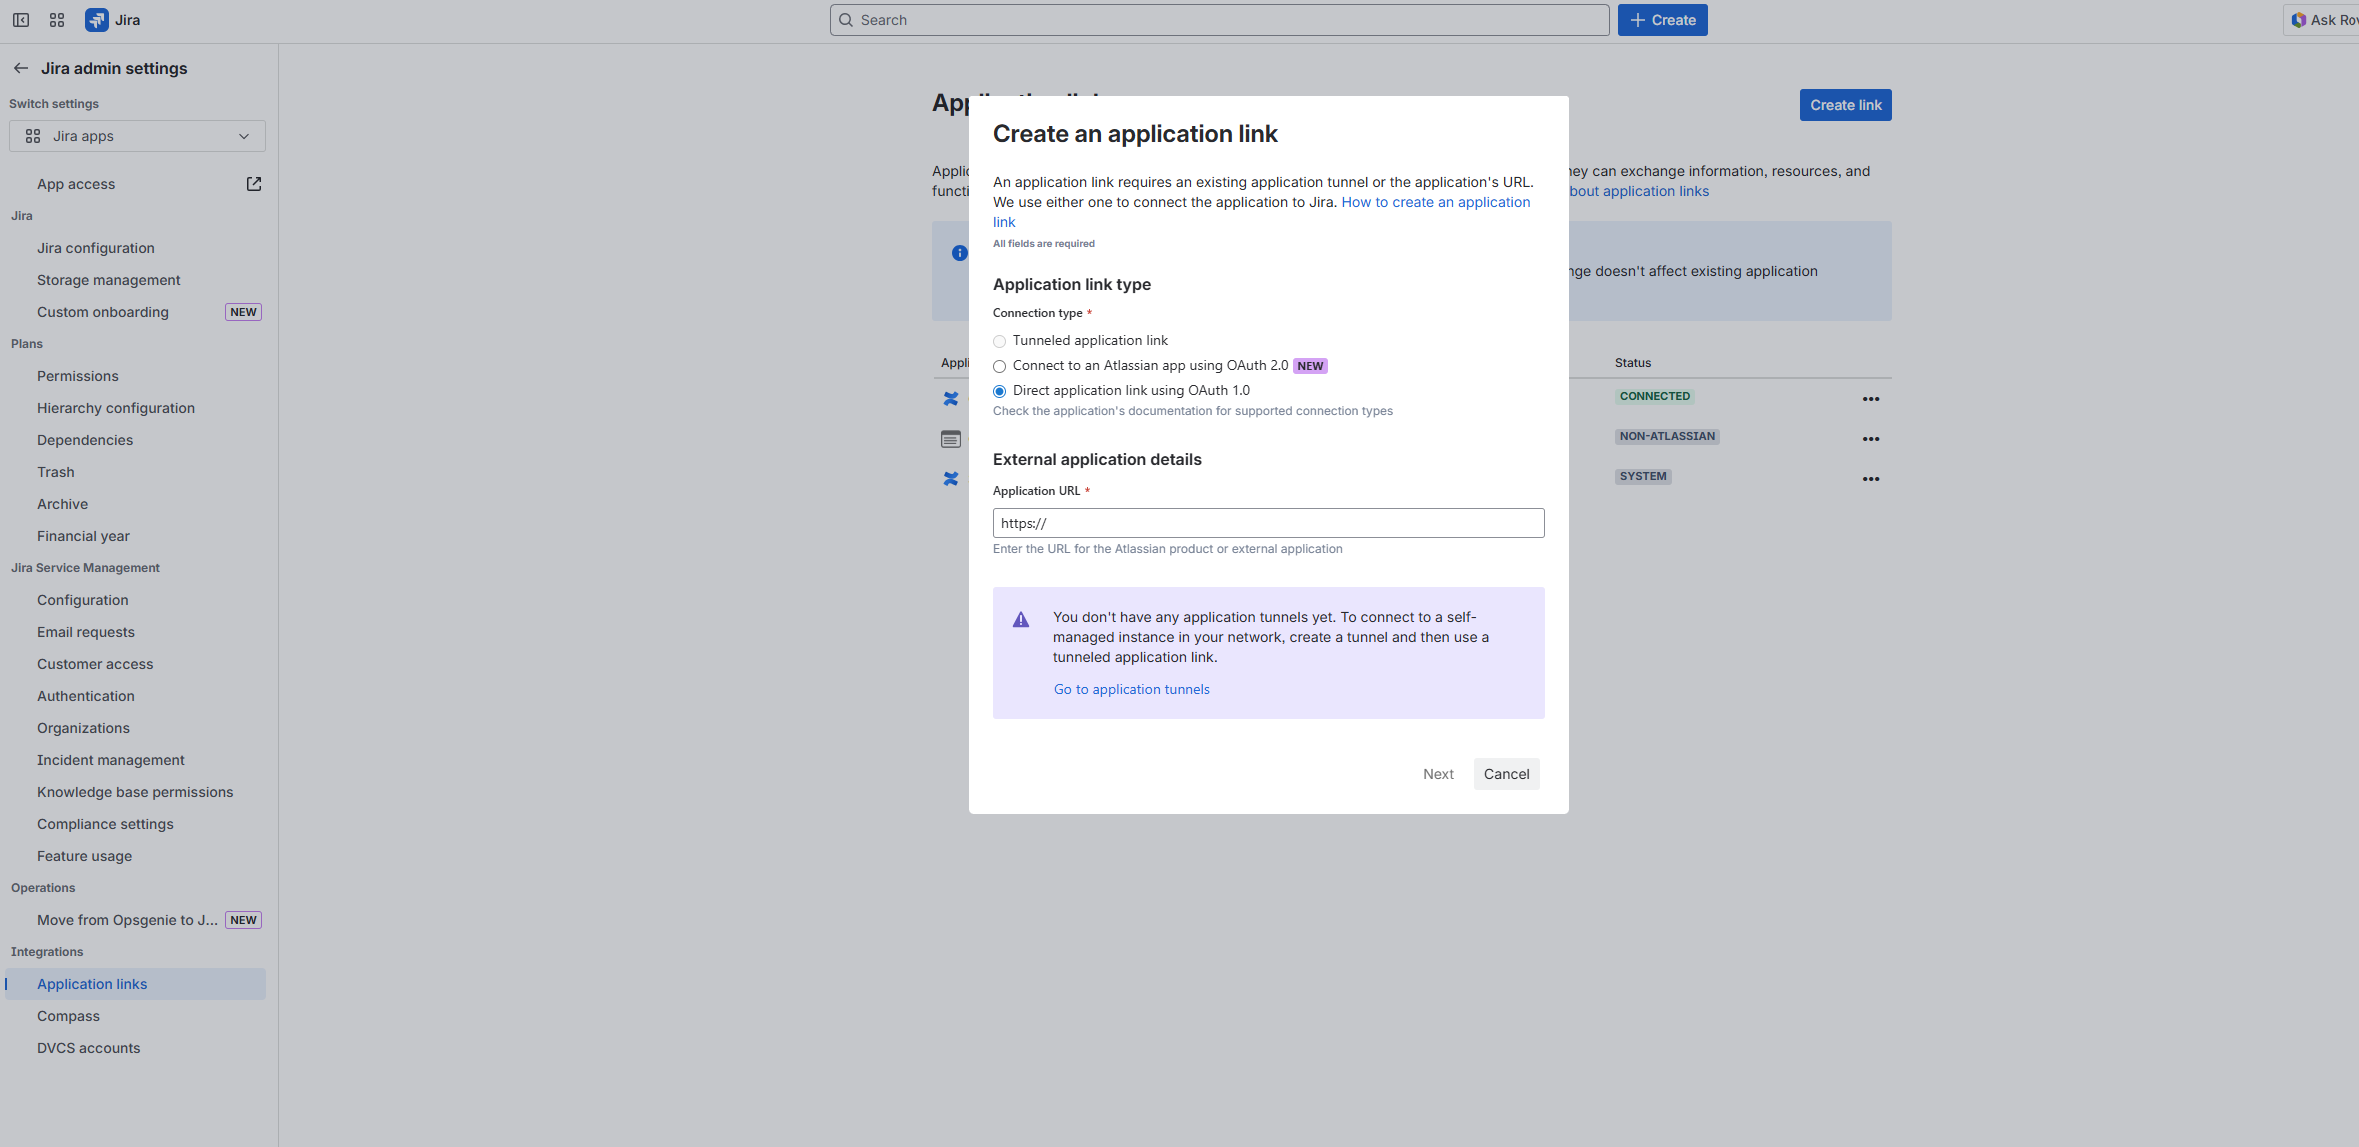
You find more details about application links here.
Deploy Outlook add-in
MICROSOFT ADMIN ACTION
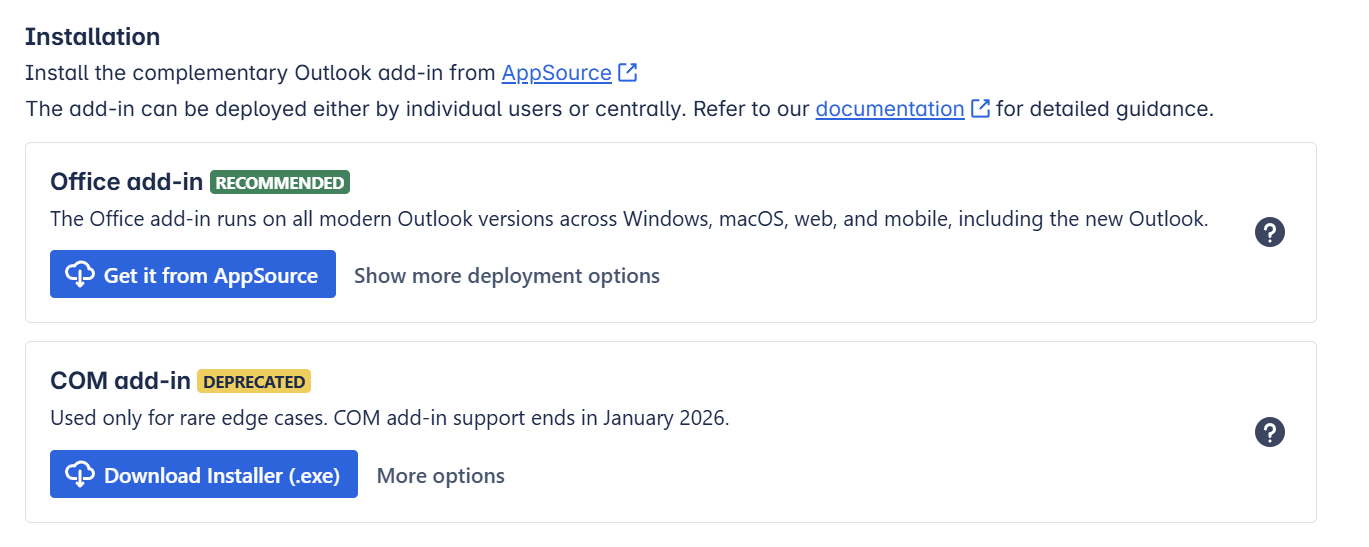
First, decide on the right add-in for your company.
Then, deploy it centrally or alternatively, let your users deploy it on their own.
(COM add-in / Office add-in)
The COM add-in will soon be deprecated.
We recommend, that you switch to our Office add-in (based on MS 365).
Here is the reason why: Why will the COM add-in be deprecated in January 2026 and what does that mean?
Tip: Make sure to install the Outlook add-in to all those users, who work with emails a lot (and most probably need) to bring them to Jira. Otherwise, Jira user’s won’t be able to access emails in the issue in the first place.
Emails in Jira
This feature requires Microsoft 365!
For Jira Cloud is turned on by default and does not require an explicit setting.
Enabling email sharing allows users to manage Outlook emails directly within their Jira issues, such as sending new emails. Additionally, shared Outlook conversations (emails synced to Jira from Outlook) can be accessed and responded to.
ℹ️ This panel is only visible in the settings when sharing emails in Jira is disabled. This situation may occur immediately after installing Microsoft 365 for Jira or if the feature has been intentionally disabled.
Once email sharing is enabled, it remains active, and the panel will no longer be visible.
By default, we’ll turn on sharing & sending emails, if we detect Microsoft 365. This happens, if any user of the Outlook add-in logs in with their Microsoft 365 account for the first time.

Default settings
The Jira admin can define specific default settings here for the Outlook add-in.
However, as soon as the Outlook add-in is deployed, the individual user can change them later in the Outlook settings, if required.
The settings serve more as a guideline rather than a rigid default.
General settings
Privacy settings
Screen recording: For troubleshooting capabilities, you can allow recording for debug purposes. This settings has always to be turned on manually and only lasts one session.
Sending reports: Allow sending of bug reports.

Performance settings
Allow refreshing feed: To reduce the request load on your Jira instance, automatically allow refreshing feed.

Please note: Disabling the above mentioned options will severely impact our troubleshooting capabilities.
Email Preset
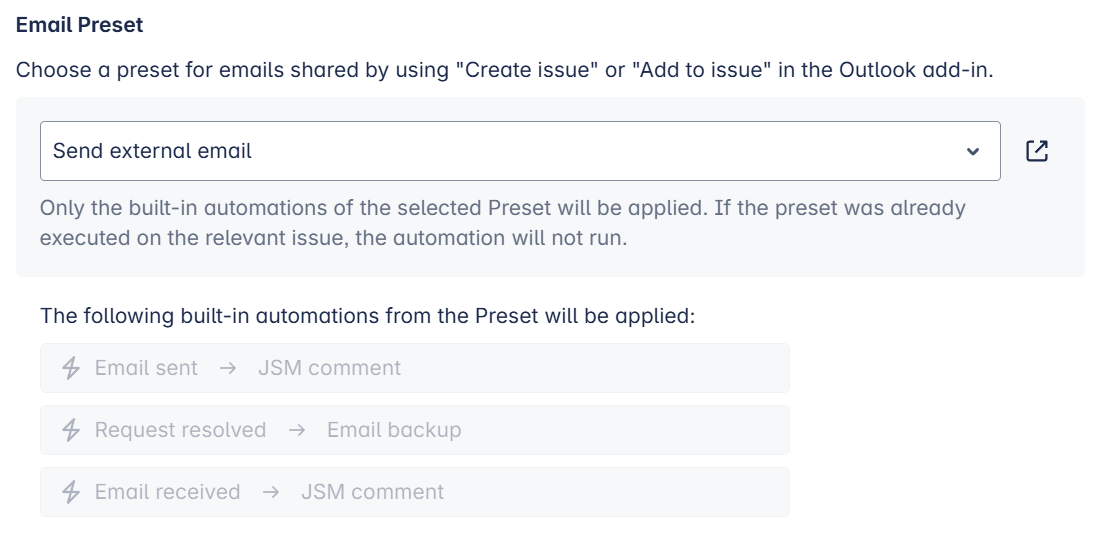
The Outlook add-in's default settings allow you to use existing global Email Presets (external/internal) with our app in your Outlook inbox.
More precisely, choose built-in automations from the Email Presets to determine future actions between Outlook and Jira.
For example, when you create a new work item from an email or link to it to an existing work item/request, our app will automatically add a Jira/JSM comment in Jira. Involved persons will thus, be notified via email about the new project and its origin.
Please note: Only global Presets can be chosen.
Check it out: Learn more and configure your Email Presets here.
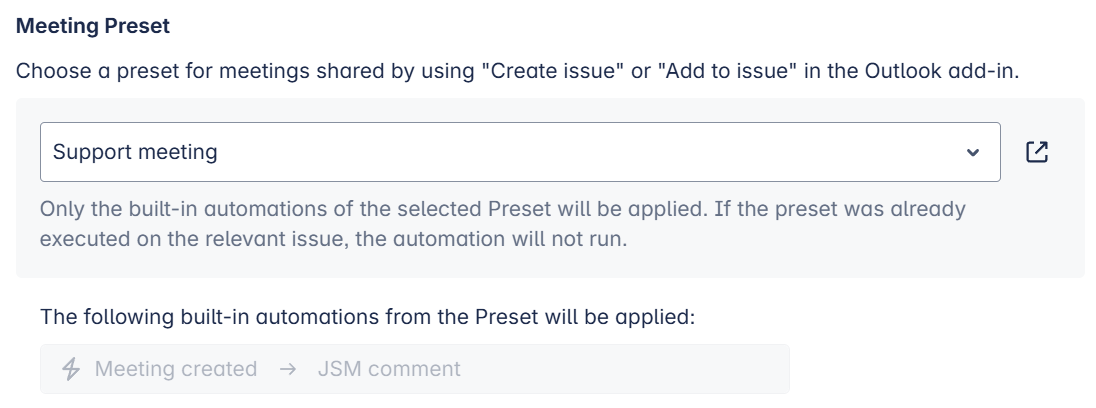
Meeting Presets
The Outlook add-in's default settings allow you to use existing global Meeting Presets with our app in your Outlook calendar.
More precisely, choose built-in automations from the Email Presets to determine future actions between the Outlook calendar and Jira.
For example, when you create a new work item from a meeting or link to it to an existing work item/request, our app will automatically add a Jira/JSM comment in Jira. Involved persons will thus, be notified via email about the new project and its origin.
Please note: Only global Presets can be chosen.
Check it out: Learn more and configure your Meetings Presets here.
User defaults
Configure the settings a new user will get by default when first installing our Outlook add-in.
This will only affect new users when adding this Jira instance as their first instance.
Each user can then adjust these settings for his personal preferences.
The settings will appear to any new user when installing our Outlook add-in for the first time. Adjustments can be done afterwards by the user individually via Outlook settings.
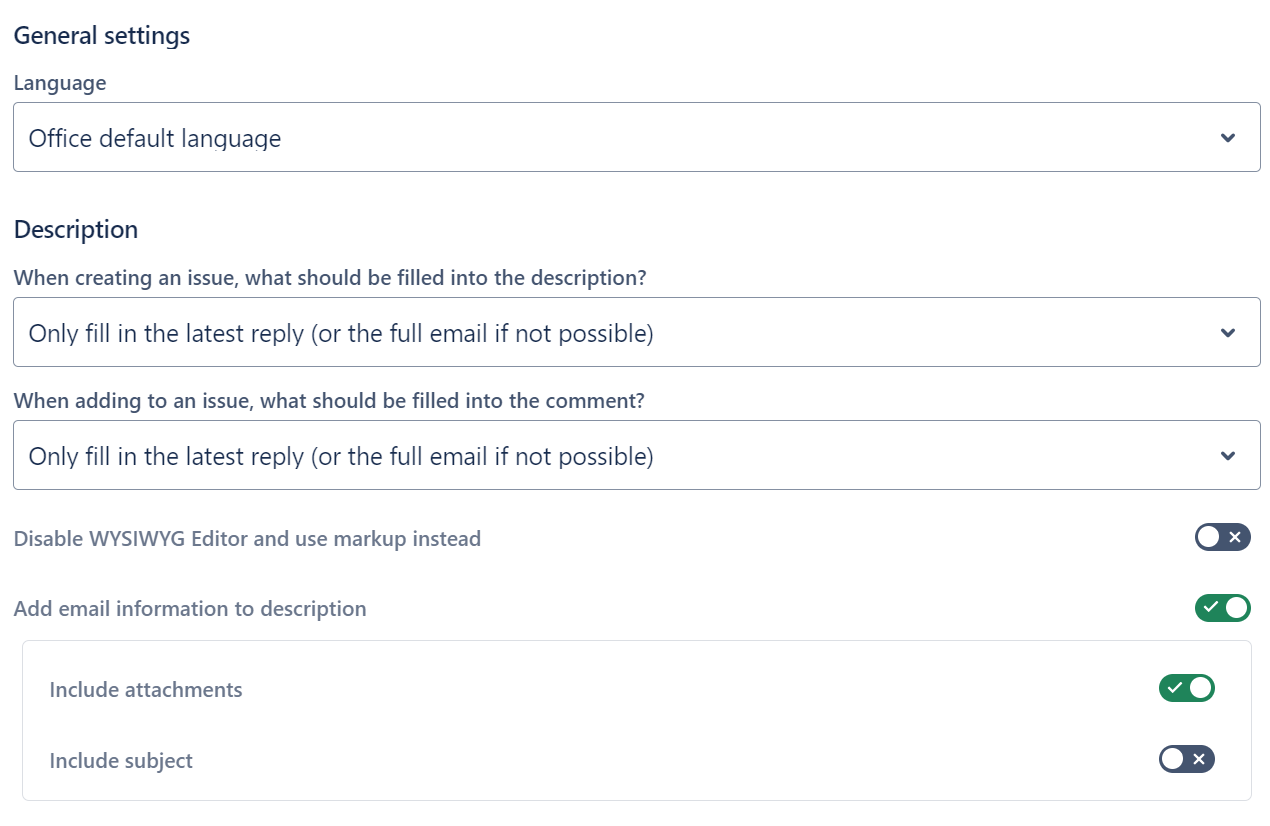
General settings
Office default language: Choose desired language.
When creating an issue, what should be filled into the description? Choose among the options proposed.
When adding to an issue, what should be filled into the comment section? Choose among the options proposed.
Include attachments to the issue description.
Include subject to the issue description.
Attachments
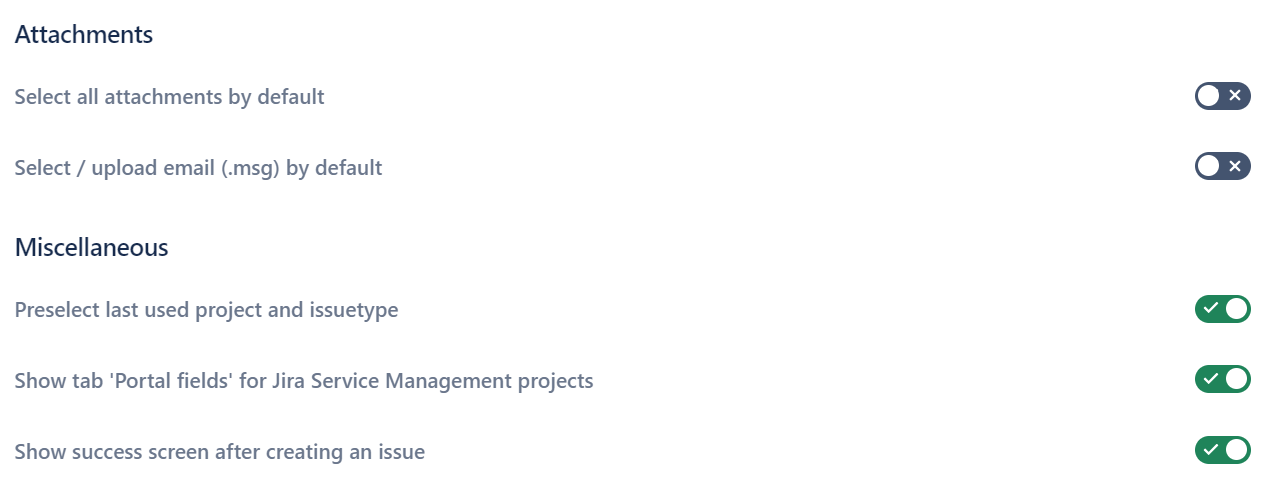
Decide what attachment you want to add to the issue:
Select all attachments by default
Select / upload email (.msg) by default
Decide on project and issue creation settings:
Preselect last used project and issue type.
Show tab “Portal fields” for JSM projects.
Show success screen after creating the issue.
Emails in Jira
Sharing options selectable when creating issue based on emails from Outlook.
What do you want to share of this mail conversation?
Just this email
This conversation incl. future replies
Who should be able to see the mail conversation?
Just myself (private)
Everybody in my company with access to this issue
Every logged in user with access to this issue

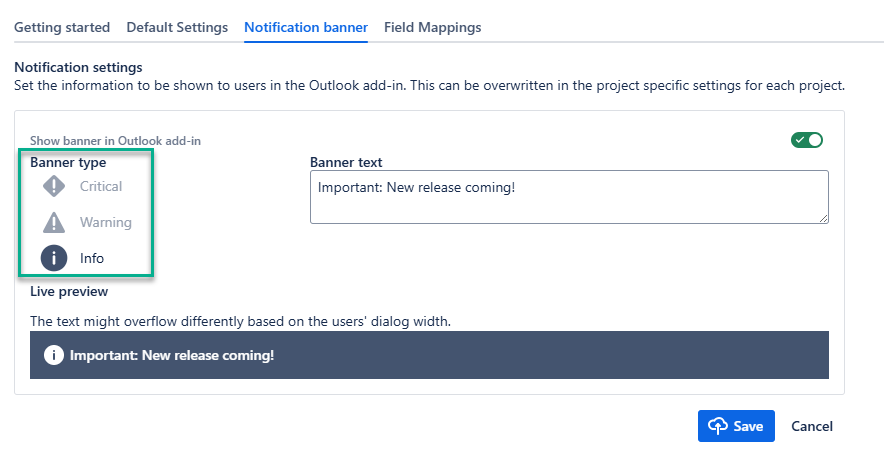
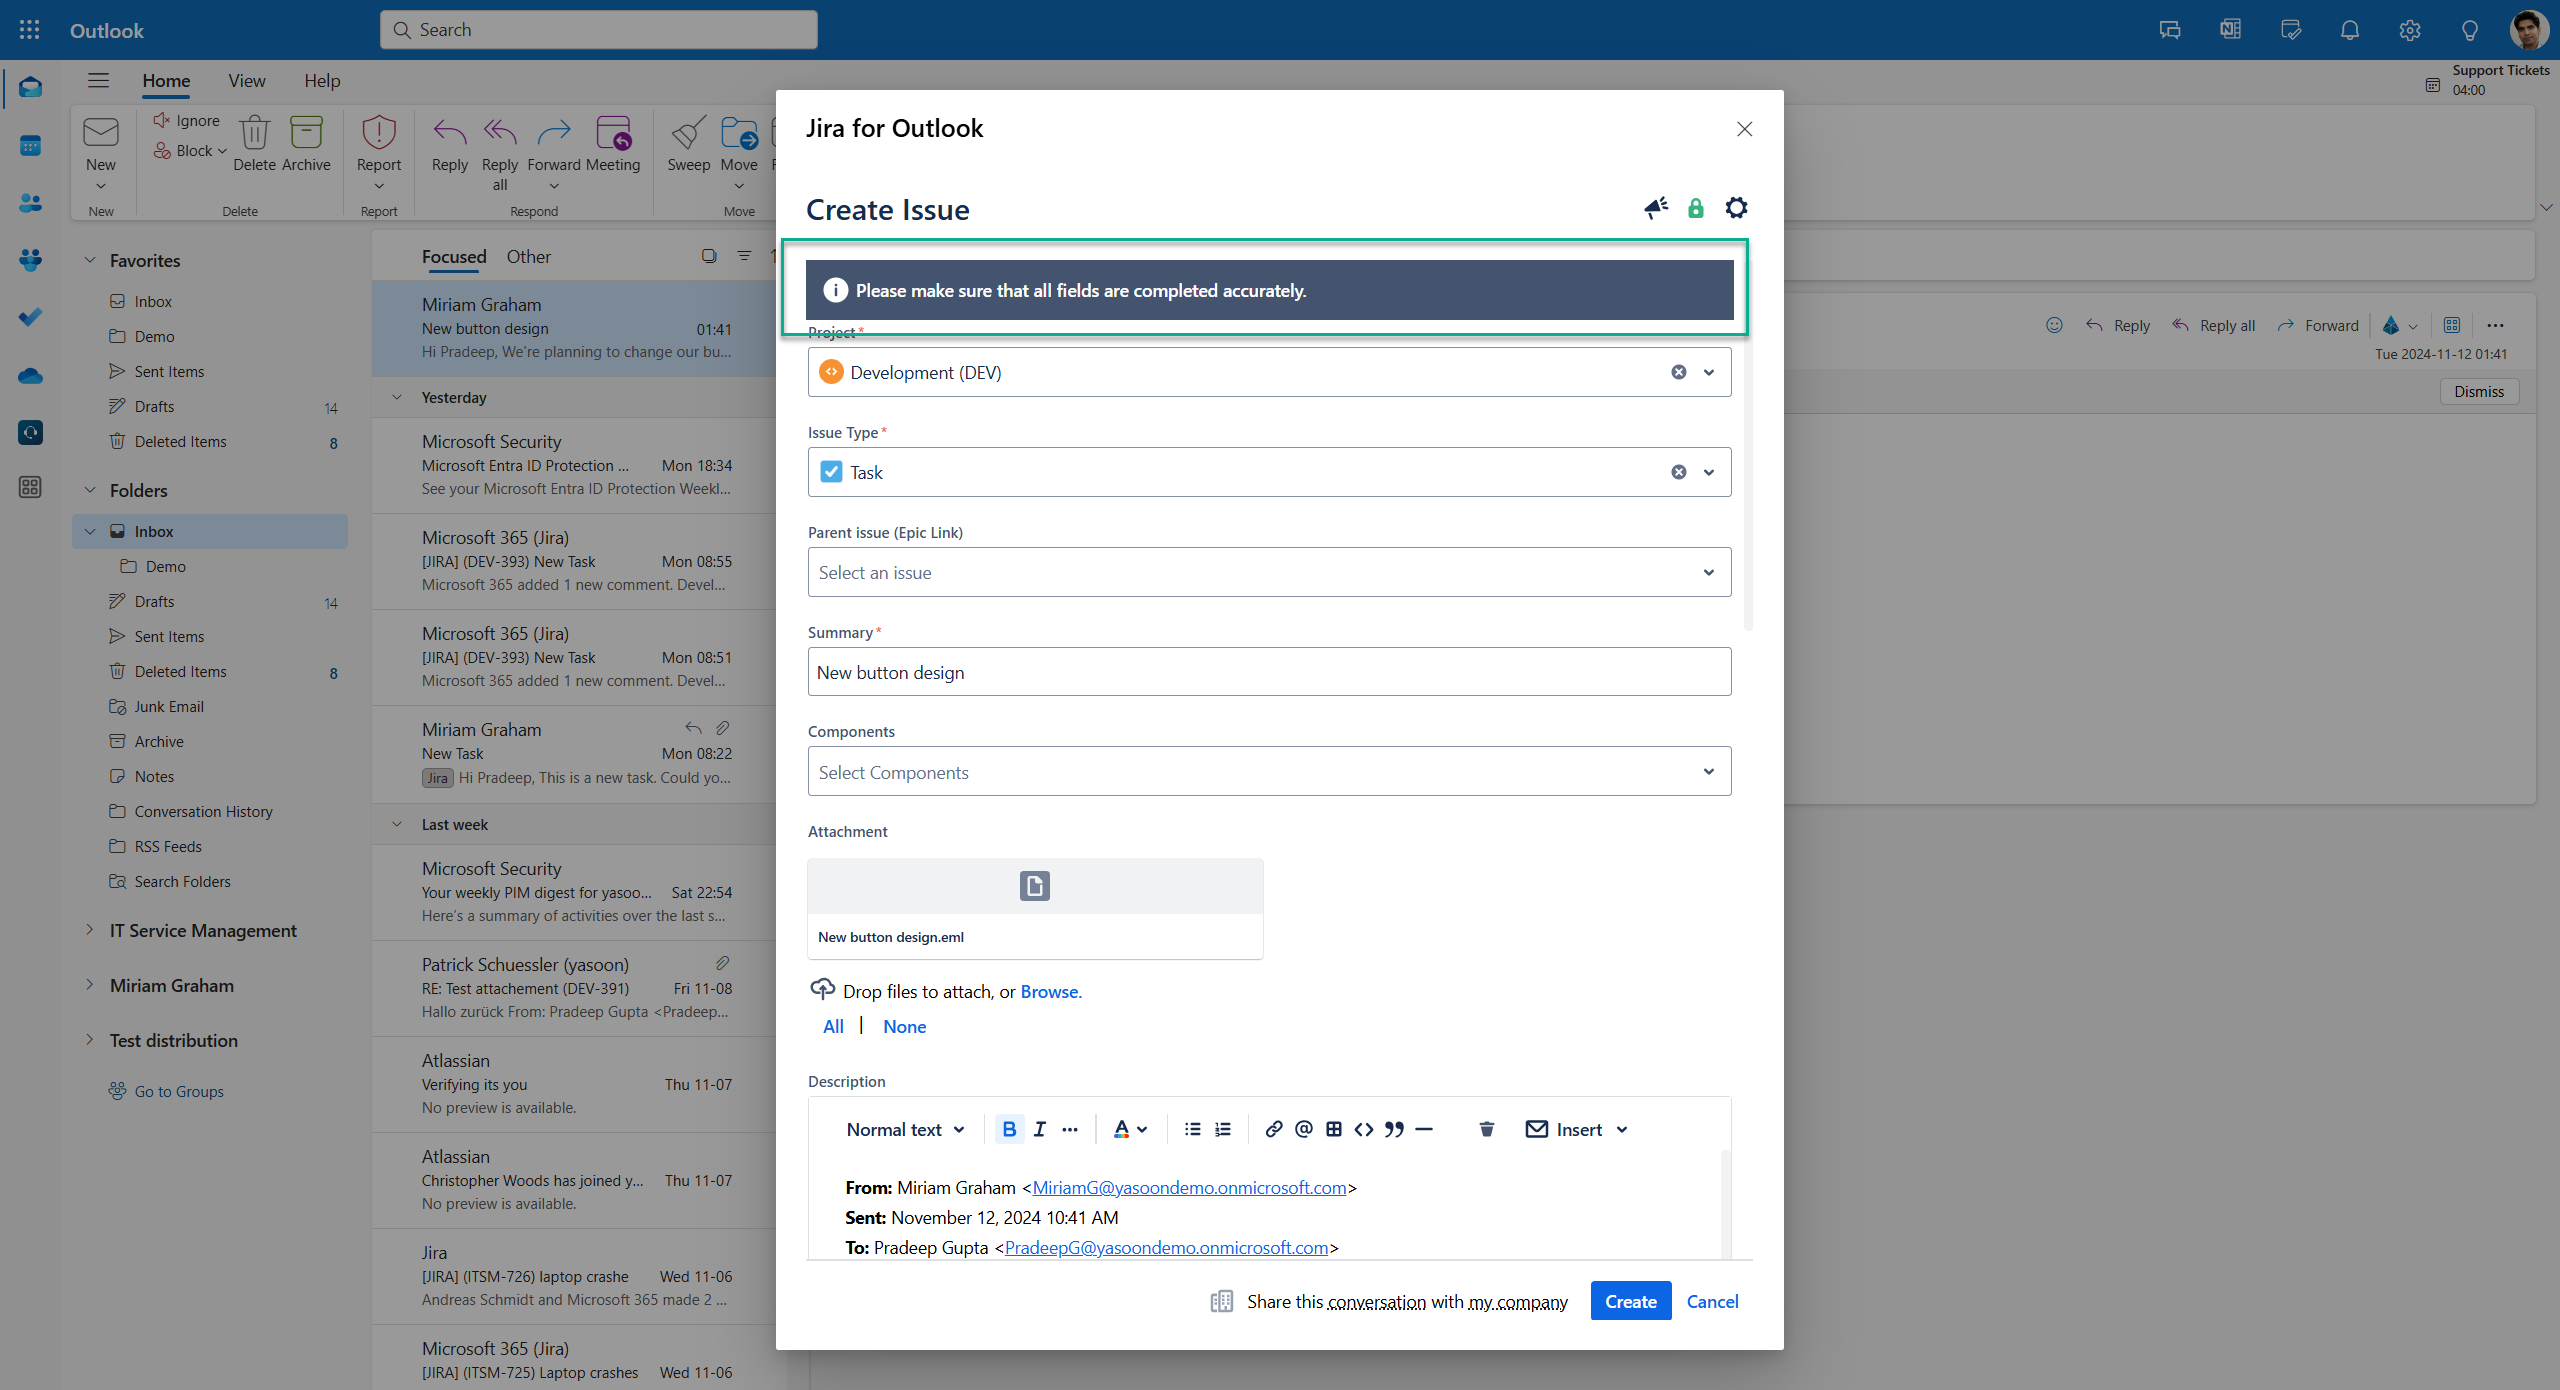
Notification banner
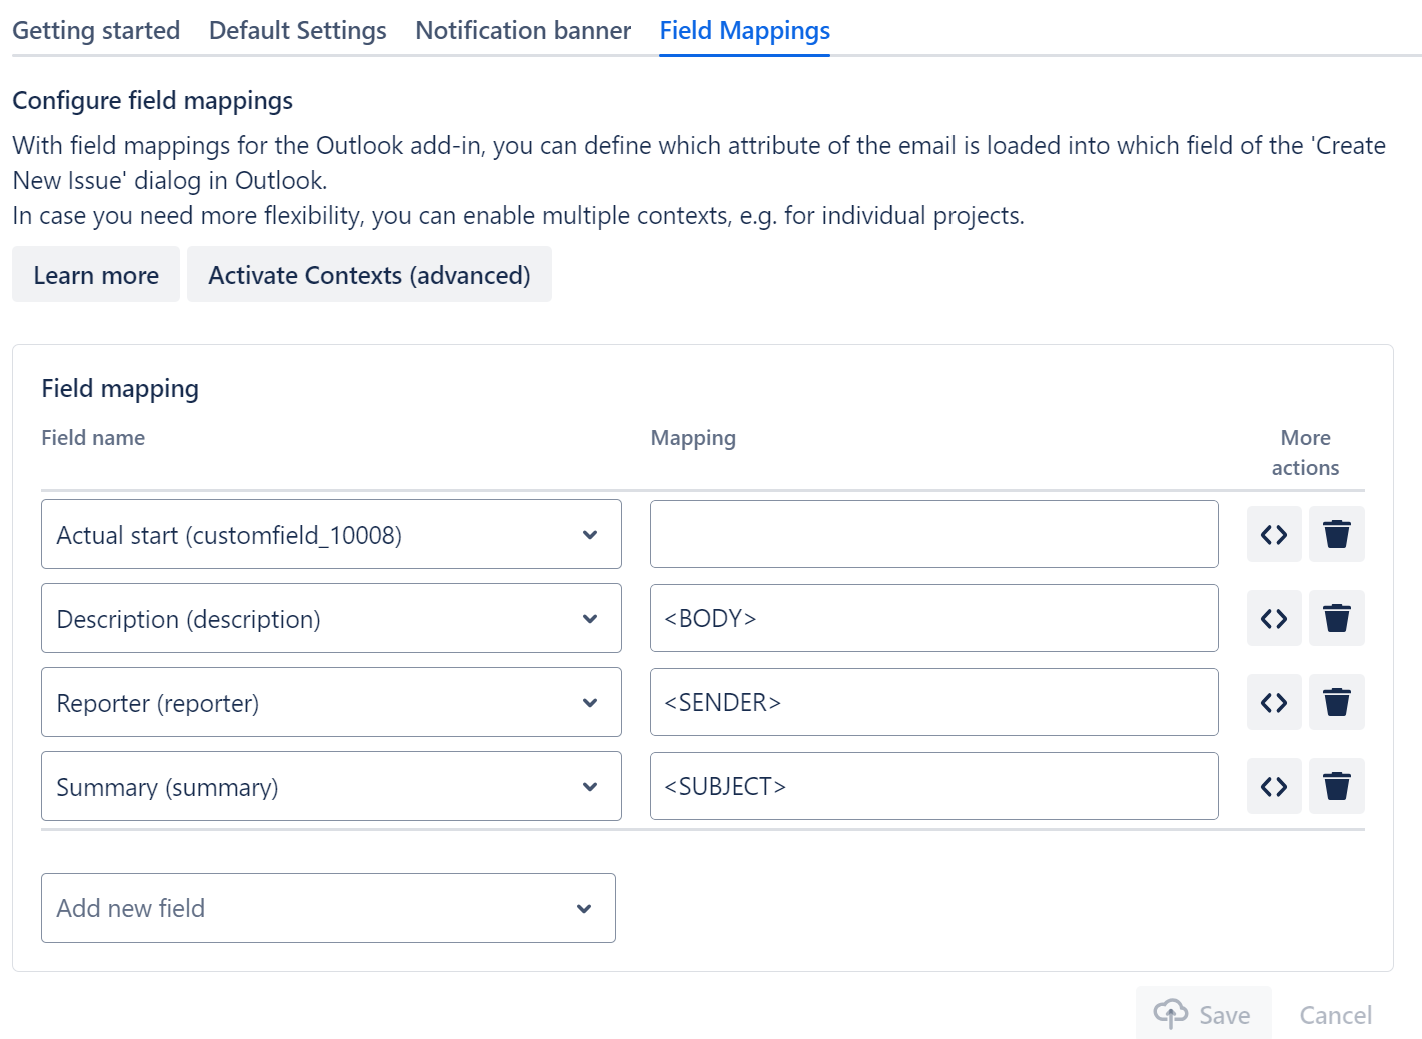
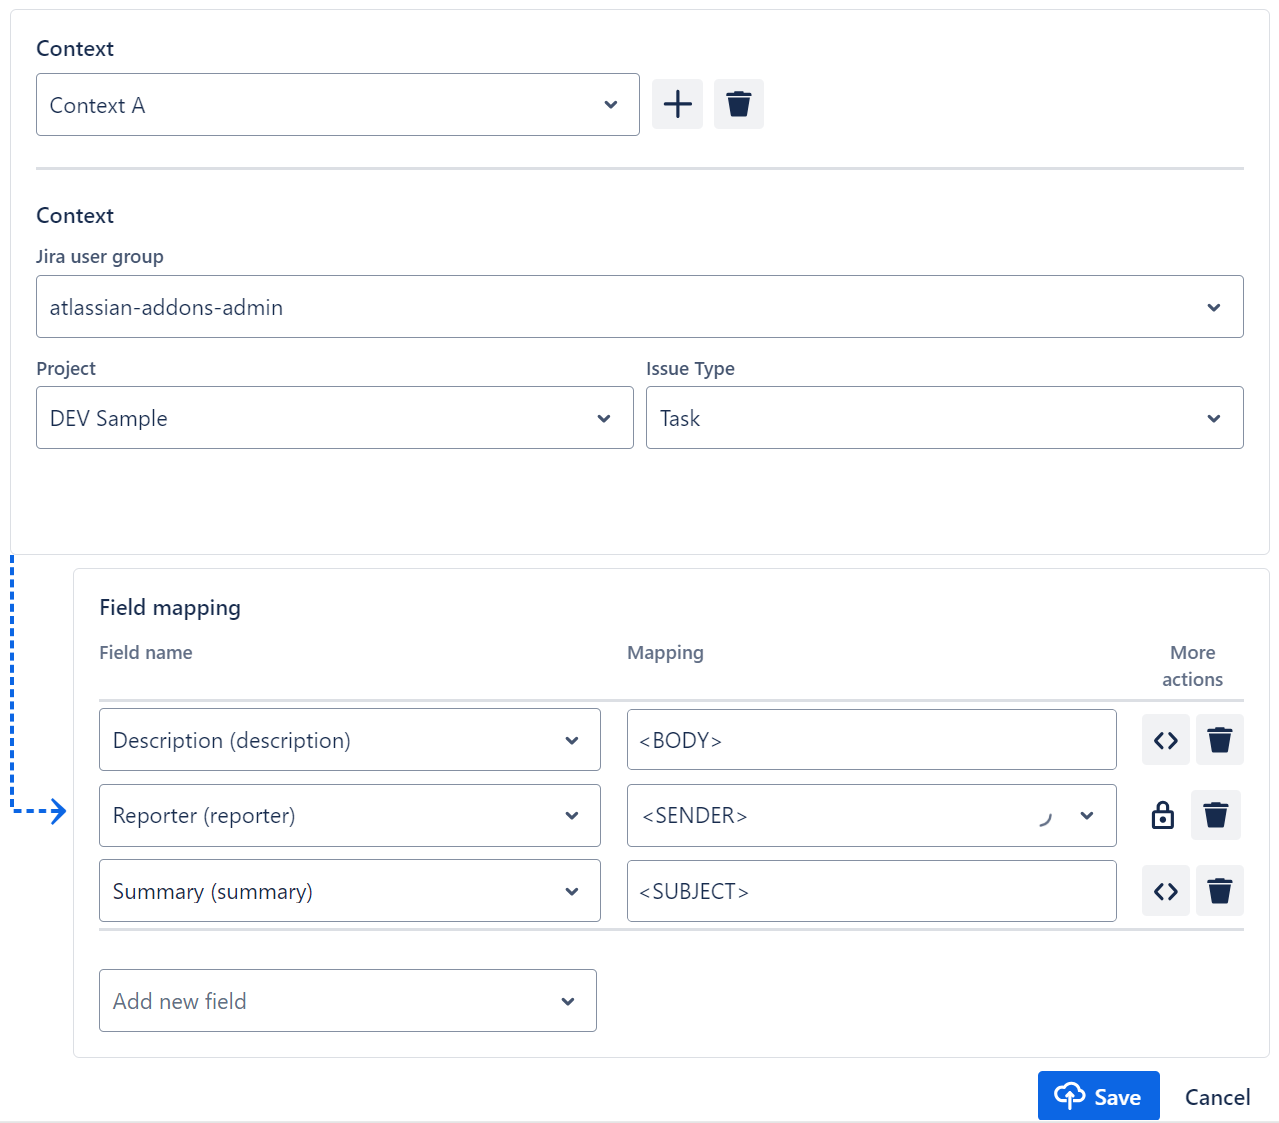
Field Mappings
Benefits
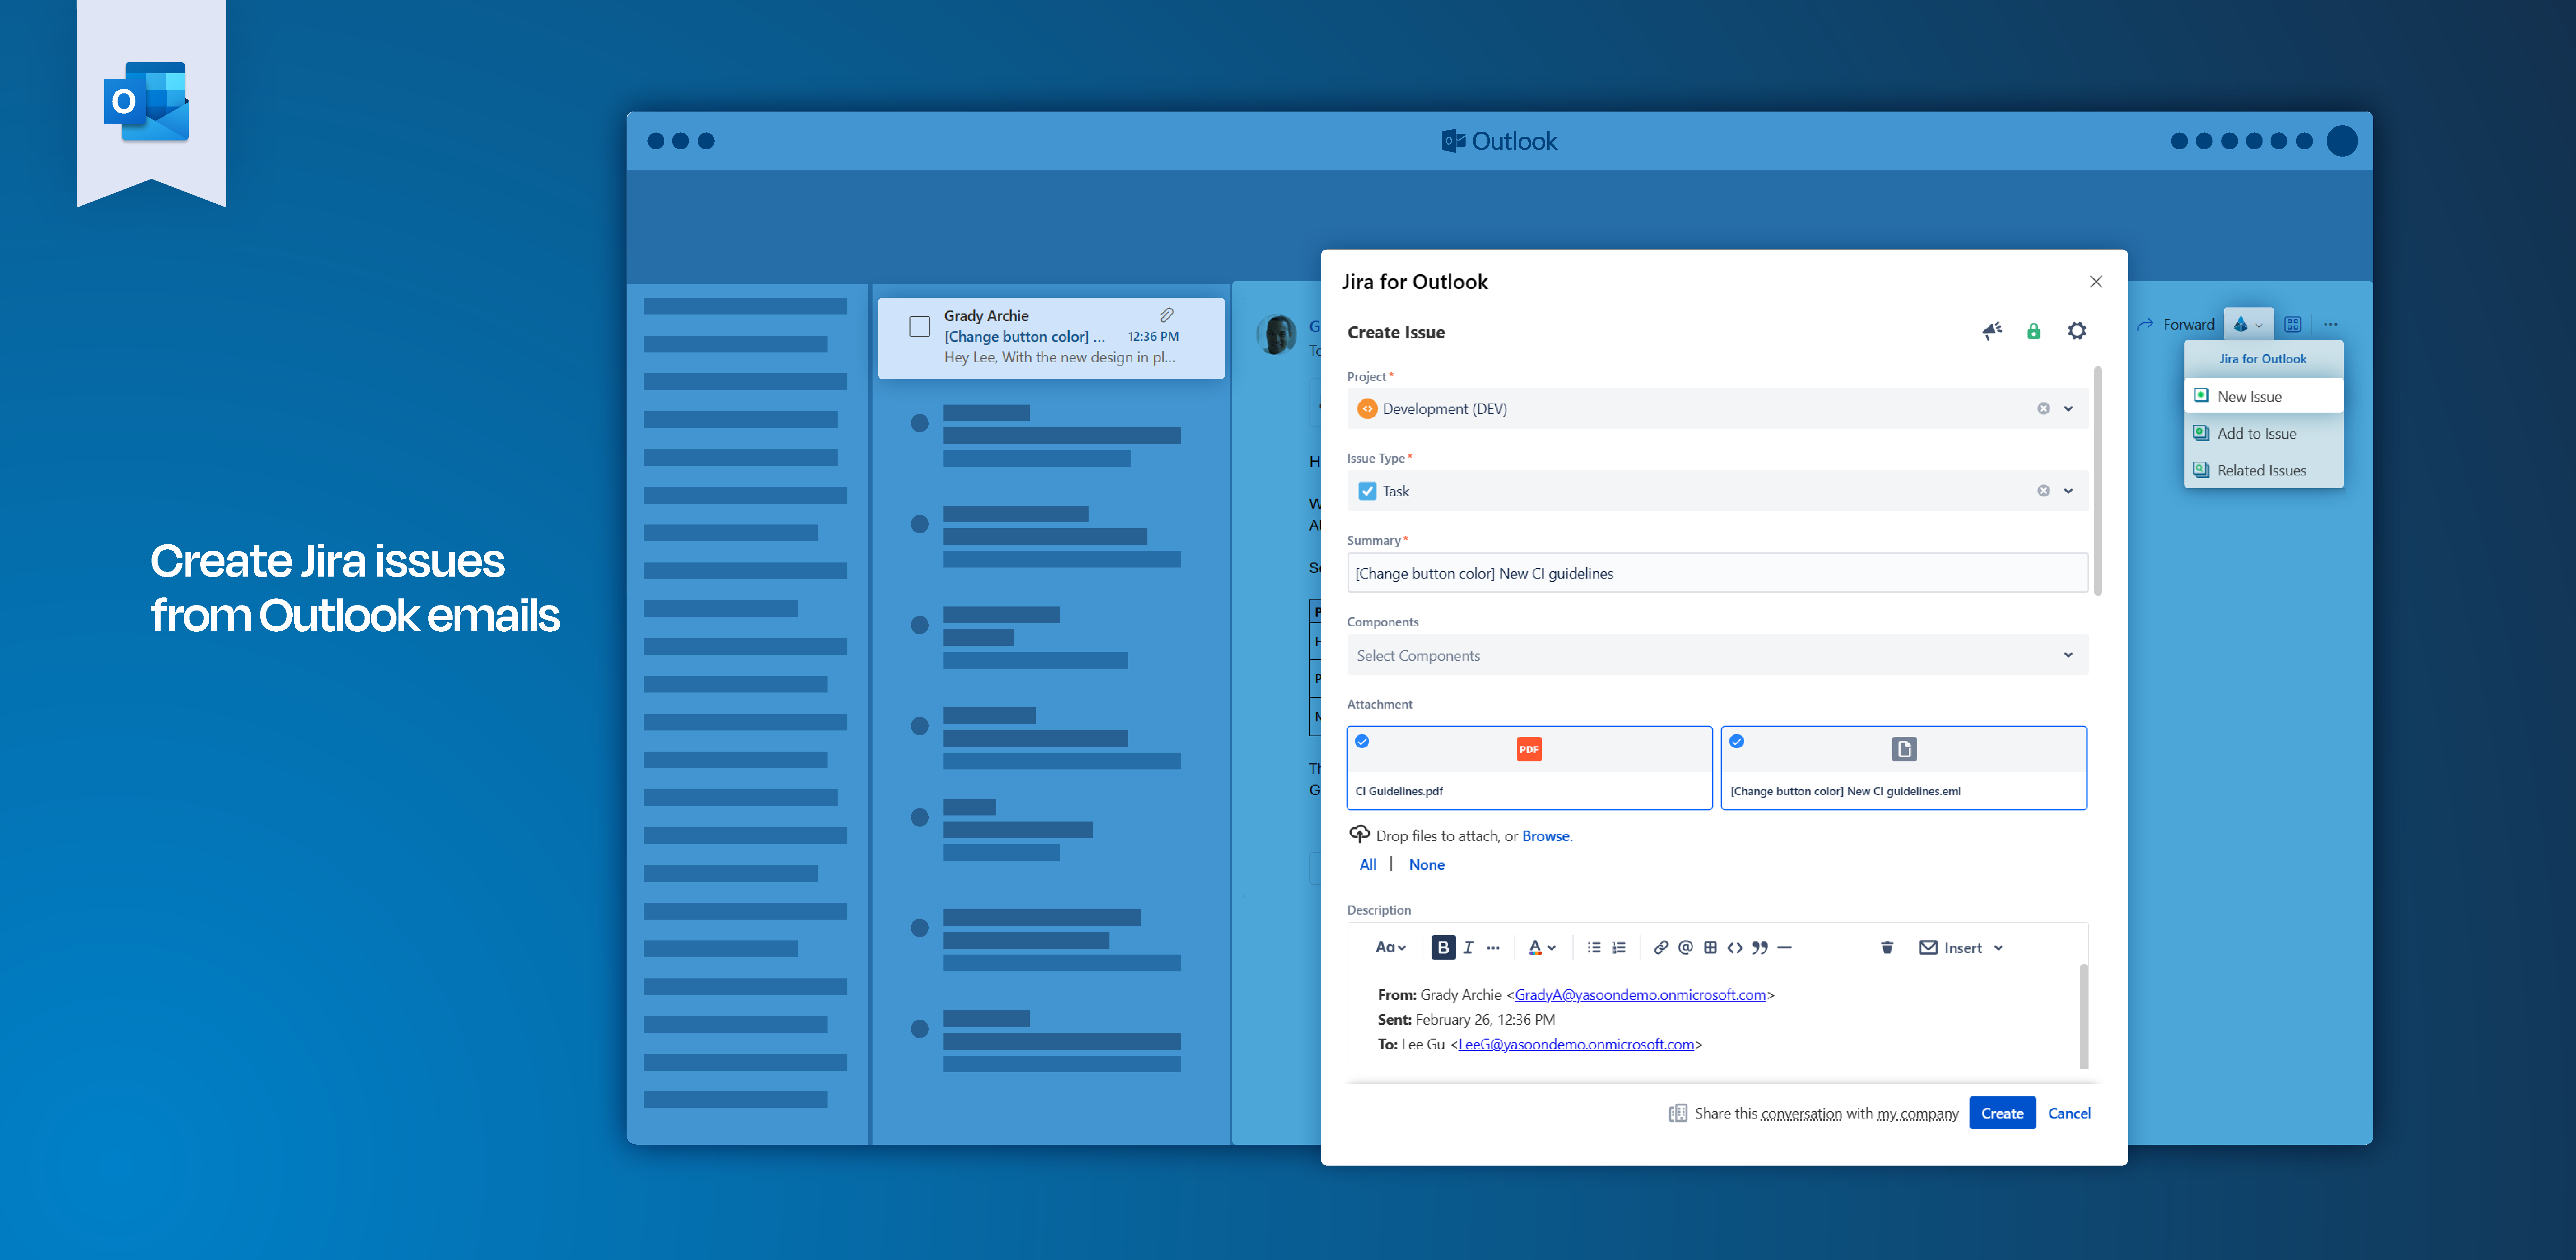
After deploying the Outlook add-in, you have connected your Jira instance with your Outlook inbox.
📋 You can now use the following features in Outlook:
Create issues right from your Outlook inbox
Search for related issues in the sidebar
Work with emails in Jira (share conversation)
![]() Without installing the add-in, you only have the ability to:
Without installing the add-in, you only have the ability to:
See issue-related emails in the Jira issue
Start new or answer back on emails from the Jira issue
You can’t access issue related information in Outlook? Related issue information can only be accessed when the Outlook add-in is installed.

